


It’s a very well known fact that Zabbix can only be installed on Linux. But what if you are in a Windows environment and getting a Linux machine is not so simple or even possible? This can obstruct the implementation of Zabbix, or at least significantly delay it. Not only that, building a POC outside of the future environment makes data procurement a lot more complicated. Is there a way to work around this and get Zabbix as close to Windows as we possibly can?
Table of Contents
WSL
WSL/WSL 2 is a fast and easy solution for installing and using Zabbix in a smaller Windows-dominant environment, be that a POC or a small company office. WSL 2 runs a real Linux kernel in a lightweight VM while being optimized for Windows. This means a faster start, lower resource consumption, and the ability to share files with Windows directly, meaning you can use Windows File explorer to find and manage the VM files.
WSL 2 also allows you to use Linux CLI while working with Windows (i.e. running vim from a Windows terminal and editing Windows files directly). At this point, you may be asking yourself, “Why not Hyper-V and VirtualBox?” Those are definitely options too, but they are quite heavy on system resources. In addition, boot times are a bit longer and sharing files between a host and a guest OS is clunkier.
Maybe Docker Desktop then? It’s an absolutely valid option, but that would require a bit of Docker knowledge and you would still be using WSL, technically speaking. So, with that said, WSL is definitely the fastest and most reliable way to sprung a Zabbix instance in a Windows-focused environment.
We will use WSL 2, but as a note WSL 1 is also available. Here are the differences:
- WSL 2 is usually the better performer overall, especially for dev environments. It also has better Linux compatibility.
- WSL 1 Linux files aren’t isolated, which can make them more accessible. In WSL 2, Linux runs in a virtual disk (ext4), so Linux and Windows files are more separate. Integration is still pretty good, however.
- WSL 2 has better Linux compatibility – systemd, iptables, etc.
- WSL 1 shared the same IP as Windows, WSL 2 is a VM – some networking required.
- With WSL 1 you can see Linux running processes in Task Manager. WSL 2 will have processes isolated.
Installing Zabbix using WSL
Install WSL
Open PowerShell as an Administrator and run:
PS C:\Windows\system32> wsl --installIf you’ve already have WSL 1 installed, update it:
PS C:\Windows\system32> wsl --updateYou can also set WSL 2 as default:
PS C:\Windows\system32> wsl --set-default-version 2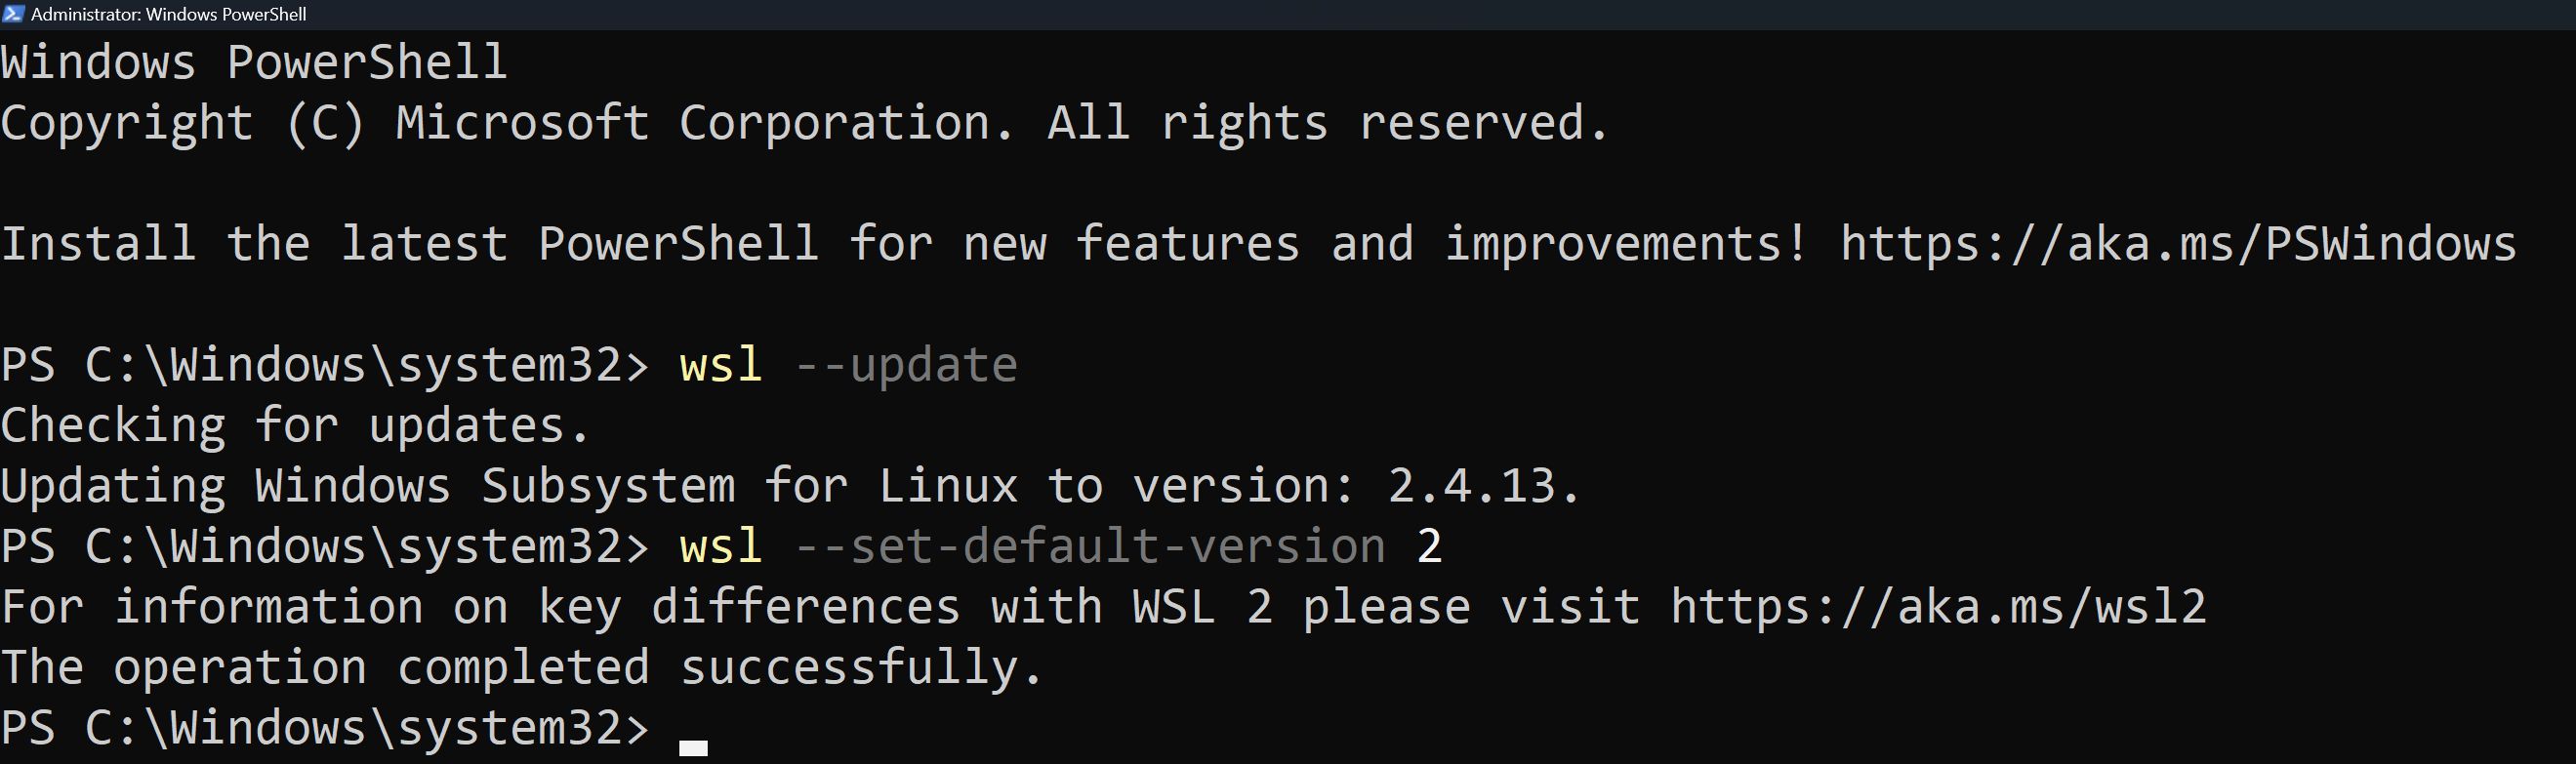
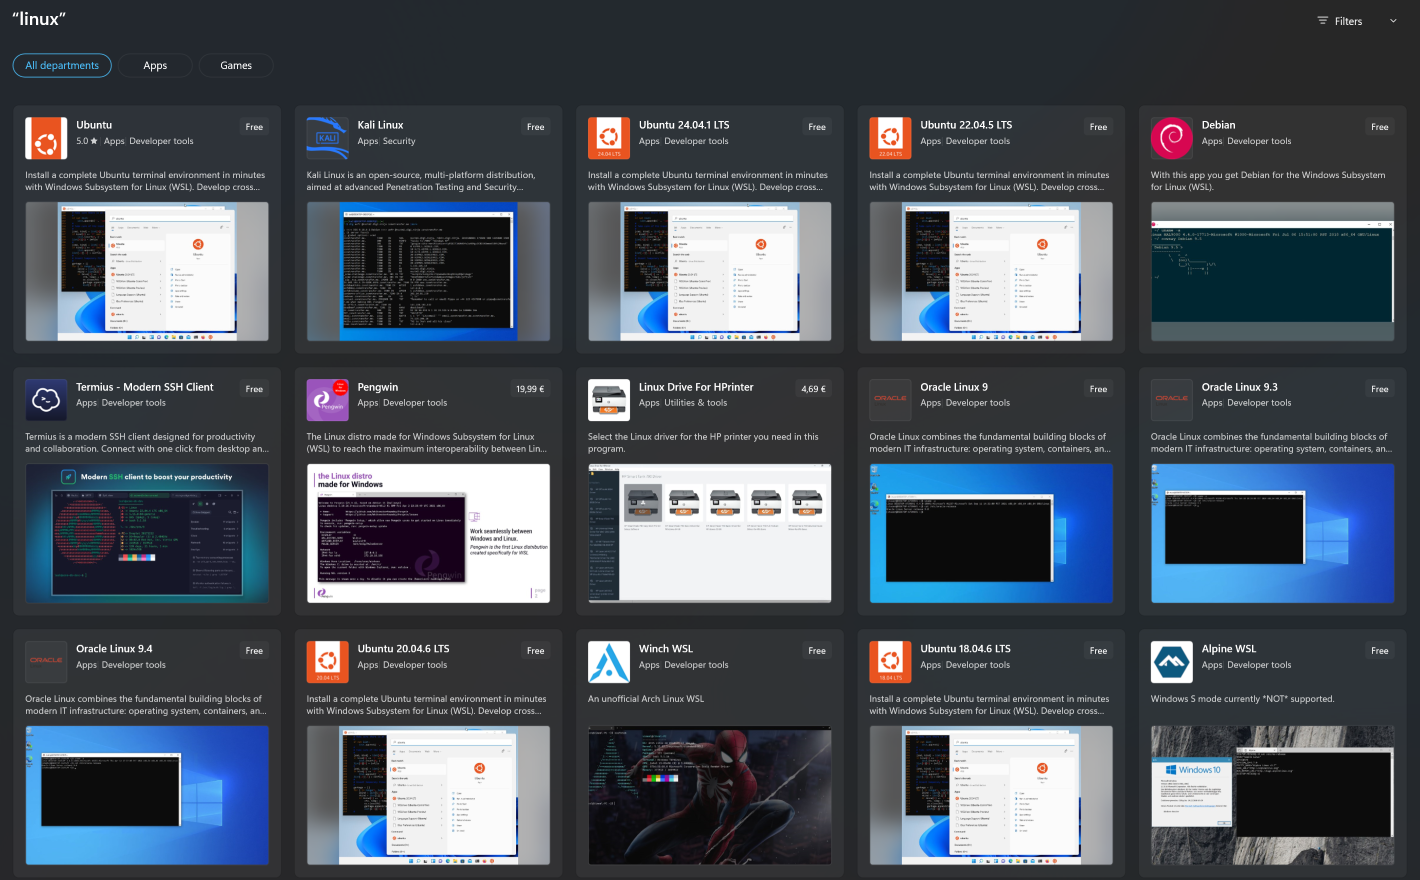
Install/Get preferred Linux Distribution using either Microsoft Store (i.e. Ubuntu, Debian, Oracle Linux) or just download directly. I will be using Oracle Linux 9.4.
You can also download the RootFS tarball from the preferred distribution portal, but then the process will be a bit different. Create a folder using PowerShell:
PS C:\Windows\system32> mkdir C:\WSL\OracleLinux9Copy the .tar.xz file to this folder, then run:
PS C:\Windows\system32> wsl --import OracleLinux9 C:\WSL\OracleLinux9 .\oraclelinux9-rootfs.tar.xz --version 2After the image is installed or imported, start Oracle Linux using PowerShell:
PS C:\Windows\system32> oraclelinux94When installation is finished, there is a prompt to create a default UNIX user account and password for the said user, as the username does not need to match your Windows username. I’ll set it to “zabbix” of course, but you can set it to any other.
PS C:\Windows\system32> Enter new UNIX username:
PS C:\Windows\system32> zabbix
PS C:\Windows\system32> New password: <your-password>
PS C:\Windows\system32> passwd: all authentication tokens updated successfully.
PS C:\Windows\system32> Installation successful!
Now OracleLinux is ready for use!
Prepare the system
You will be immediately logged in to the new environment. If logged out, to log in again just execute in PowerShel:
PS C:\Windows\system32> oraclelinux94Being logged in, first double check that your selected OS is indeed installed by executing in the PowerShell, which will now serve as your VM CLI access point:
[zabbix@PC-NAME ~]$ cat /etc/os-release
NAME="Oracle Linux Server"
VERSION="9.4"
ID="ol"
ID_LIKE="fedora"
VARIANT="Server"
VARIANT_ID="server"
VERSION_ID="9.4"
PLATFORM_ID="platform:el9"
PRETTY_NAME="Oracle Linux Server 9.4"
ANSI_COLOR="0;31"
CPE_NAME="cpe:/o:oracle:linux:9:4:server"
HOME_URL="https://linux.oracle.com/"
BUG_REPORT_URL=https://github.com/oracle/oracle-linux
Confirmation received, make sure all OS updates are installed:
[zabbix@PC-NAME ~]$ sudo dnf update -yWhen the update process is finished, you will need to decide whether you would like to use systemd or not (this may increase booting time). I will enable systemd. To do this, edit the wsl.conf on the Linux subsystem:
vi /etc/wsl.confAdd to the newly created file:
[boot]
systemd=true
Reboot the images (this command will reboot all of them):
PS C:\Windows\system32> wsl.exe --shutdownStart back your Linux distribution:
PS C:\Windows\system32> oraclelinux94Install Zabbix database
We will need to prepare the database engine. Again, any preferred database engine can be used, in this case I install and configure MariaDB:
[zabbix@PC-NAME ~]$ sudo dnf install -y mariadb-server mariadb
[zabbix@PC-NAME ~]$ sudo systemctl enable --now mariadb
Confirm MariaDB is running:
[zabbix@PC-NAME ~]$ Systemctl status mariadb

mariadb.service - MariaDB 10.5 database server
     Loaded: loaded (/usr/lib/systemd/system/mariadb.service; enabled; preset: disabled)
     Active: active (running) since Tue 2025-04-29 12:39:54 EEST; 3min 55s ago
       Docs: man:mariadbd(8)
             https://mariadb.com/kb/en/library/systemd/
   Main PID: 235 (mariadbd)
     Status: "Taking your SQL requests now..."
      Tasks: 9 (limit: 26213)
     Memory: 109.6M
     CGroup: /system.slice/mariadb.service
             └─235 /usr/libexec/mariadbd --basedir=/usr
After confirmation, secure it a bit by creating a root password and selecting the options in bold:
[zabbix@PC-NAME ~]$ sudo mysql_secure_installation

Enter current password for root (enter for none):
OK, successfully used password, moving on...

Setting the root password or using the unix_socket ensures that nobody
can log into the MariaDB root user without the proper authorisation.

You already have your root account protected, so you can safely answer 'n'.

Switch to unix_socket authentication [Y/n] n
 ... skipping.

You already have your root account protected, so you can safely answer 'n'.

Change the root password? [Y/n] Y
New password:
Re-enter new password:
Password updated successfully!
Reloading privilege tables..
 ... Success!

Remove anonymous users? [Y/n] Y
 ... Success!

Disallow root login remotely? [Y/n] Y
 ... Success!

Remove test database and access to it? [Y/n] Y


Reload privilege tables now? [Y/n] Y

 ... Success!

Cleaning up...

All done!  If you've completed all of the above steps, your MariaDB
installation should now be secure.

Thanks for using MariaDB!
Now to create the Zabbix database. Log in to MariaDB:
[zabbix@PC-NAME ~]$ sudo mysql -u root -p
[zabbix@PC-NAME ~]$ Enter password: <enter your password, won’t be visible>
Follow the steps from the Zabbix installation page:
MariaDB [(none)]> create database zabbix character set utf8mb4 collate utf8mb4_bin;
MariaDB [(none)]> create user zabbix@localhost identified by '<custom-password>';
MariaDB [(none)]> grant all privileges on zabbix.* to zabbix@localhost;
MariaDB [(none)]> set global log_bin_trust_function_creators = 1;

MariaDB [(none)]> quit;
Installing Zabbix
Install the Zabbix repository:
[zabbix@PC-NAME ~]$ sudo dnf install https://repo.zabbix.com/zabbix/7.0/centos/9/x86_64/zabbix-release-latest-7.0.el9.noarch.rpm
[zabbix@PC-NAME ~]$ dnf clean all
Proceed to install the Zabbix server, frontend, and agent:
[zabbix@PC-NAME ~]$ sudo dnf -y install zabbix-server-mysql zabbix-web-mysql zabbix-apache-conf zabbix-sql-scripts zabbix-selinux-policy zabbix-agent
...
[zabbix@PC-NAME ~]$zabbix-agent-7.0.12-release1.el9.x86_64 zabbix-apache-conf-7.0.12-release1.el9.noarch zabbix-selinux-policy-7.0.12-release1.el9.x86_64  zabbix-server-mysql-7.0.12-release1.el9.x86_64 zabbix-sql-scripts-7.0.12-release1.el9.noarch
 zabbix-web-7.0.12-release1.el9.noarch zabbix-web-deps-7.0.12-release1.el9.noarch zabbix-web-mysql-7.0.12-release1.el9.noarch

Complete!
Now import the initial database schema:
[zabbix@PC-NAME ~]$ zcat /usr/share/zabbix-sql-scripts/mysql/server.sql.gz | mysql -u zabbix -p zabbix
Enter password: <enter your DB user password and wait until you will see the next line appear>
[root@ZBX-5CD3221K14 zabbix]#
Disable the log_bin_trust_function_creators option after import has finished:
# mysql -uroot -p
password
MariaDB [(none)]>  set global log_bin_trust_function_creators = 0;
MariaDB [(none)]>  quit;
Add your Zabbix user database password to the Zabbix server configuration file:
[zabbix@PC-NAME ~]$ vi /etc/zabbix/zabbix_server.conf### Option: DBPassword
# Database password.
# Comment this line if no password is used.
#
# Mandatory: no
# Default:
DBPassword=<your-DB-user-password>Start the Zabbix server and frontend and add them to autorun:
[zabbix@PC-NAME ~]$  systemctl restart zabbix-server zabbix-agent httpd php-fpm
[zabbix@PC-NAME ~]$  systemctl enable zabbix-server zabbix-agent httpd php-fpm
Created symlink /etc/systemd/system/multi-user.target.wants/zabbix-server.service → /usr/lib/systemd/system/zabbix-server.service.
Created symlink /etc/systemd/system/multi-user.target.wants/zabbix-agent.service → /usr/lib/systemd/system/zabbix-agent.service.
Created symlink /etc/systemd/system/multi-user.target.wants/httpd.service → /usr/lib/systemd/system/httpd.service.
Created symlink /etc/systemd/system/multi-user.target.wants/php-fpm.service → /usr/lib/systemd/system/php-fpm.service.
Installation of the backend is now finished, but we still need the frontend.
Exposing and installing the Zabbix frontend for WSL
Since WSL2 does not expose services to localhost by default, you need to determine the WSL IP:
[zabbix@PC-NAME ~]$ ip addr show eth0
2: eth0: <BROADCAST,MULTICAST,UP,LOWER_UP> mtu 1500 qdisc mq state UP group default qlen 1000
    link/ether 00:15:5d:47:32:c6 brd ff:ff:ff:ff:ff:ff
    inet 172.29.128.155/20 brd 172.29.143.255 scope global eth0
       valid_lft forever preferred_lft forever
    inet6 fe80::215:5dff:fe47:32c6/64 scope link
       valid_lft forever preferred_lft forever
Look for an IP like 172.x.x.x, then using your browser go to:
http://<WSL_IP>/zabbixIn this example, that would be:
http://172.29.128.155/zabbixYou can also port forward WSL to localhost with netsh in PowerShell:
PS C:\Windows\system32> netsh interface portproxy add v4tov4 listenport=8080 listenaddress=127.0.0.1 connectport=80 connectaddress=<WSL_IP>Then you will be able to access Zabbix from http://localhost:8080/zabbix. Now, just finish the standard frontend setup and Zabbix is ready to use!
WSL advantages
Some extra advantages you get with this approach include clearer resource usage visibility:

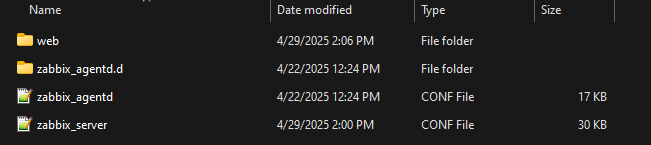
Direct access to the Linux subsystem files through File explorer with your favorite Windows tools:
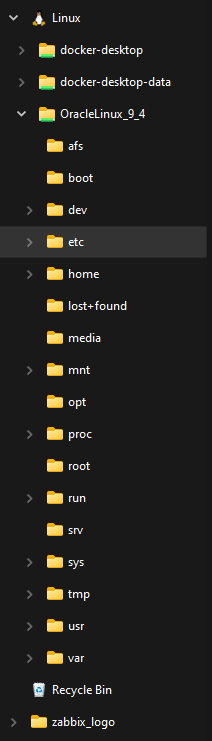
As you can see, docker is here as well. System and configuration files are also visible and editable:
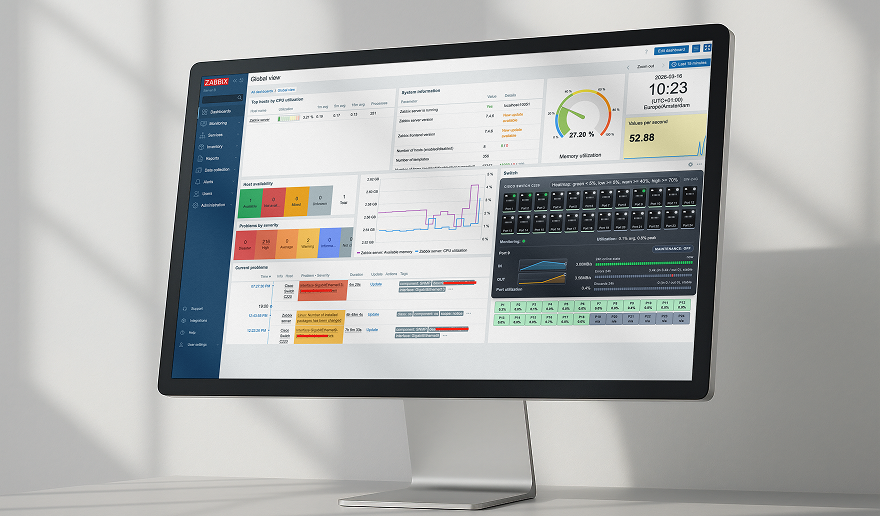
Now you can proceed with building your Zabbix or Zabbix POC, (almost) without needing to leave your regular Windows environment!


Excellent material Sir Alexander Petrov. For us Windows users it will be very helpful, especially in studying Zabbix.
Congratulations 🙂
Thank you for the kind words, I do hope that will make Zabbix more accessible 🙂