Recently, a new customer of ours at Opensource ICT Solutions asked whether we could migrate their Nagios instance to Zabbix. Because Nagios and Zabbix are very different in their storage methods, we told them that we would have to investigate and see if we could come up with a viable solution. It wasn’t long until we found a way to do it and started building some script to get it done.
Table of Contents
The customer’s wishes
- No loss of any Nagios configuration data
- Historic performance data migrated to Zabbix
- Existing problems migrated from Nagios
- Nagios XI to be disabled entirely, as the license is expiring
The customer was clear in their wishes – we needed to turn off Nagios, but without losing historic data. As such, they wanted all their old data visible in Zabbix instead of having Nagios running somewhere as a backup. This meant that a script had to be built to get that Nagios data out and into Zabbix.
The configuration data
The good part here is that it starts simple. When we dive into the Nagios configuration data, we clearly see that Nagios has hosts just like Zabbix. They just have a slightly different build than our usual Zabbix hosts. For example, we can see three different names for a host in Nagios:
- Host Name
- Alias = Host name
- Display Name = Visible name
That immediately gives us a good way to hook up Nagios names to Zabbix host and visible names.
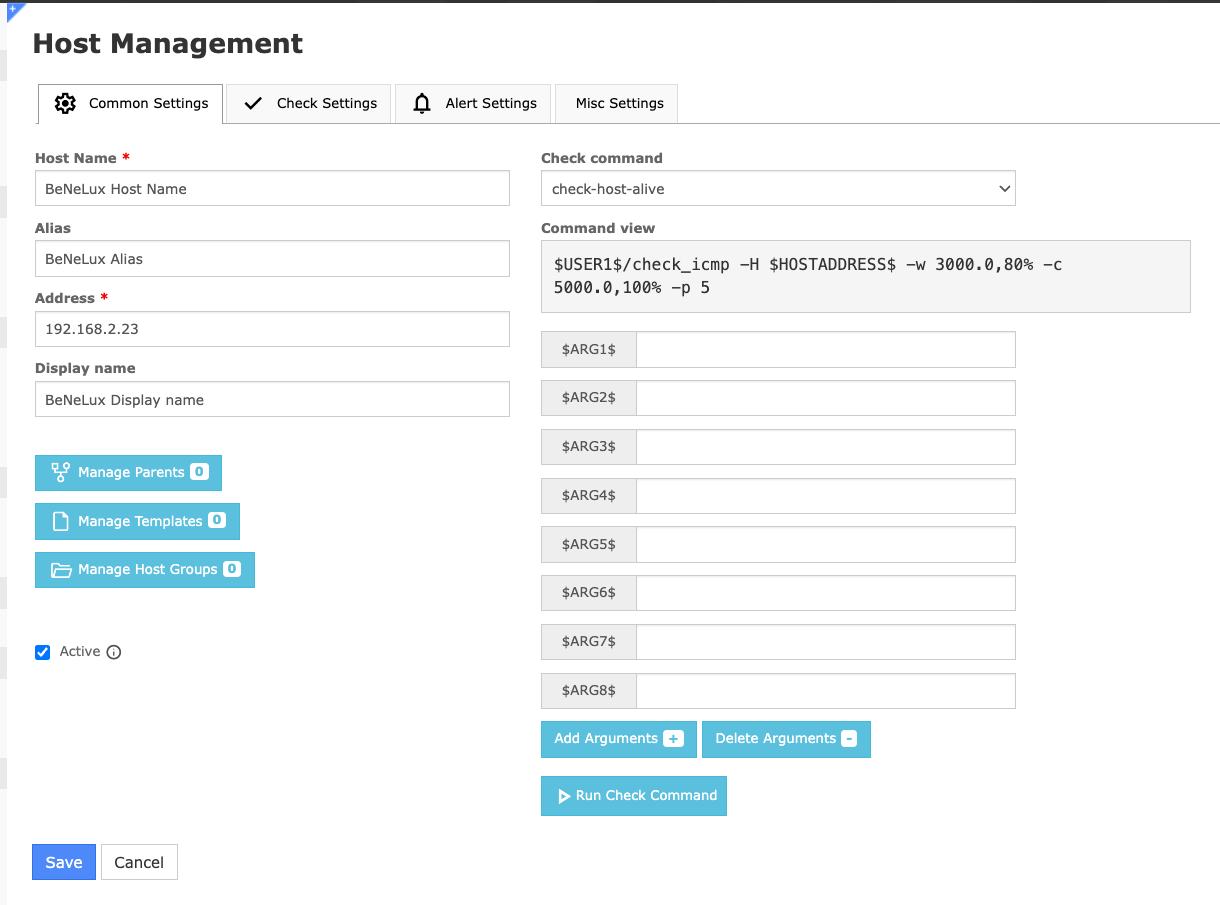
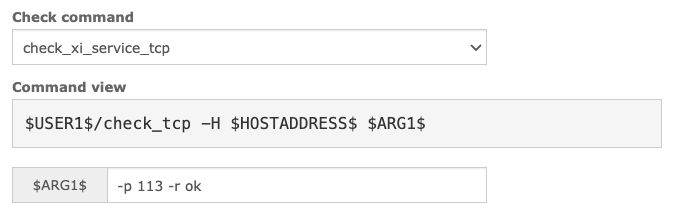
When we then take a look at the checks and how they are executed in Nagios, we also see similarities with Zabbix. In the end, both of them are monitoring solutions, of course. However, Nagios works more in a command execution kind of way, which is good for our migration. We can take this command and find an equivalent item in Zabbix. For example the check_icmp command can easily be translated into a simple check in Zabbix icmpping, icmppingloss, and icmppingsec.
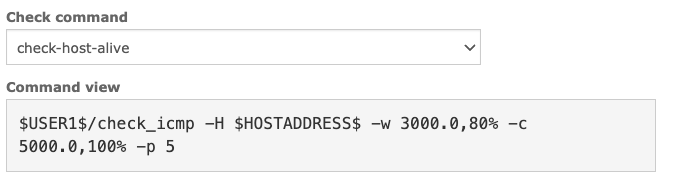
For the check_tcp command we can do a similar translation. Making sure we use the simple check net.tcp.service whenever this command is executed on a Nagios host.
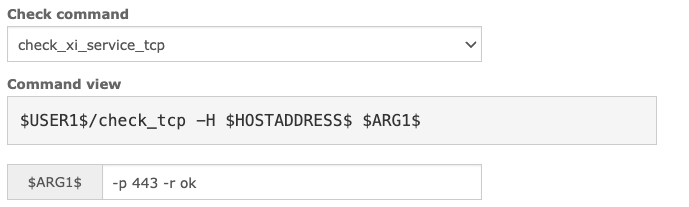
Because of the big differences between Nagios and Zabbix, this does mean we need to make some manual translations between the Nagios commands and Zabbix items. Depending on your Nagios instance, this could be a big task. Luckily for us, this was a smaller instance with only ICMP and TCP port checks.
The history (i.e. performance) data
Now that we know how to start creating our hosts and items, we need to understand how Nagios is storing its data. Zabbix has a big centralized MariaDB or PostgreSQL database, which makes it easy to parse through and work with our data. Unfortunately, Nagios instances use a different technique. Nagios stores data in .rrd (Round Robin Database) files and with it a .xml file to interpret the RRD file. The RRD files are not centralized like a Zabbix database, but they are more manageable in terms of storage size. We can see an RRD file per type of check in Nagios, which means we will have to grab the data from that file while understanding what it is going to belong to in Zabbix.

To see the data in the RRD file, we can use a special command line tool.
rrdtool /usr/local/nagios/share/perfdata/BeNeLux-Host-Name/Availability.rrd LAST --start -30d --end now | grep -v "nan"

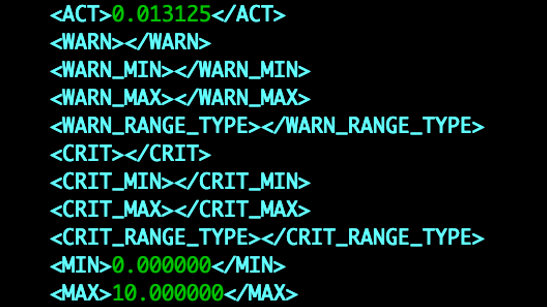
Now we can clearly see that this specific RRD file above contains 8 columns, 7 with a performance value. The first column contains the timestamp in Unixtime, which is great because it will be perfect for storing in the Zabbix database. The other 7 columns in this file are different though, because we do not know what the value in the column belongs to. This is where the .xml file comes into play. The XML file belongs with the RRD file and contains details on what is included in the RRD file.
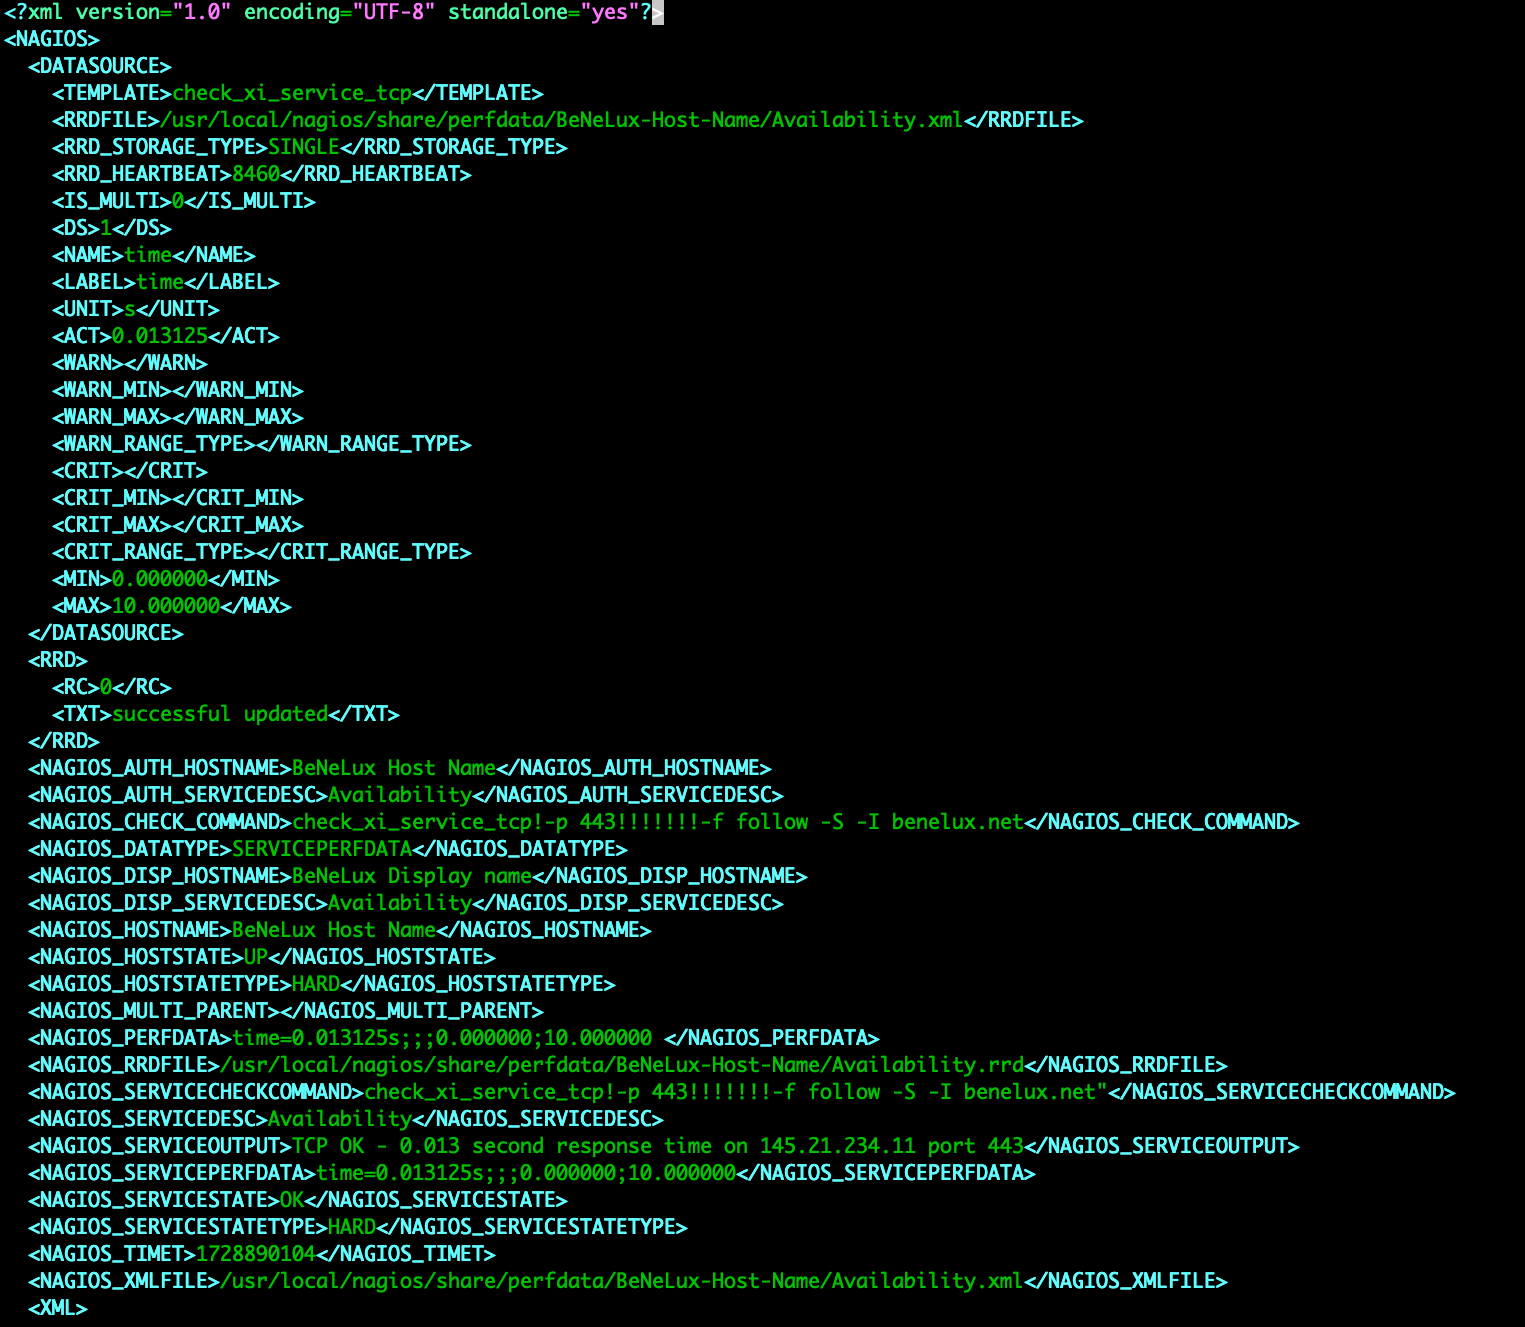
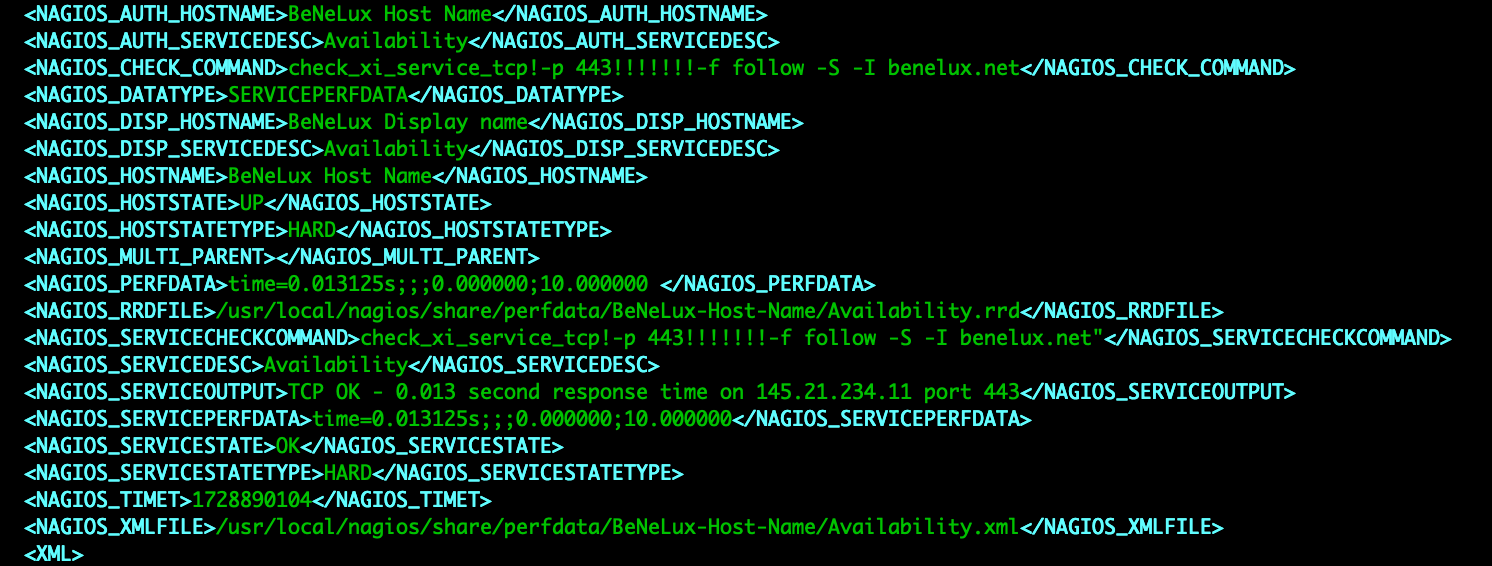
In this XML file we will find all of the required host information, which is great for creating the host in Zabbix. It also contains the check information, so we can also use this file to create the items in Zabbix. The biggest thing we will have to keep in mind is to make sure that the XML and RRD file match up in terms of number of RRD entries and columns. Column 1 in the RRD file will match with the first entry in our XML.
Let’s create a script
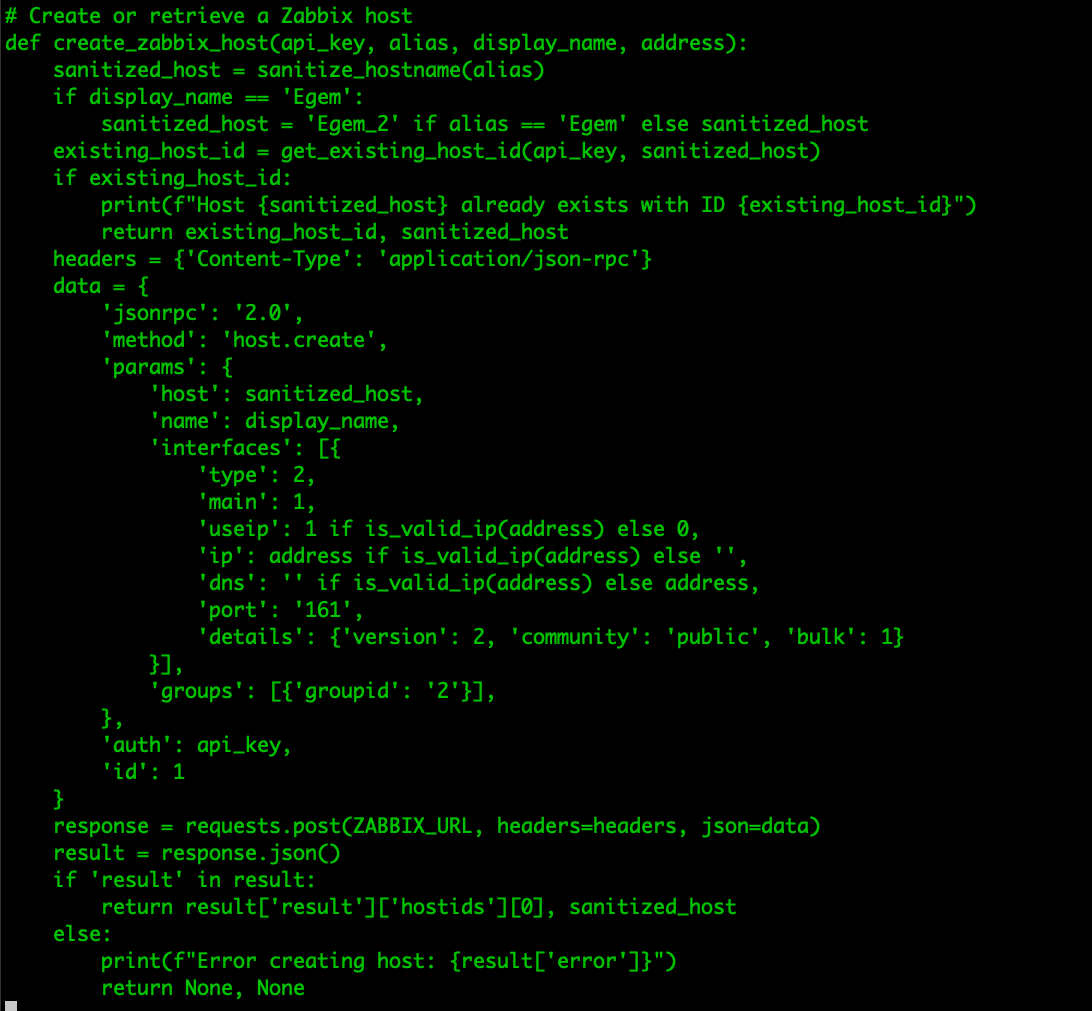
With the host, item and history data identified, we can start to create a script. In our case we decided to create a Python import tool. As Zabbix comes with some limitations in terms of which hostnames we can use (which are different from the limitations in Nagios), we need to sanitize our hostnames slightly.

Then all we need to do is parse through all the XML files and create new hosts in Zabbix through the Zabbix API.
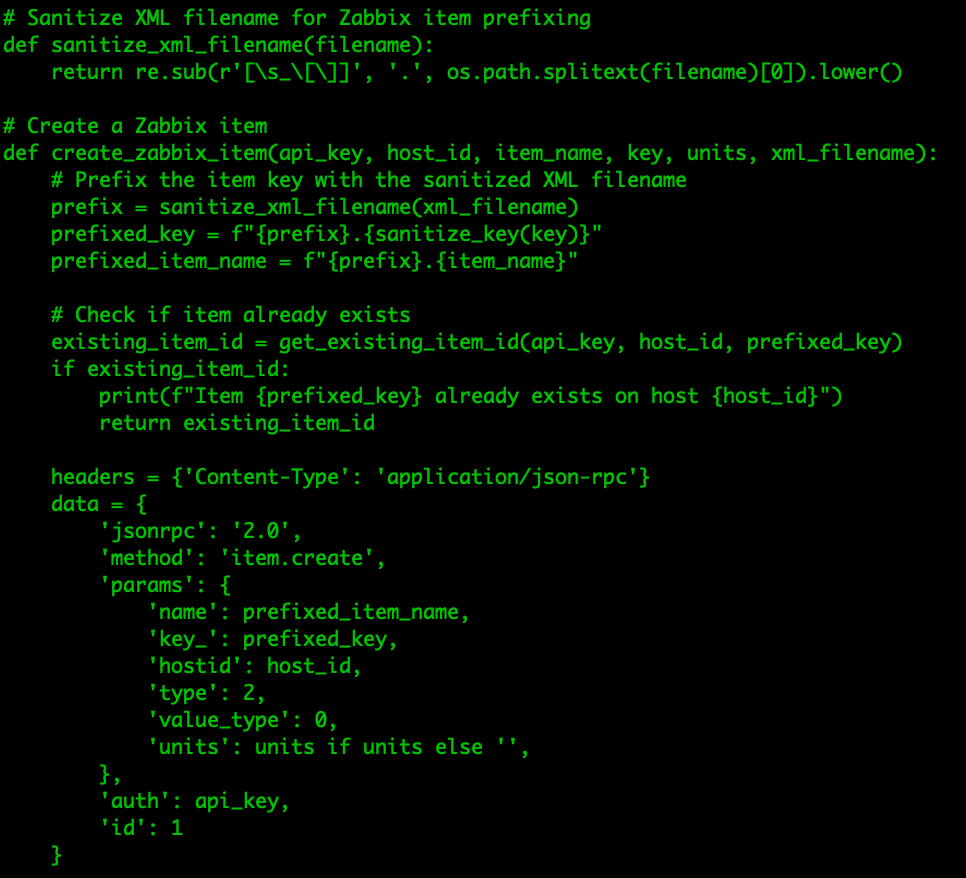
It will be a very similar process for our items, as we parse through our XML file and create all of the required items in Zabbix through the API.
We can even create the triggers straight from the XML file by parsing through the different severities already set up in Nagios.
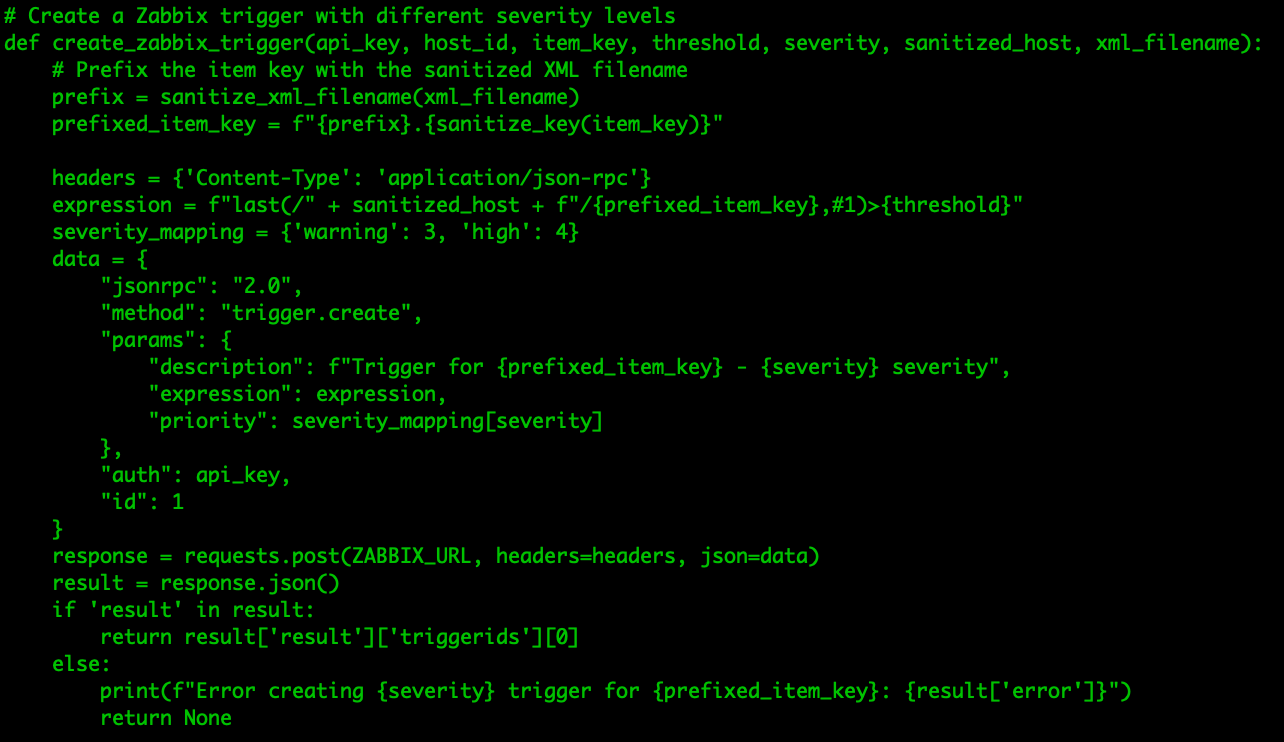
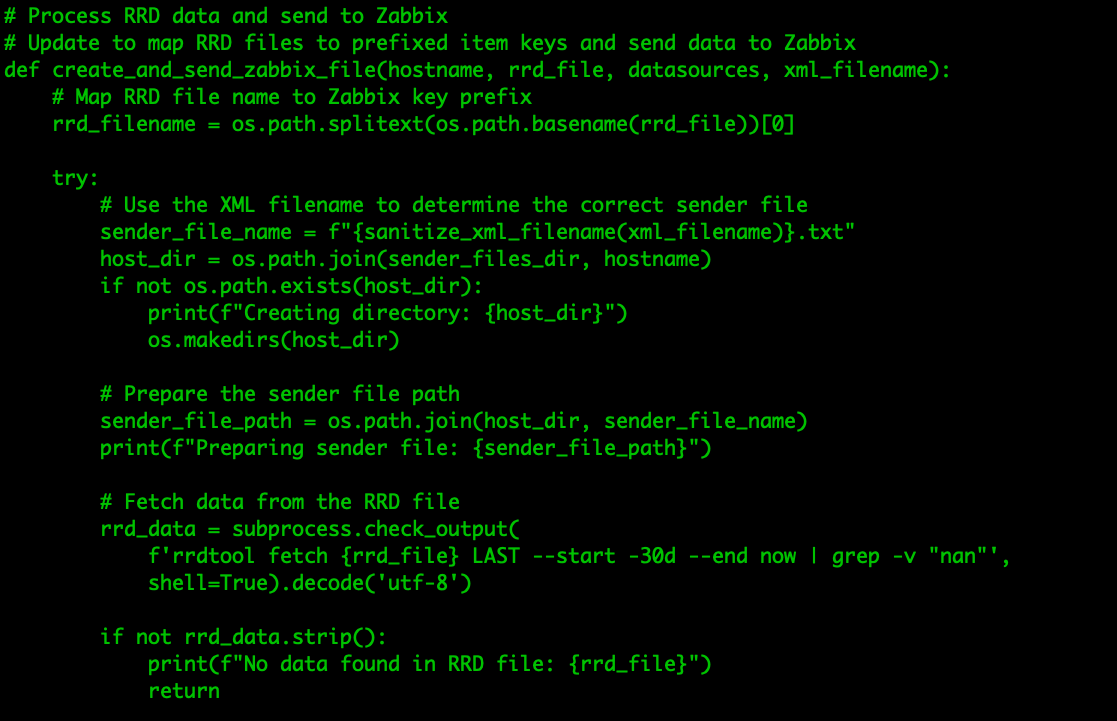
Once everything is created in Zabbix, the Python script can now start using RRDTool to parse through the RRD file, making sure to keep the XML file structure in mind when parsing through the columns.
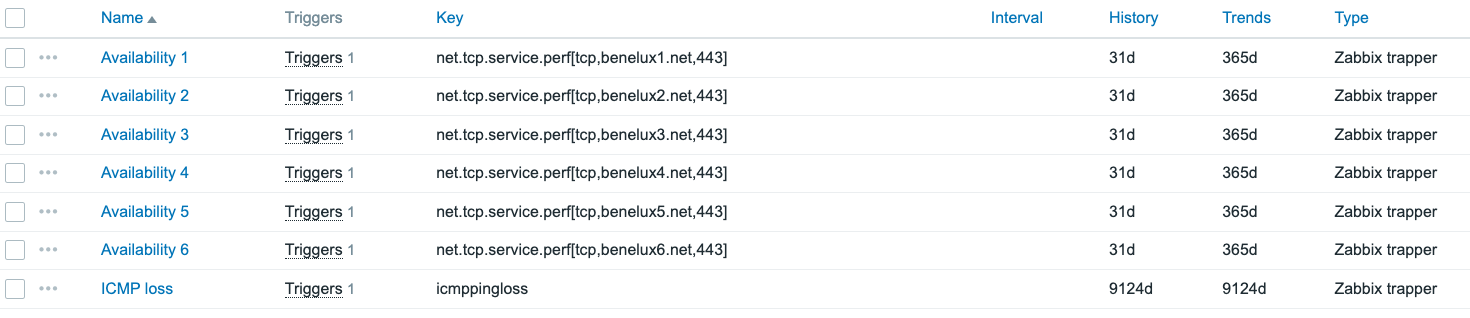
This script can now create the hosts, the items, the triggers, and then import all of the data. We can see the hosts being created and data being imported.

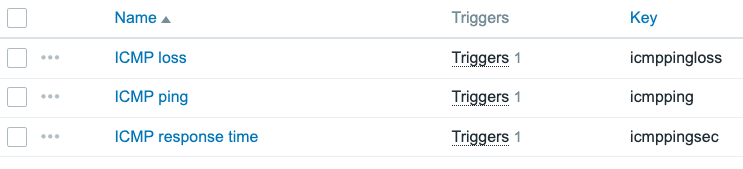
The beauty of importing history data into Zabbix while the triggers are already created is then also seen below.

All of the triggers will trigger and be resolved based on the data imported, meaning that we can create problems with historic data. This means that not only do we have our historic data, but also all the problems with the correct duration as they are now discovered from the actual imported data.
To make this possible we can use the Zabbix sender tool. It has an option to include the timestamp upon every historic value imported.

Our Python script grabs the values from the RRD file and then converts them into a new _HOST_.sender file. This file will be sent to the Zabbix server using the Zabbix sender tool.
Looking at the file, we can see it contains only the name of the host, the unixtime stamp, and the actual value to send.
![]()

All we need to do is make our script send this file to the correct item in Zabbix.
Manual template and item creation
The last step will be our cleanup. We decided that we would start dirty with a one-on-one data import from Nagios. This means hostnames, item names, and trigger names are imported straight from Nagios. No templates will be created in Zabbix by the tool either, skipping the Zabbix best practice to use templates for all hosts.
We did this to make the initial import easier and not go overboard with scripting. It’s easier to have a messy Zabbix to clean up than to script everything perfectly in Python. Time is valuable.
What we did afterwards is create all the templates manually to take over the items as is from the hosts. For example, we can translate the ICMP ping and TCP stuff easily into a template.

After doing so, we do end up with some bad looking templates, but we can now start cleaning up.

We can also start creating normal trigger names and clean up…

…while changing our dynamic port names for something more expected as well.

And that’s it!
I hope you enjoyed reading this blog post. If you have any questions or need help configuring anything in your Zabbix setup feel free to contact me and the team at Opensource ICT Solutions. We build a ton of cool stuff like this and more!
Nathan Liefting
![]()