


Monitoring data storage systems is the key to keeping modern IT systems running smoothly. With the rapid growth of data and the need for instant access, using high-performance solutions like Pure Storage FlashArray is not just an advantage – it’s a necessity. However, even the most advanced systems require careful oversight regarding their performance and health. Good monitoring helps find problems early and makes it possible to use resources more efficiently. In this article, we will explore how to set up monitoring for the Pure Storage FlashArray storage system with Zabbix using our new templates.
Pure Storage FlashArray offers two API versions: REST API 1.X and REST API 2.X. To ensure compatibility and comprehensive coverage for the maximum number of devices, two templates have been developed for these API versions. This allows users to effectively monitor their Pure Storage FlashArray storage systems regardless of which API version they are utilizing, making sure that they can take full advantage of the monitoring capabilities and performance metrics provided by each version. By accommodating both API versions, organizations can achieve a more flexible and comprehensive monitoring setup tailored to meet their specific infrastructure needs.
Table of Contents
Preparing Pure Storage FlashArray for monitoring with Zabbix
In all of these examples, the Purity for FlashArray (Purity//FA) graphical user interface (GUI) will be used, so keep in mind that some of the UI elements or navigation menus can potentially change in the future.
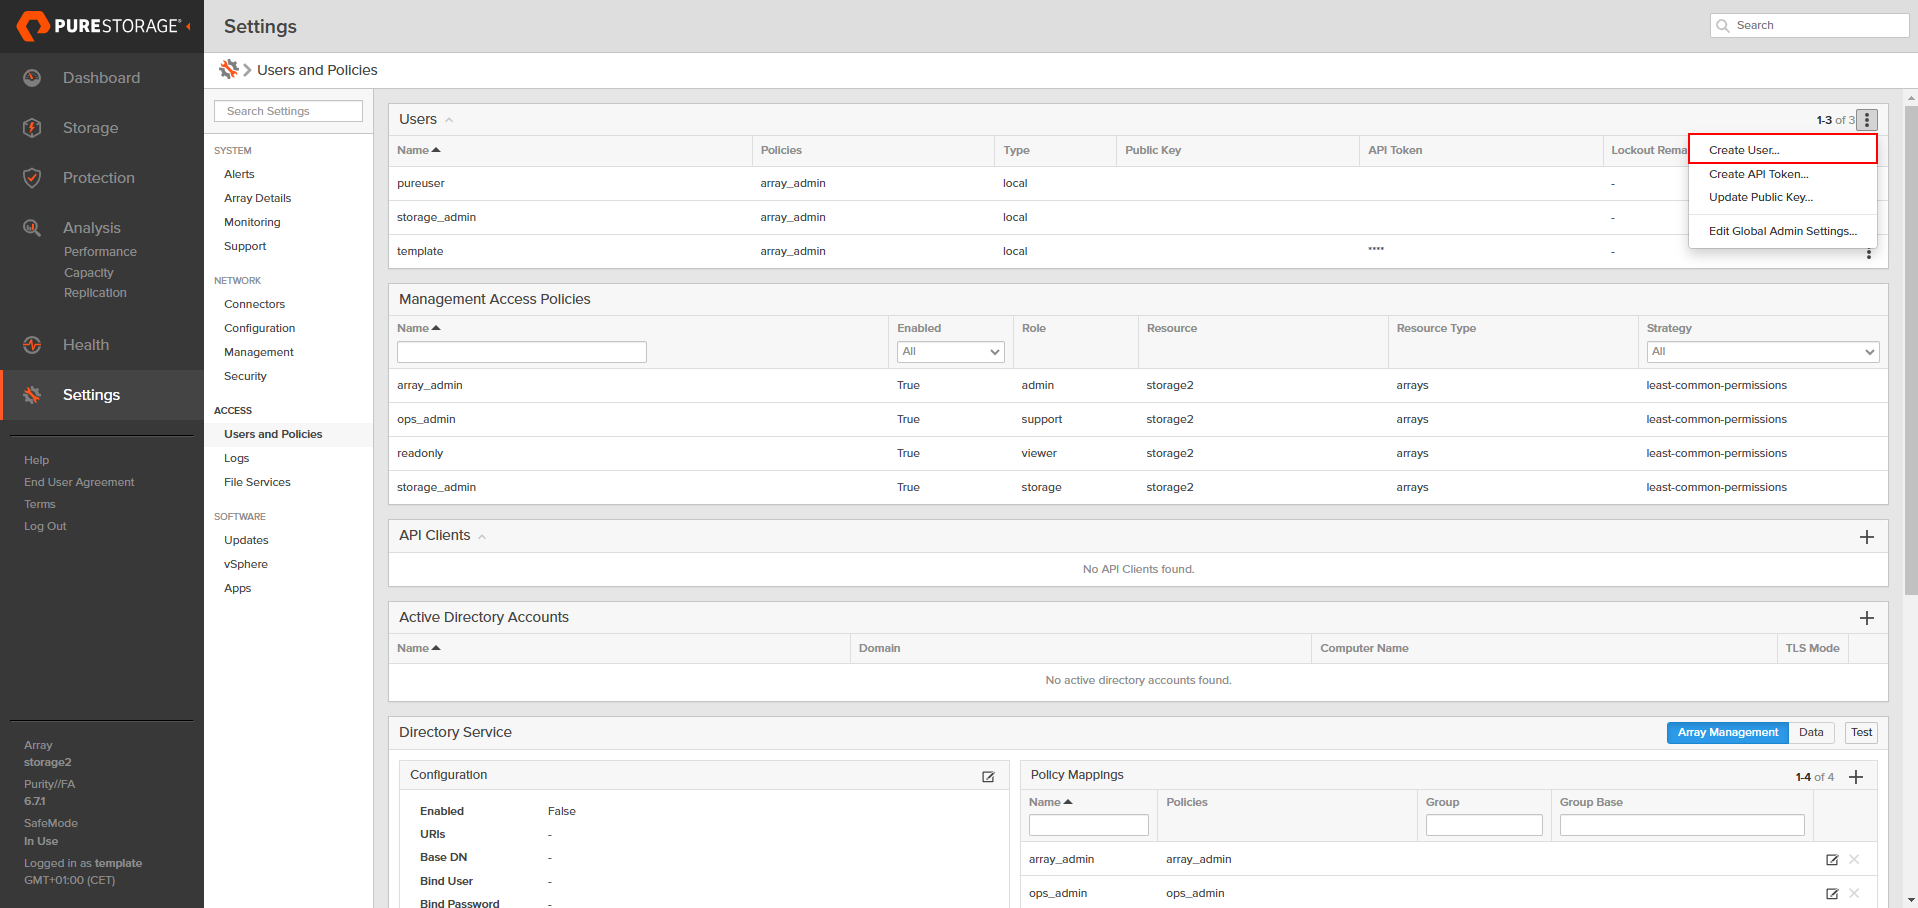
User creation
First of all, you need to set up a user in GUI that Zabbix will use to access the REST API and gather data. To do so, navigate to 'Settings' -> 'Users and Policies' -> 'Users' from the left-side menu. On this page, pay attention to the ‘Users’ block. In the upper right corner of this block, you will see three dots. Click on them to open a context menu. In this menu, select the 'Create User...' option. Here, create a new user by filling in the fields.
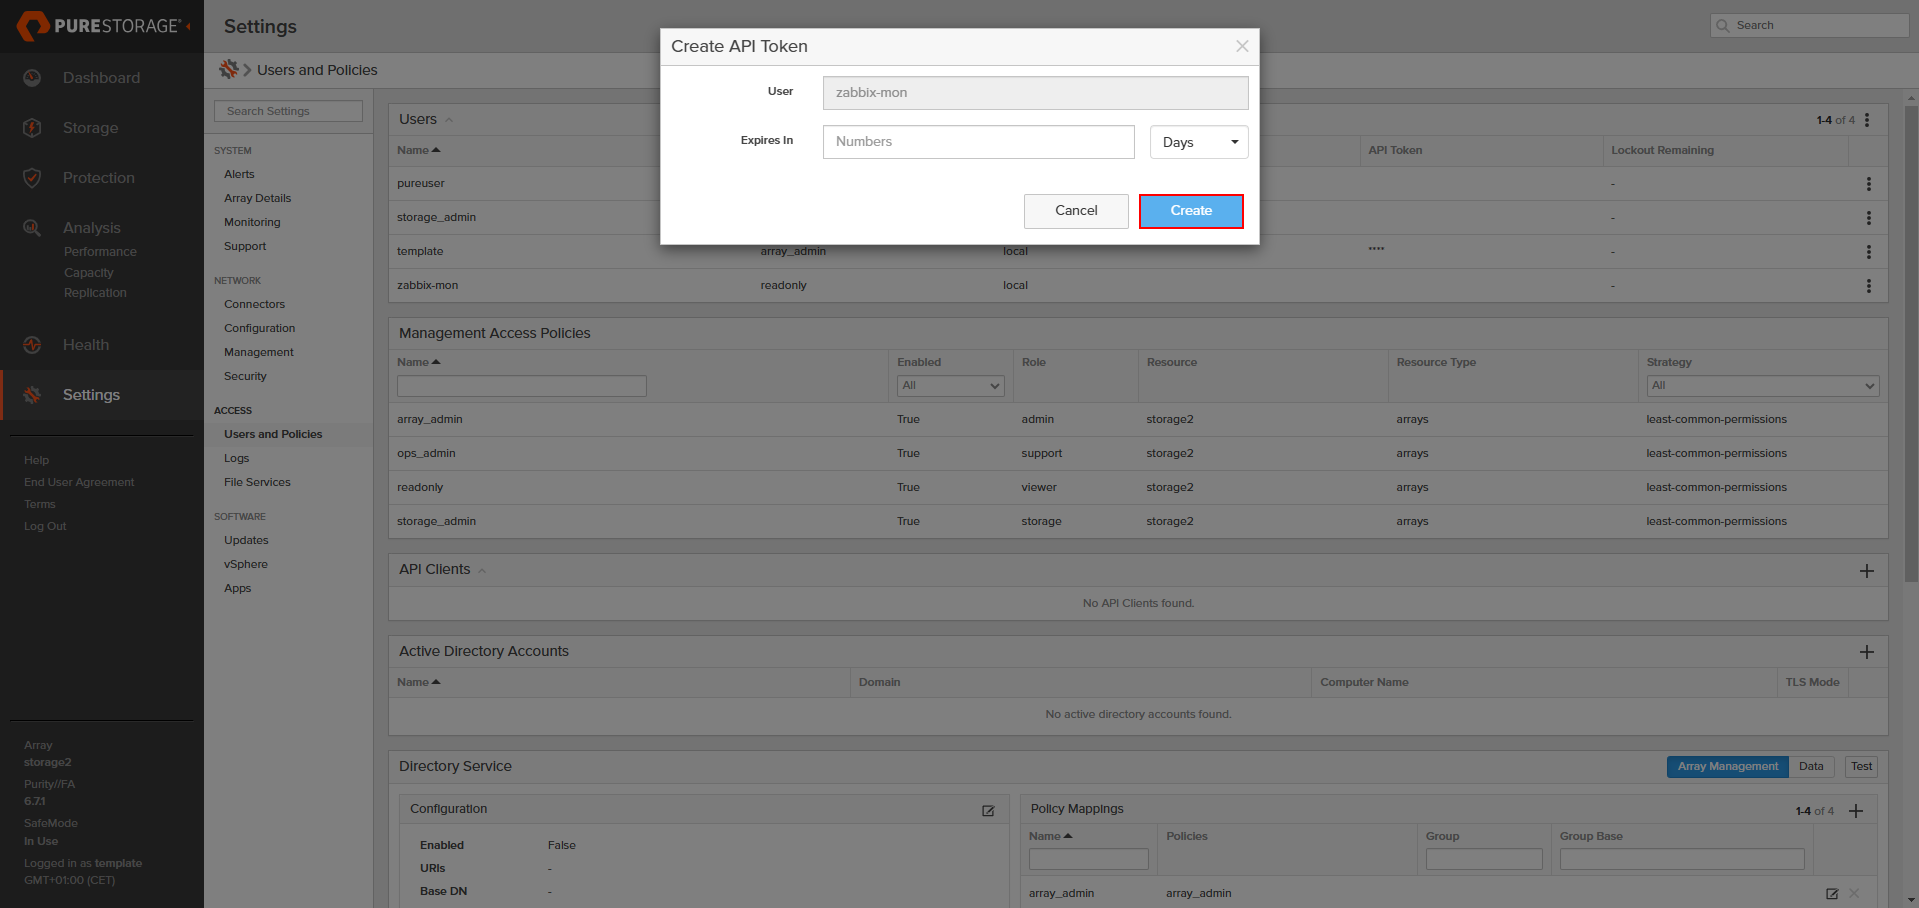
API Key creation
Unlike Pure Storage FlashArray v2 by HTTP, Pure Storage FlashArray v1 by HTTP supports authentication using a username and password instead of a token. This feature is left for backward compatibility with older versions of devices and firmware. However, it is strongly recommended to use token authentication if there are no technical limitations.
If you do plan to use username and password authentication in the Pure Storage FlashArray v1 by HTTP template, you can skip this step and move on to the next one.
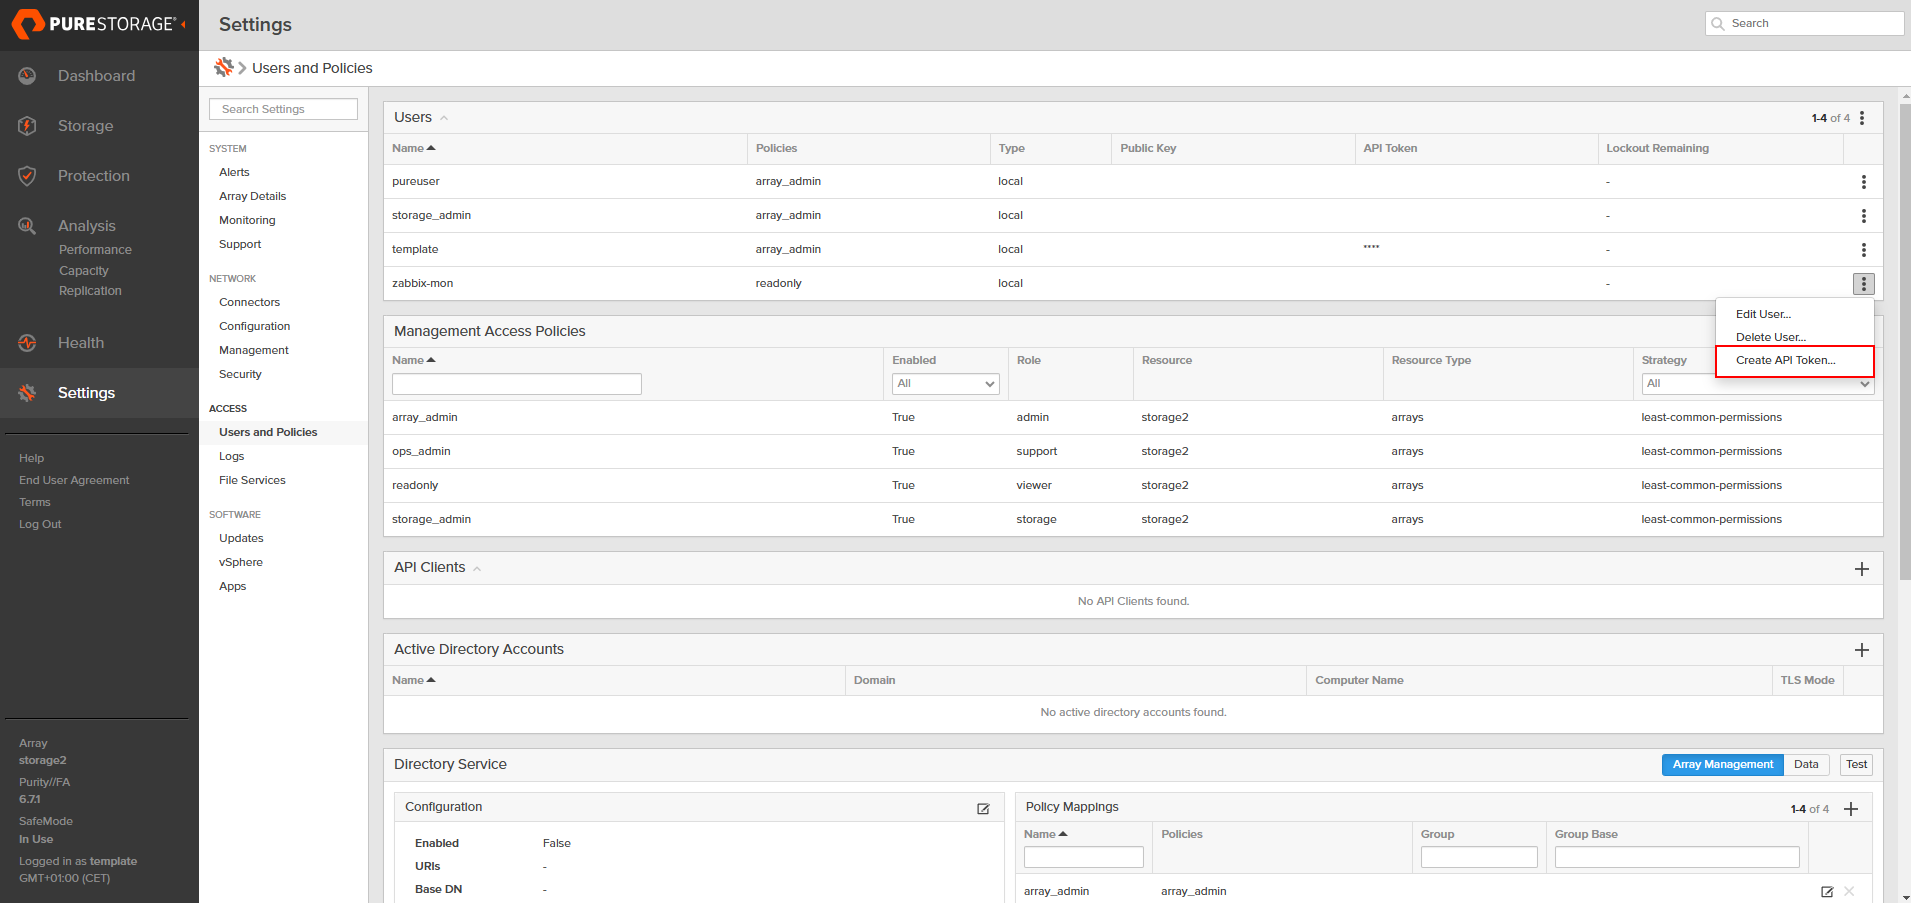
Once you have created the user, the next step is to generate an API token. To do this, find the newly created user in the 'Users' block on the 'Settings' -> 'Users and Policies' page. On the right side of the user’s entry, locate the three dots and click on them to open the menu. From this menu, select 'Create API Token...'. Follow the prompts to generate the API token, which Zabbix will use to authenticate requests. The 'Expires In' field can be left empty.
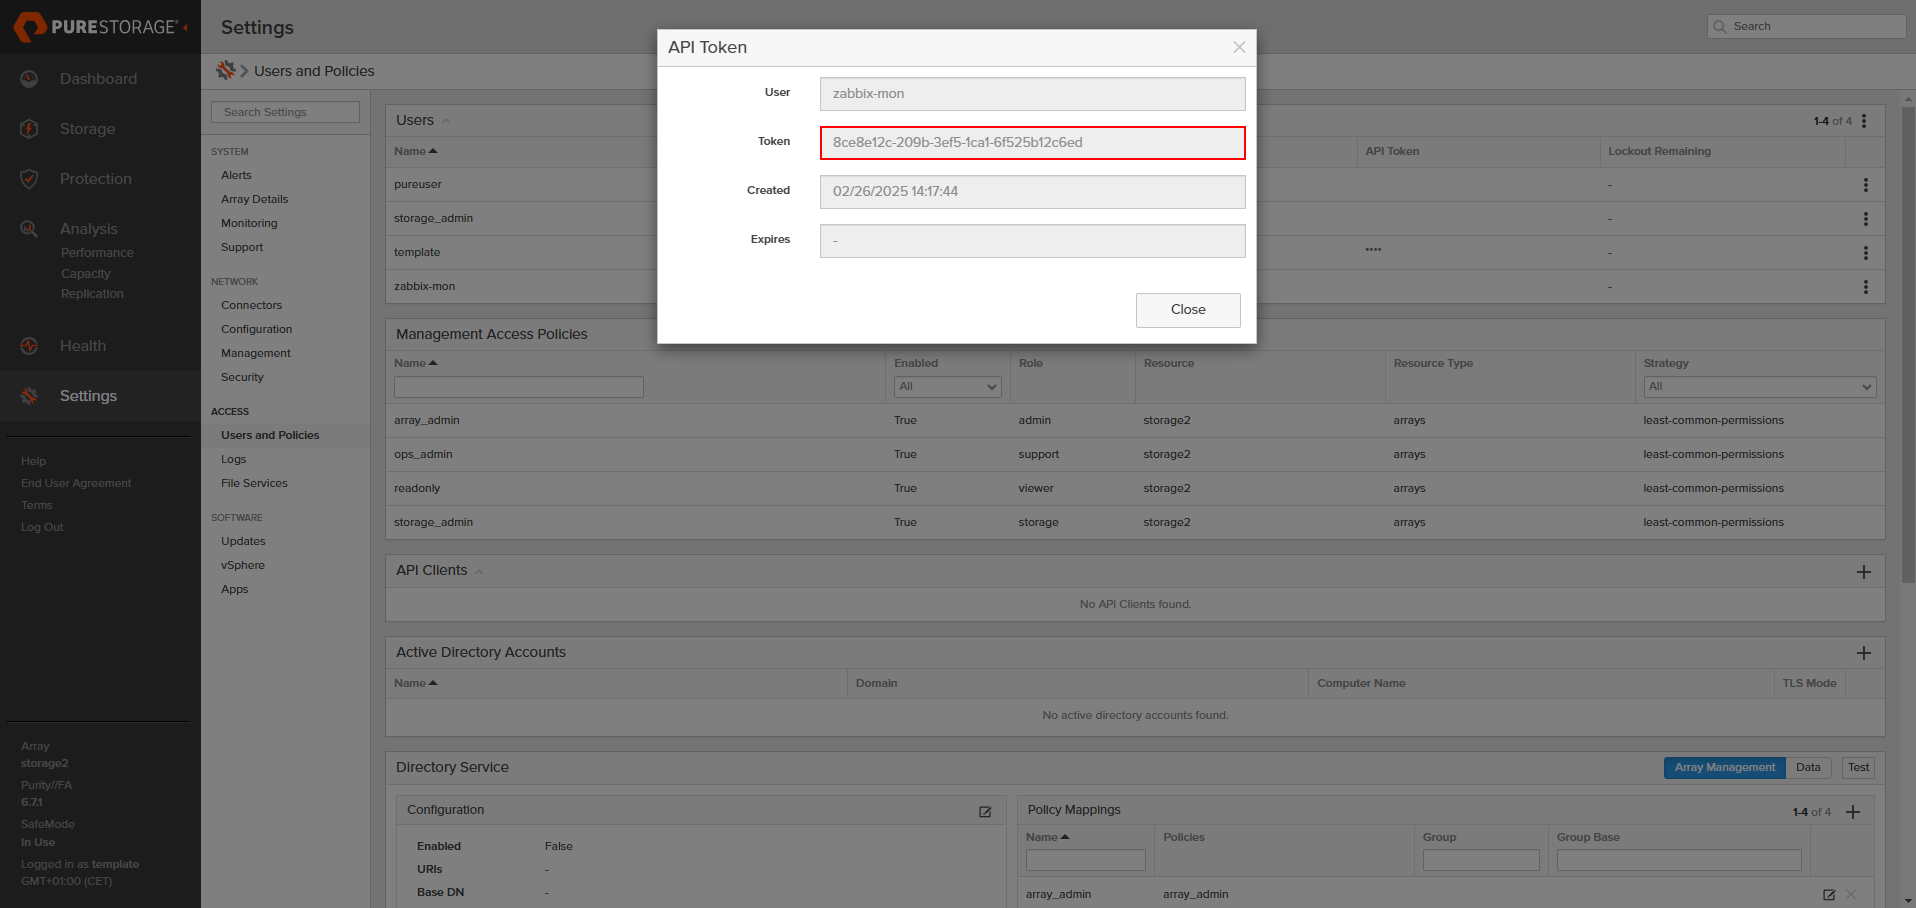
After clicking the Create button, the GUI will show you details about the API key. Save this information somewhere safe for now, as we will need to use this data later in Zabbix. After saving, you can close this pop-up.
Preparing Zabbix
Create a host
Open your Zabbix web interface, then navigate to the ‘Configuration' -> 'Hosts‘ page and create a new host. In this step, you need to specify a host name of your choice, so choose one of the Pure Storage FlashArray v1 by HTTP or Pure Storage FlashArray v2 by HTTP templates and assign the host to a group. The choice of template depends on the version of the Pure Storage FlashArray RESTful API that is supported by your devices.

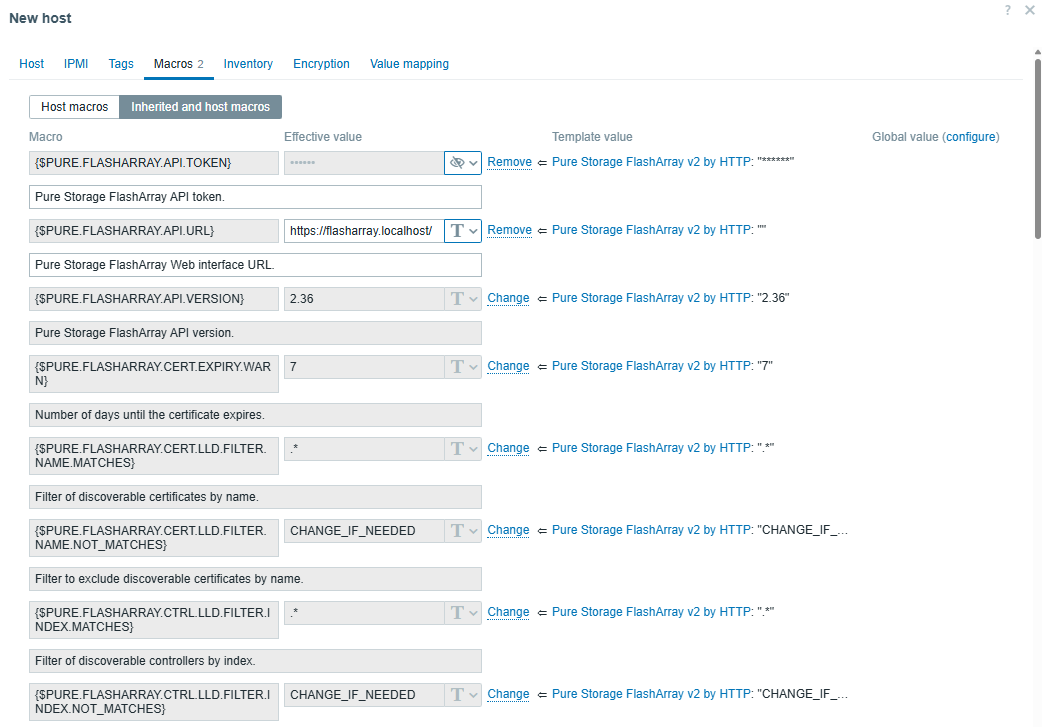
Before clicking the Add button, you need to configure macros. Open the Macros tab and choose both Inherited and host macros. You’ll find a lot of macros there, but only a few of them need to be changed to start using the template. Let’s take a look at these macros.
Macro list in the Pure Storage FlashArray v1 by HTTP template:
| Macro | Default value | Description |
|---|---|---|
{$PURE.FLASHARRAY.API.URL} |
– | Web interface URL. |
{$PURE.FLASHARRAY.API.TOKEN} |
– | API token. |
{$PURE.FLASHARRAY.API.USERNAME} |
– | Web interface username. |
{$PURE.FLASHARRAY.API.PASSWORD} |
– | Web interface password. |
{$PURE.FLASHARRAY.API.VERSION} |
1.19 | API version. |
For the Pure Storage FlashArray v1 by HTTP template, it is mandatory to specify the {$PURE.FLASHARRAY.API.URL} macro, as well as either the {$PURE.FLASHARRAY.API.TOKEN} or {$PURE.FLASHARRAY.API.USERNAME} and {$PURE.FLASHARRAY.API.PASSWORD}. It is highly recommended to use a token for authentication.
Macro list in the Pure Storage FlashArray v2 by HTTP template:
| Macro | Default value | Description |
|---|---|---|
{$PURE.FLASHARRAY.API.URL} |
– | Web interface URL. |
{$PURE.FLASHARRAY.API.TOKEN} |
– | API token. |
{$PURE.FLASHARRAY.API.VERSION} |
2.36 | API version. |
For the Pure Storage FlashArray v2 by HTTP template, it is mandatory to specify just the {$PURE.FLASHARRAY.API.URL} and {$PURE.FLASHARRAY.API.TOKEN} macros to start using the template.
You can change the value for the {$PURE.FLASHARRAY.API.VERSION} macro if your device does not support this version of the API.
After specifying at least the mandatory macro values, your Macros tab should look something like this:
After clicking the Add button, this host will be added to Zabbix.
Data collection
After following the above steps, you should notice the newly created triggers and items after a short time if the macro values are correct.
In case there are any problems with the template’s data collection, you will find errors in the last history data of items with a name ending with item errors. Also, the corresponding triggers should be fired if there are any problems with the collection of any data.
After that, you should see newly discovered items in the Items view (for example).

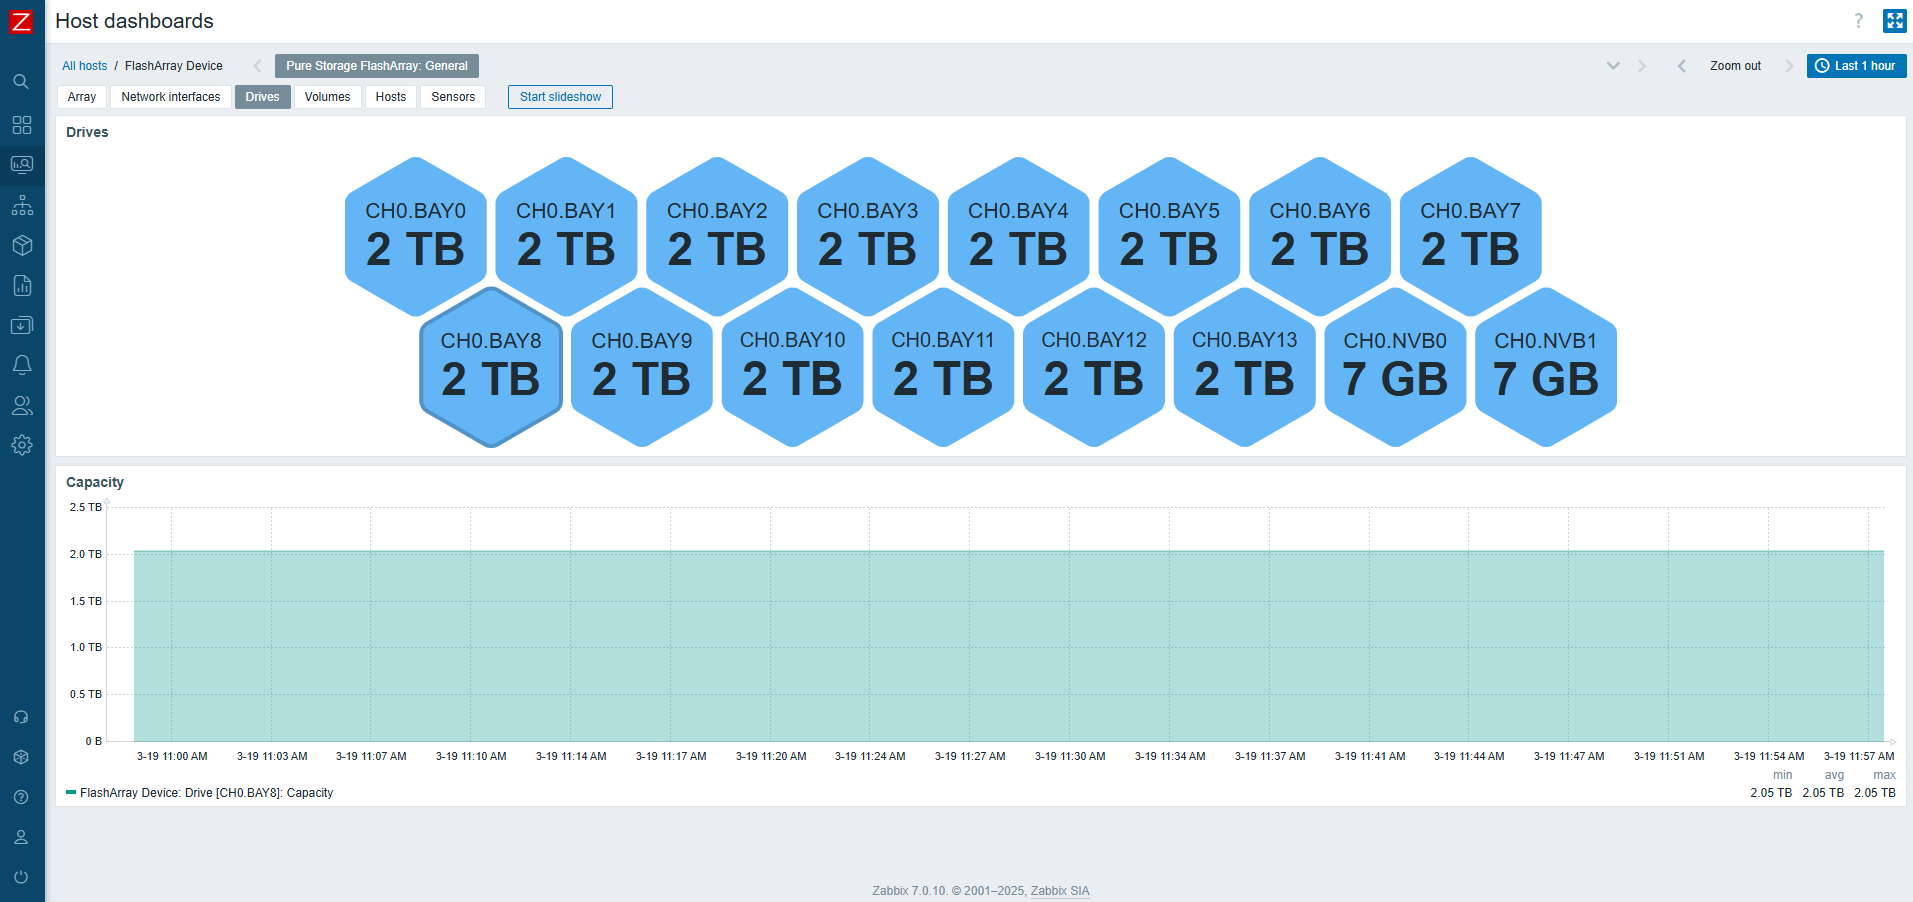
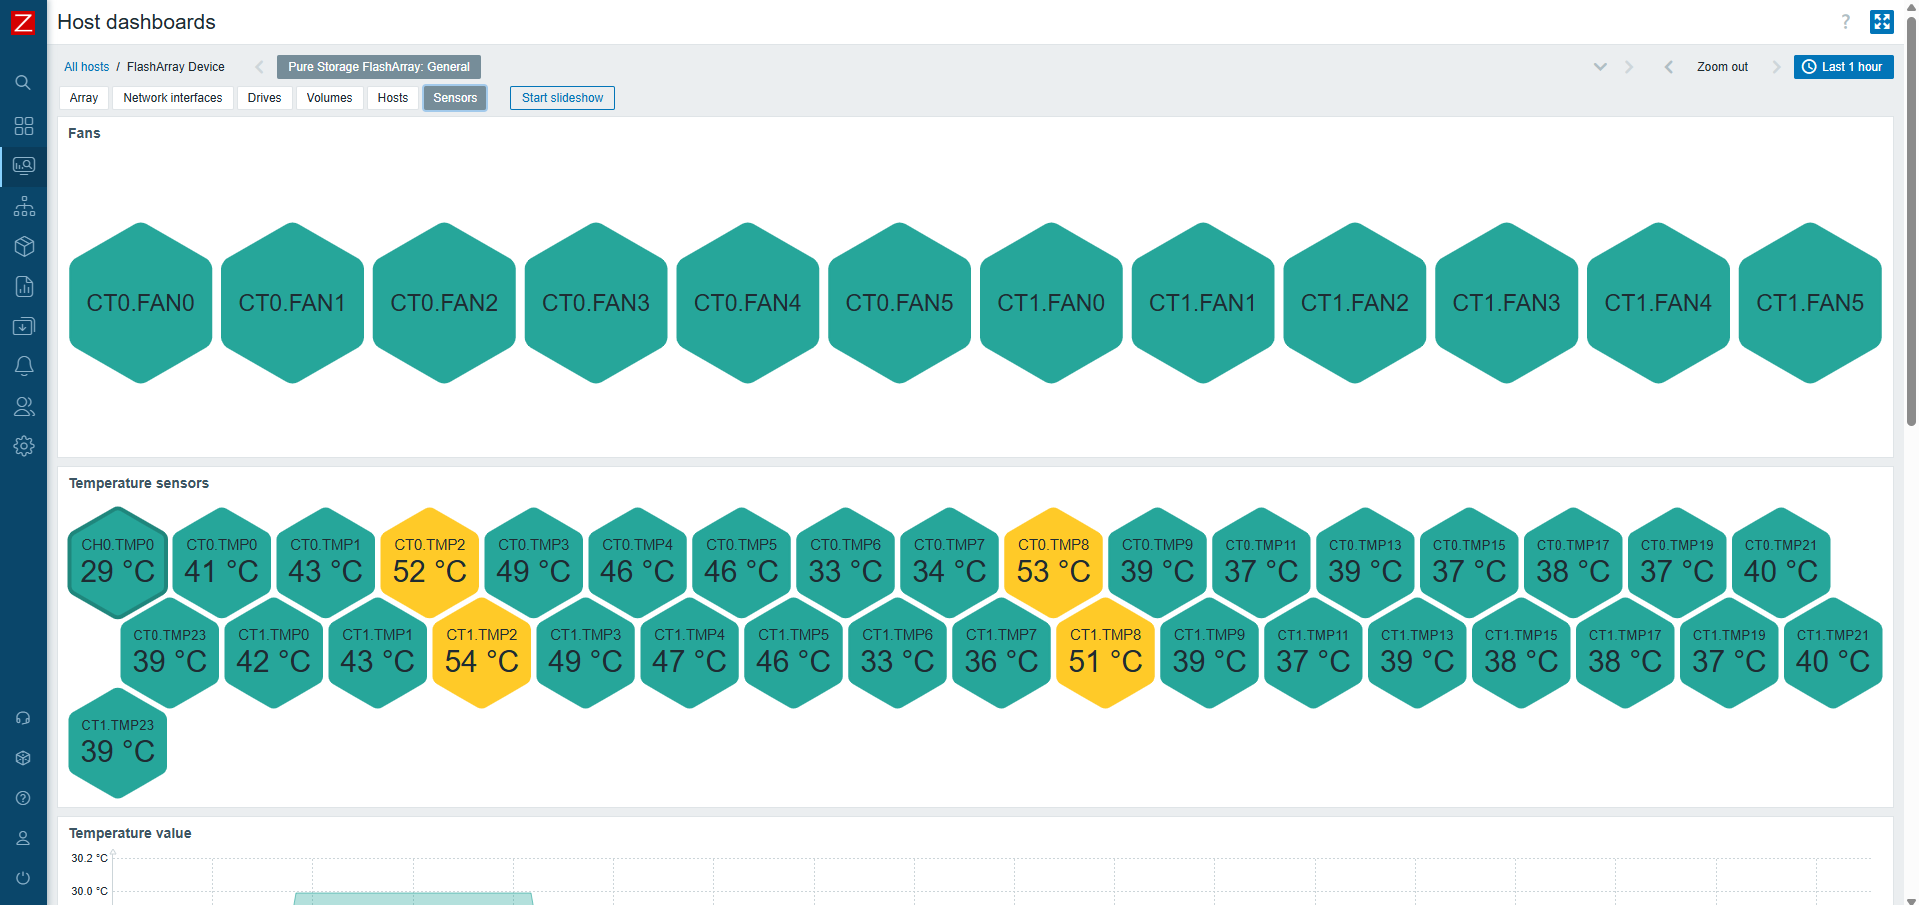
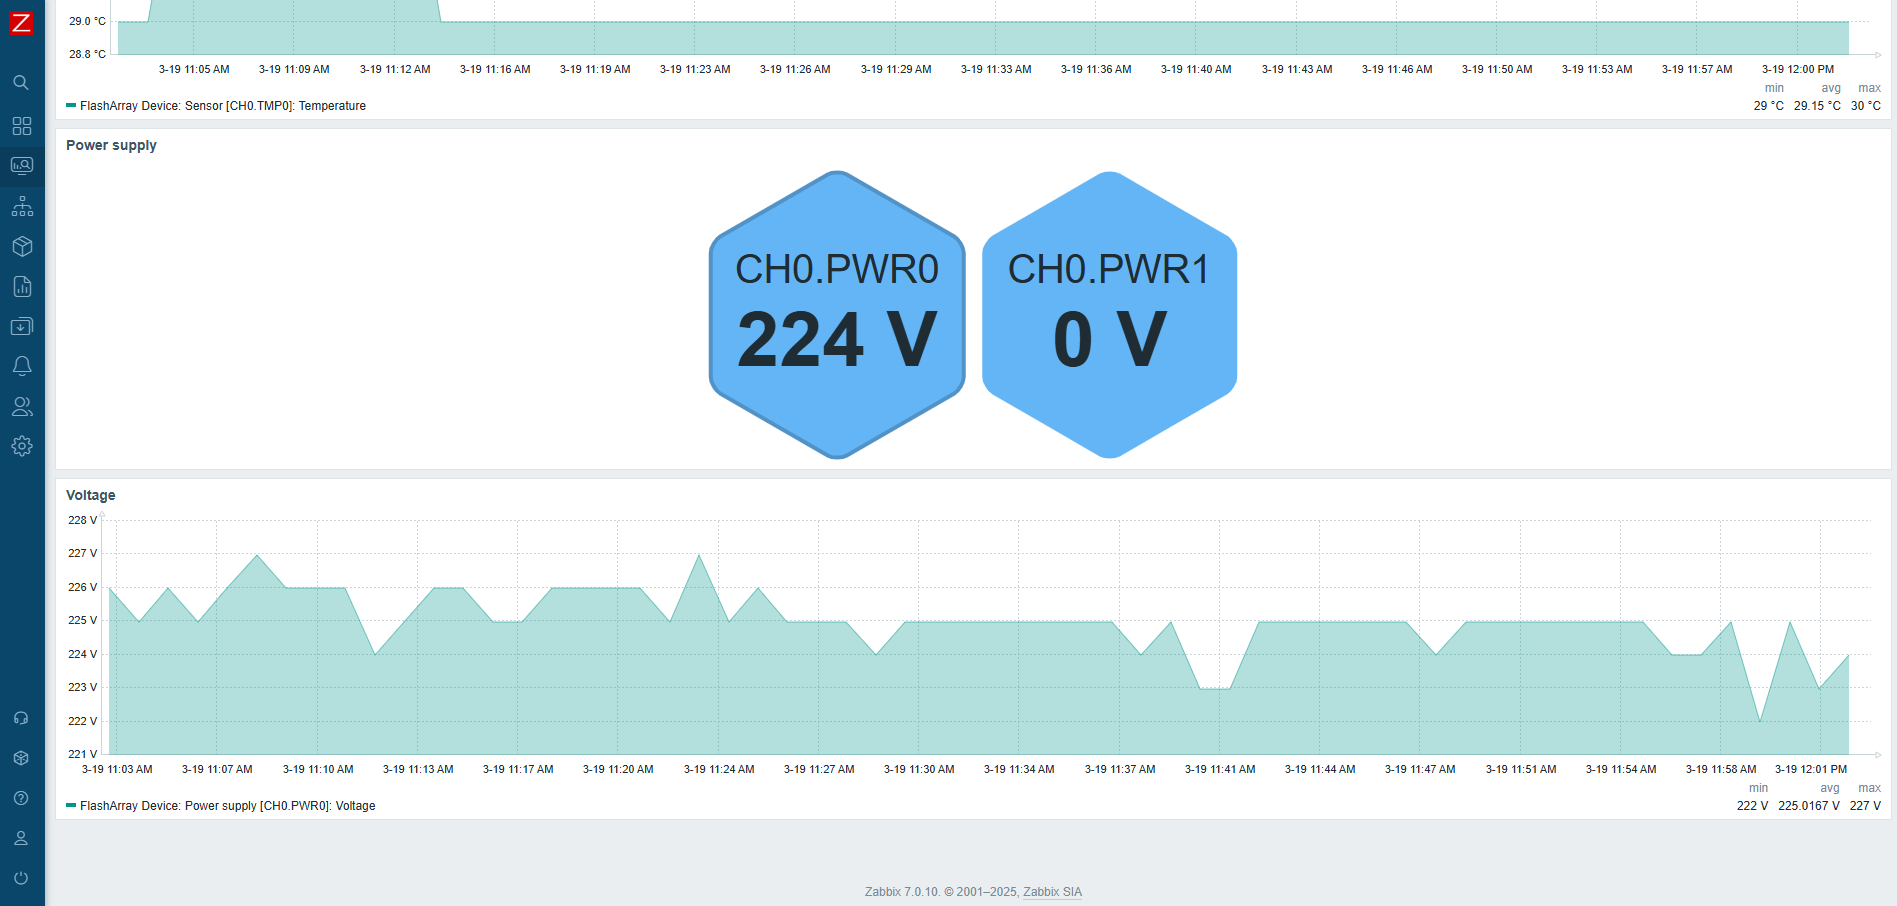
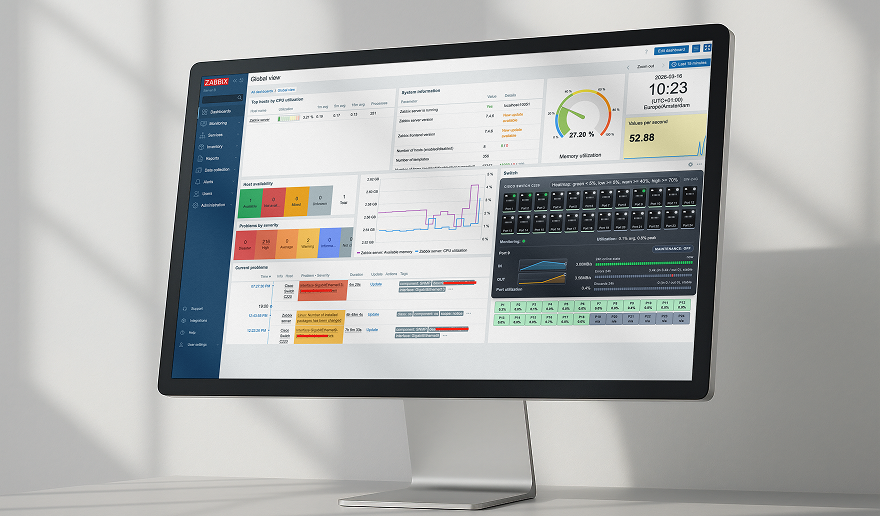
On top of that, each host will have its own dashboard created automatically that will provide you with a good overview of resource utilization.
Use macros for low-level discovery filtering
In official Zabbix templates, you might find macros that end with MATCHES and NOT_MATCHES. These are used for low-level discovery rules (LLDs), to help you filter resources that should or should not be discovered. These values use regular expressions. Therefore, you can use wildcard symbols for pattern matching.
Usage of these macros can be found in the Filters tab, under discovery rules.
The typical default value for MATCHES is .* and for NOT_MATCHES – CHANGE_IF_NEEDED. This means that any kind of value will be discovered if it is not equal to CHANGE_IF_NEEDED. For example, in Network interface discovery, filters are used to check the interface name:
- Macro
{$PURE.FLASHARRAY.NETIF.LLD.FILTER.NAME.MATCHES}has a value of.*; - Macro
{$PURE.FLASHARRAY.NETIF.LLD.FILTER.NAME.NOT_MATCHES}has a value ofCHANGE_IF_NEEDED.
You can set the value of macro {$PURE.FLASHARRAY.NETIF.LLD.FILTER.NAME.NOT_MATCHES}filevip, which will cause an interface named filevip to not be discovered.
Now that you have an idea how these filters work, you can adjust them based on your requirements.
HTTP proxy usage
If needed, you can specify an HTTP proxy for the template to use by changing the value of the{$PURE.FLASHARRAY.HTTP_PROXY} user macro. Every request will use this proxy.
Afterword
To wrap things up, setting up monitoring for Pure Storage FlashArray devices in Zabbix is an important step that guarantees the smooth operation of your infrastructure. I hope that our new templates will help you manage and monitor your devices more effectively.
This short article has been created to provide you with the necessary knowledge and tools to set up a monitoring system that meets your specific needs. By enabling efficient monitoring, you will be better equipped to respond to changes in system performance and maintain optimal operation. I believe this material will be valuable in helping you achieve these goals!


If you are unsure what API version your array supports, you can use this to check. It will show you a list of supported API versions.