


Today we are focusing more on the automation of installation and software configuration instead of using the manual approach. Installing and configuring software the manual way takes a lot more time, you can easily make more errors by forgetting steps or making typos, and it will probably be a bit boring when you need to do this for a large number of servers.
In this blog post, I will demonstrate how to install and configure a Zabbix environment with Ansible. Ansible has the potential to simplify many of your day-to-day tasks. As an alternative to Ansible, you may also opt in to use Puppet, Chef, and SaltStack to install and configure your Zabbix environment.
Ansible does not have any specific infrastructure requirements for it to do its job. We just need to make sure that the user exists on the target host, preferably configured with SSH keys. With tools like Puppet or Chef, you need to have a server running somewhere, and you will need to deploy an agent on your nodes. You can learn more about Ansible here: https://docs.ansible.com/ansible/latest/index.html.
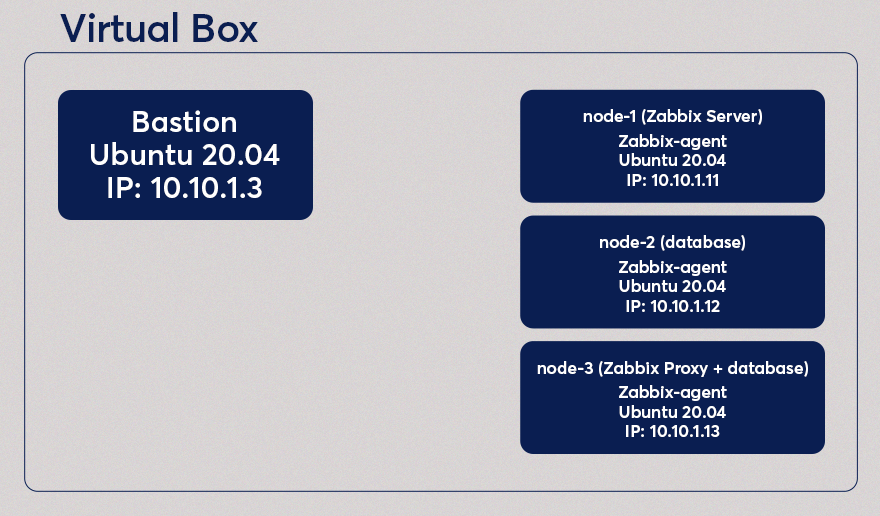
This post is the first in a series of three articles. We will set up a (MySQL) Database running on 1 node (“node-2”), Zabbix Server incl. Frontend, which will be running on a separate node (“node-1”). Once we have built this, we configure an action, media and we will create some users. In the following image you will see the environment we will create.
In the 2nd blog post, we will set up a Zabbix Proxy and a MySQL database on a new but the same node (“node-3”). In the 3rd blog post, we will install the Zabbix Agent on all of the 3 nodes we were using so far and configure some user parameters. Where the Zabbix Agent on “node-3” is using the Zabbix Proxy, the Zabbix Agent on the nodes “node-1” and “node-2” will be monitored by the Zabbix Server.
Preparations
A git repository containing the code used in these blog posts is available, which can be found on https://github.com/dj-wasabi/blog-installing-zabbix-with-ansible. Before we can do anything, we have to install Vagrant (https://www.vagrantup.com/downloads.html) and Virtualbox (https://www.virtualbox.org/wiki/Downloads). Once you have done that, please clone the earlier mentioned git repository somewhere on your host. For this demo, we will not run the Zabbix Frontend with TLS certificates.
We have to update the hosts file. With the following line, we need to make sure that we can access the Zabbix Frontend.
10.10.1.11 zabbix.example.com
In the “ROOT” directory of the git repository which you cloned some moments ago, where you can also find the Vagrantfile, This Vagrantfile contains the configuration of the virtual machine of our setup. We will create 4 Virtual Machine’s running Ubuntu 20.04, each with 1 CPU and 1 GB of Ram which you can see in the first “config” block. In the 2nd config block, we configure our “bastion” host, which we discuss later. This node will get the ip 10.10.1.3 and we also mount the ansible directory in this Virtual Machine on location “/ansible”. For installing and configuring this node we will use a playbook bastion.yml to do this. With this playbook, we will install some packages like Python, git and Ansible inside this bastion virtual machine.
The 3rd config block is part of a loop that will configure and it will create 3 Virtual Machines. Each virtual machine is also an Ubuntu node, had its own ip (respectively 10.10.1.11 for the first node, 10.10.1.12 for the second and 10.10.1.13 for the 3rd node) and just like the “bastion” node, they have each 1 CPU and 1 GB of RAM.
You will have to execute the following command:
$ vagrant up
With this command, we will start our Virtual Machine’s. This might take a while, as it will download a VirtualBox image containing Ubuntu. The “vagrant up” command will start the “bastion” node and all other nodes as a part of this demo. Once that is done, we need to access a shell on the “bastion” node:
$ vagrant ssh bastion
This “bastion” node is a fundamental node on which we will execute Ansible, but we will not be installing anything on this host. We have opened a shell in the Virtual Machine we just created. You can compare it with creating an “ssh” connection. We have to go to the following directory before we can download the dependencies:
$ cd /ansible
As mentioned before, we have to download the Ansible dependencies. The installation depends on several Ansible Roles and an Ansible Collection. With the Ansible Roles and the Ansible Collection, we can install MySQL, Apache, and the Zabbix components. We have to execute the following command to download the dependencies:
$ ansible-galaxy install -r requirements.yml
Starting galaxy role install process
- downloading role 'mysql', owned by geerlingguy
- downloading role from https://github.com/geerlingguy/ansible-role-mysql/archive/3.3.0.tar.gz
- extracting geerlingguy.mysql to /home/vagrant/.ansible/roles/geerlingguy.mysql
- geerlingguy.mysql (3.3.0) was installed successfully
- downloading role 'apache', owned by geerlingguy
- downloading role from https://github.com/geerlingguy/ansible-role-apache/archive/3.1.4.tar.gz
- extracting geerlingguy.apache to /home/vagrant/.ansible/roles/geerlingguy.apache
- geerlingguy.apache (3.1.4) was installed successfully
- extracting wdijkerman.php to /home/vagrant/.ansible/roles/wdijkerman.php
- wdijkerman.php was installed successfully
Starting galaxy collection install process
Process install dependency map
Starting collection install process
Installing 'community.zabbix:1.2.0' to '/home/vagrant/.ansible/collections/ansible_collections/community/zabbix'
Created collection for community.zabbix at /home/vagrant/.ansible/collections/ansible_collections/community/zabbix
community.zabbix (1.2.0) was installed successfully
Your output may vary because of versions that might have been updated already since writing this blog post. We now have downloaded the dependencies and are ready to install the rest of our environment. But why do we need to download a role for MySQL, Apache and php? A role contains all the neccecerry tasks and files to configure that specific service. So in the case for the MySQL Ansible role, it will install the MySQL-server and all other packages that MySQL requires on the host, it will configure that the mysqld service is created and is running, but it will also create the databases, create and configure MySQL users and configure the root password. Using a role will help us install our environment and we don’t have to figure out ourselves on installing and configuring a MySQL server manually.
So what about the collection, the Ansible Community Zabbix Collection? Ansible has introduced this concept with Ansible 2.10 and is basically a “collection” of plugins, modules and roles for a specific service. In our case, with the Zabbix Collection, the collection contains the roles for installing the Zabbix Server, Proxy, Agent, Javagateway and the Frond-end. But it also contains a plugin to use a Zabbix environment as our inventory and contains modules for creating resources in Zabbix. All of these modules will work with the Zabbix API to configure these resources, like actions, triggers, groups. templates, proxies etc. Basically, everything we want to create and use can be done with a role or a collection.
Installing Zabbix Server
Now we can execute the following command, which will install the MySQL database on “node-2” and installs the Zabbix Server on “node-1”:
$ ansible-playbook -i hosts zabbix-server.yml
This might take a while, a minute, or 10 depending on the performance of your host. We execute the “ansible-playbook” command, and then “-i” we provide the location of the inventory file. Here you see the contents of the inventory file:
[zabbix_server]
node-1 ansible_host=10.10.1.11

[zabbix_database]
node-2 ansible_host=10.10.1.12

[zabbix_proxy]
node-3 ansible_host=10.10.1.13

[database:children]
zabbix_database
zabbix_proxy
This inventory file contains basically all of our nodes and to which group the hosts belong. We can see in that file that there is a group called “zabbix_server” (The value between [] square brackets is the name for the group) and contains the “node-1” host. Because we have a group called “zabbix_server,” we also have a directory containing some files. These are all the properties (or variables) that will be used for all hosts (in our case, only the “node-1”) in the “zabbix_server” group.
Web Interface
Now you can open your favorite browser and open “zabbix.example.com”, and you will see the Zabbix login screen. Please enter the default credentials:
Username: Admin
Password: zabbix
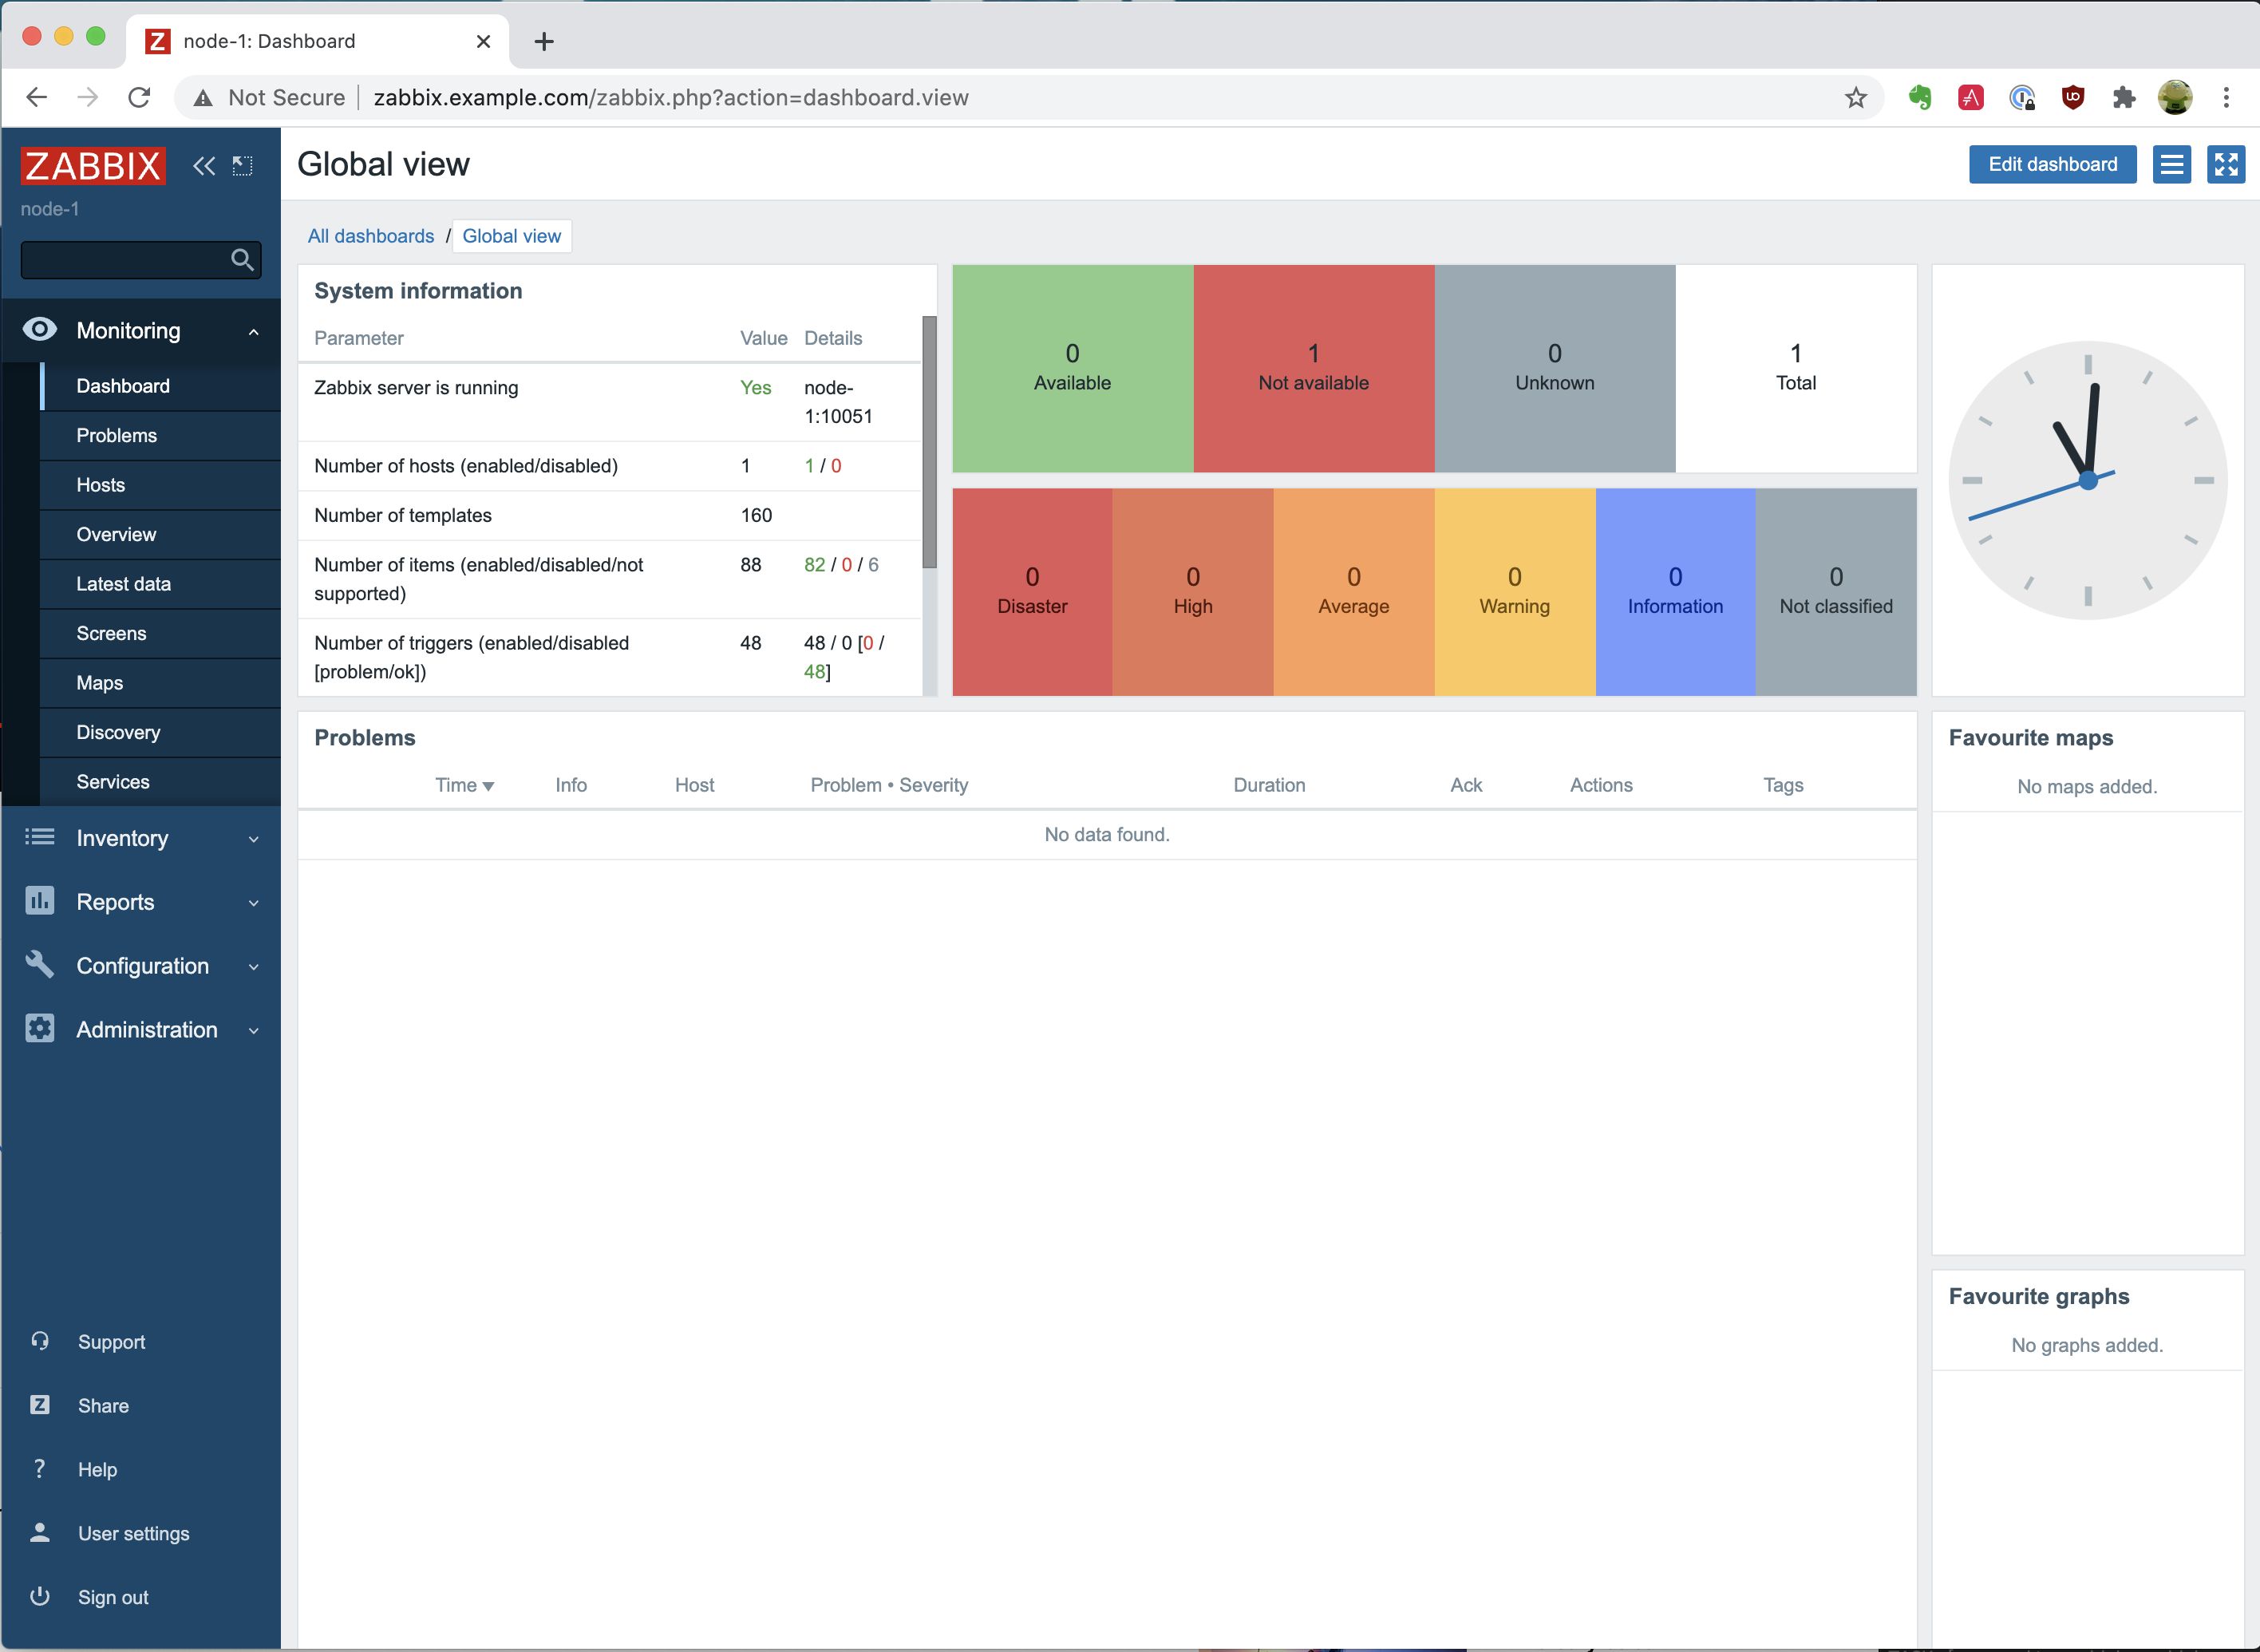
On the Dashboard, you will probably notice that it complains that it can not connect to the Zabbix Agent running on the Zabbix Server, which is fine as we haven’t installed it yet. We will do this in a later blog post.
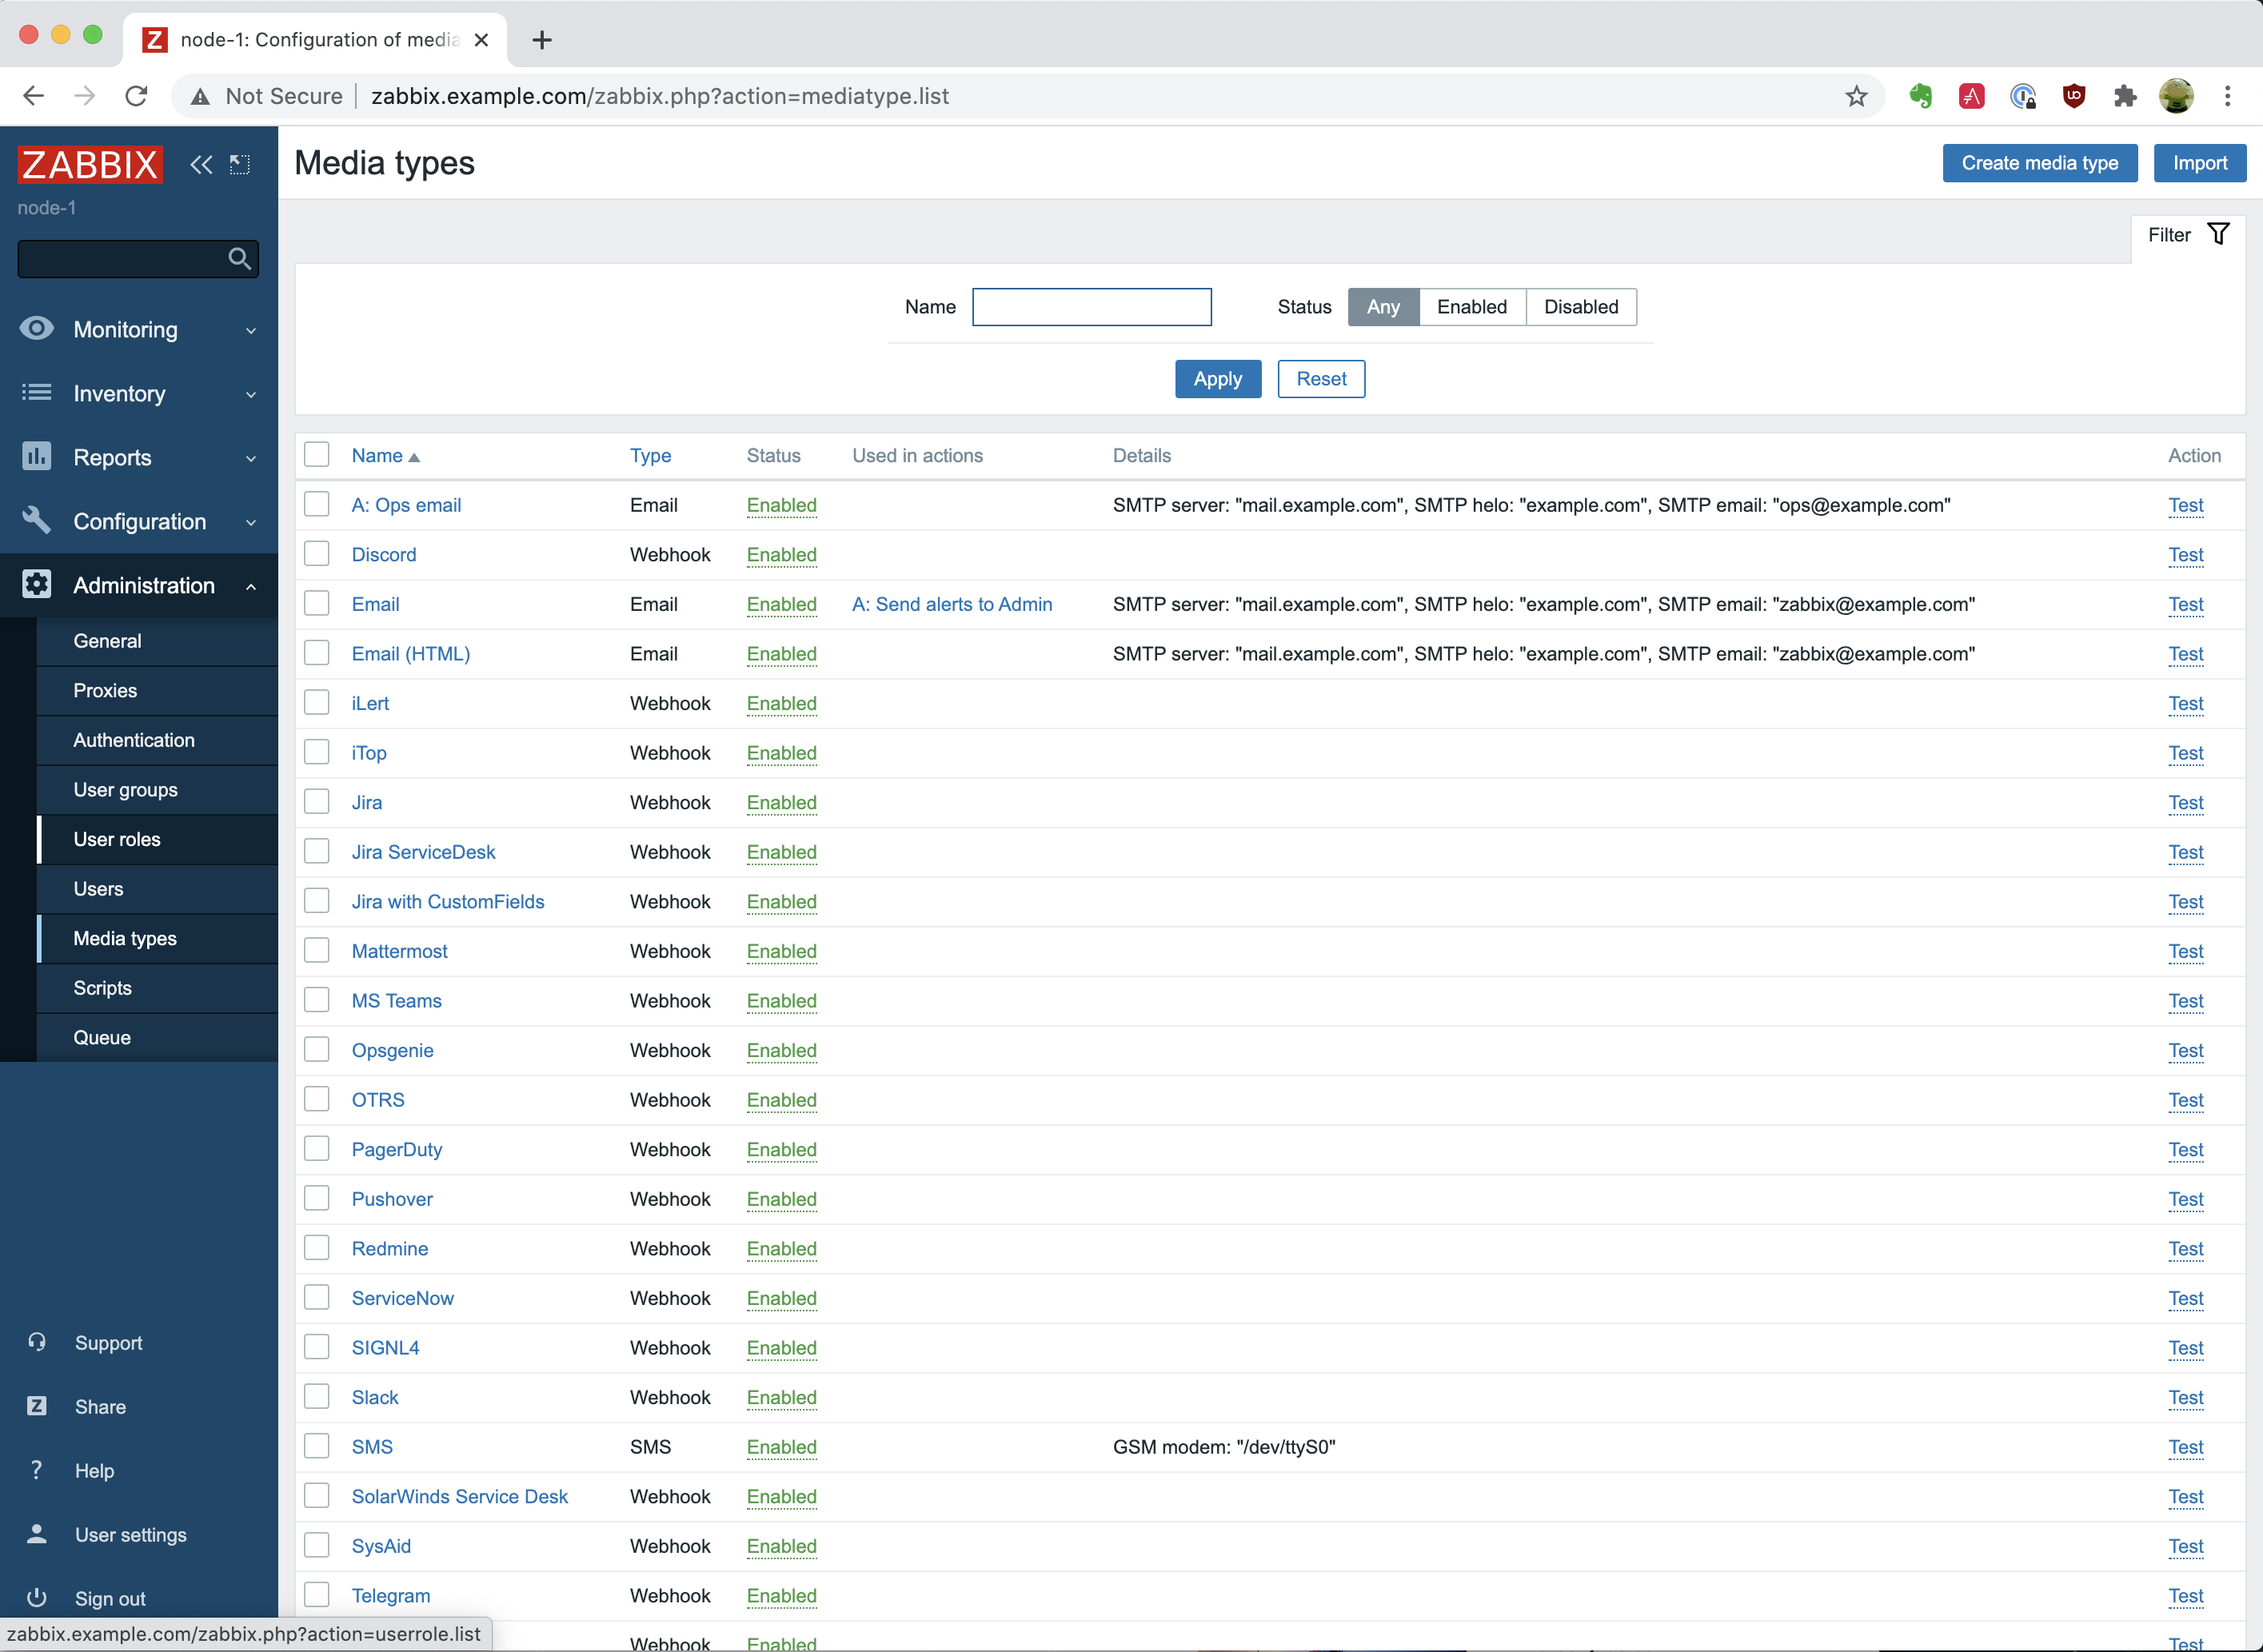
When we go to “Administration” and click on “Media types,” we will see a media type called “A: Ops email.” That is the one we have created. We can open the “/ansible/zabbix-server.yml” file and go to line 33, where we have configured the creation of the Mediatype. In this case, we have configured multiple templates for sending emails via the “mail.example.com” SMTP server.
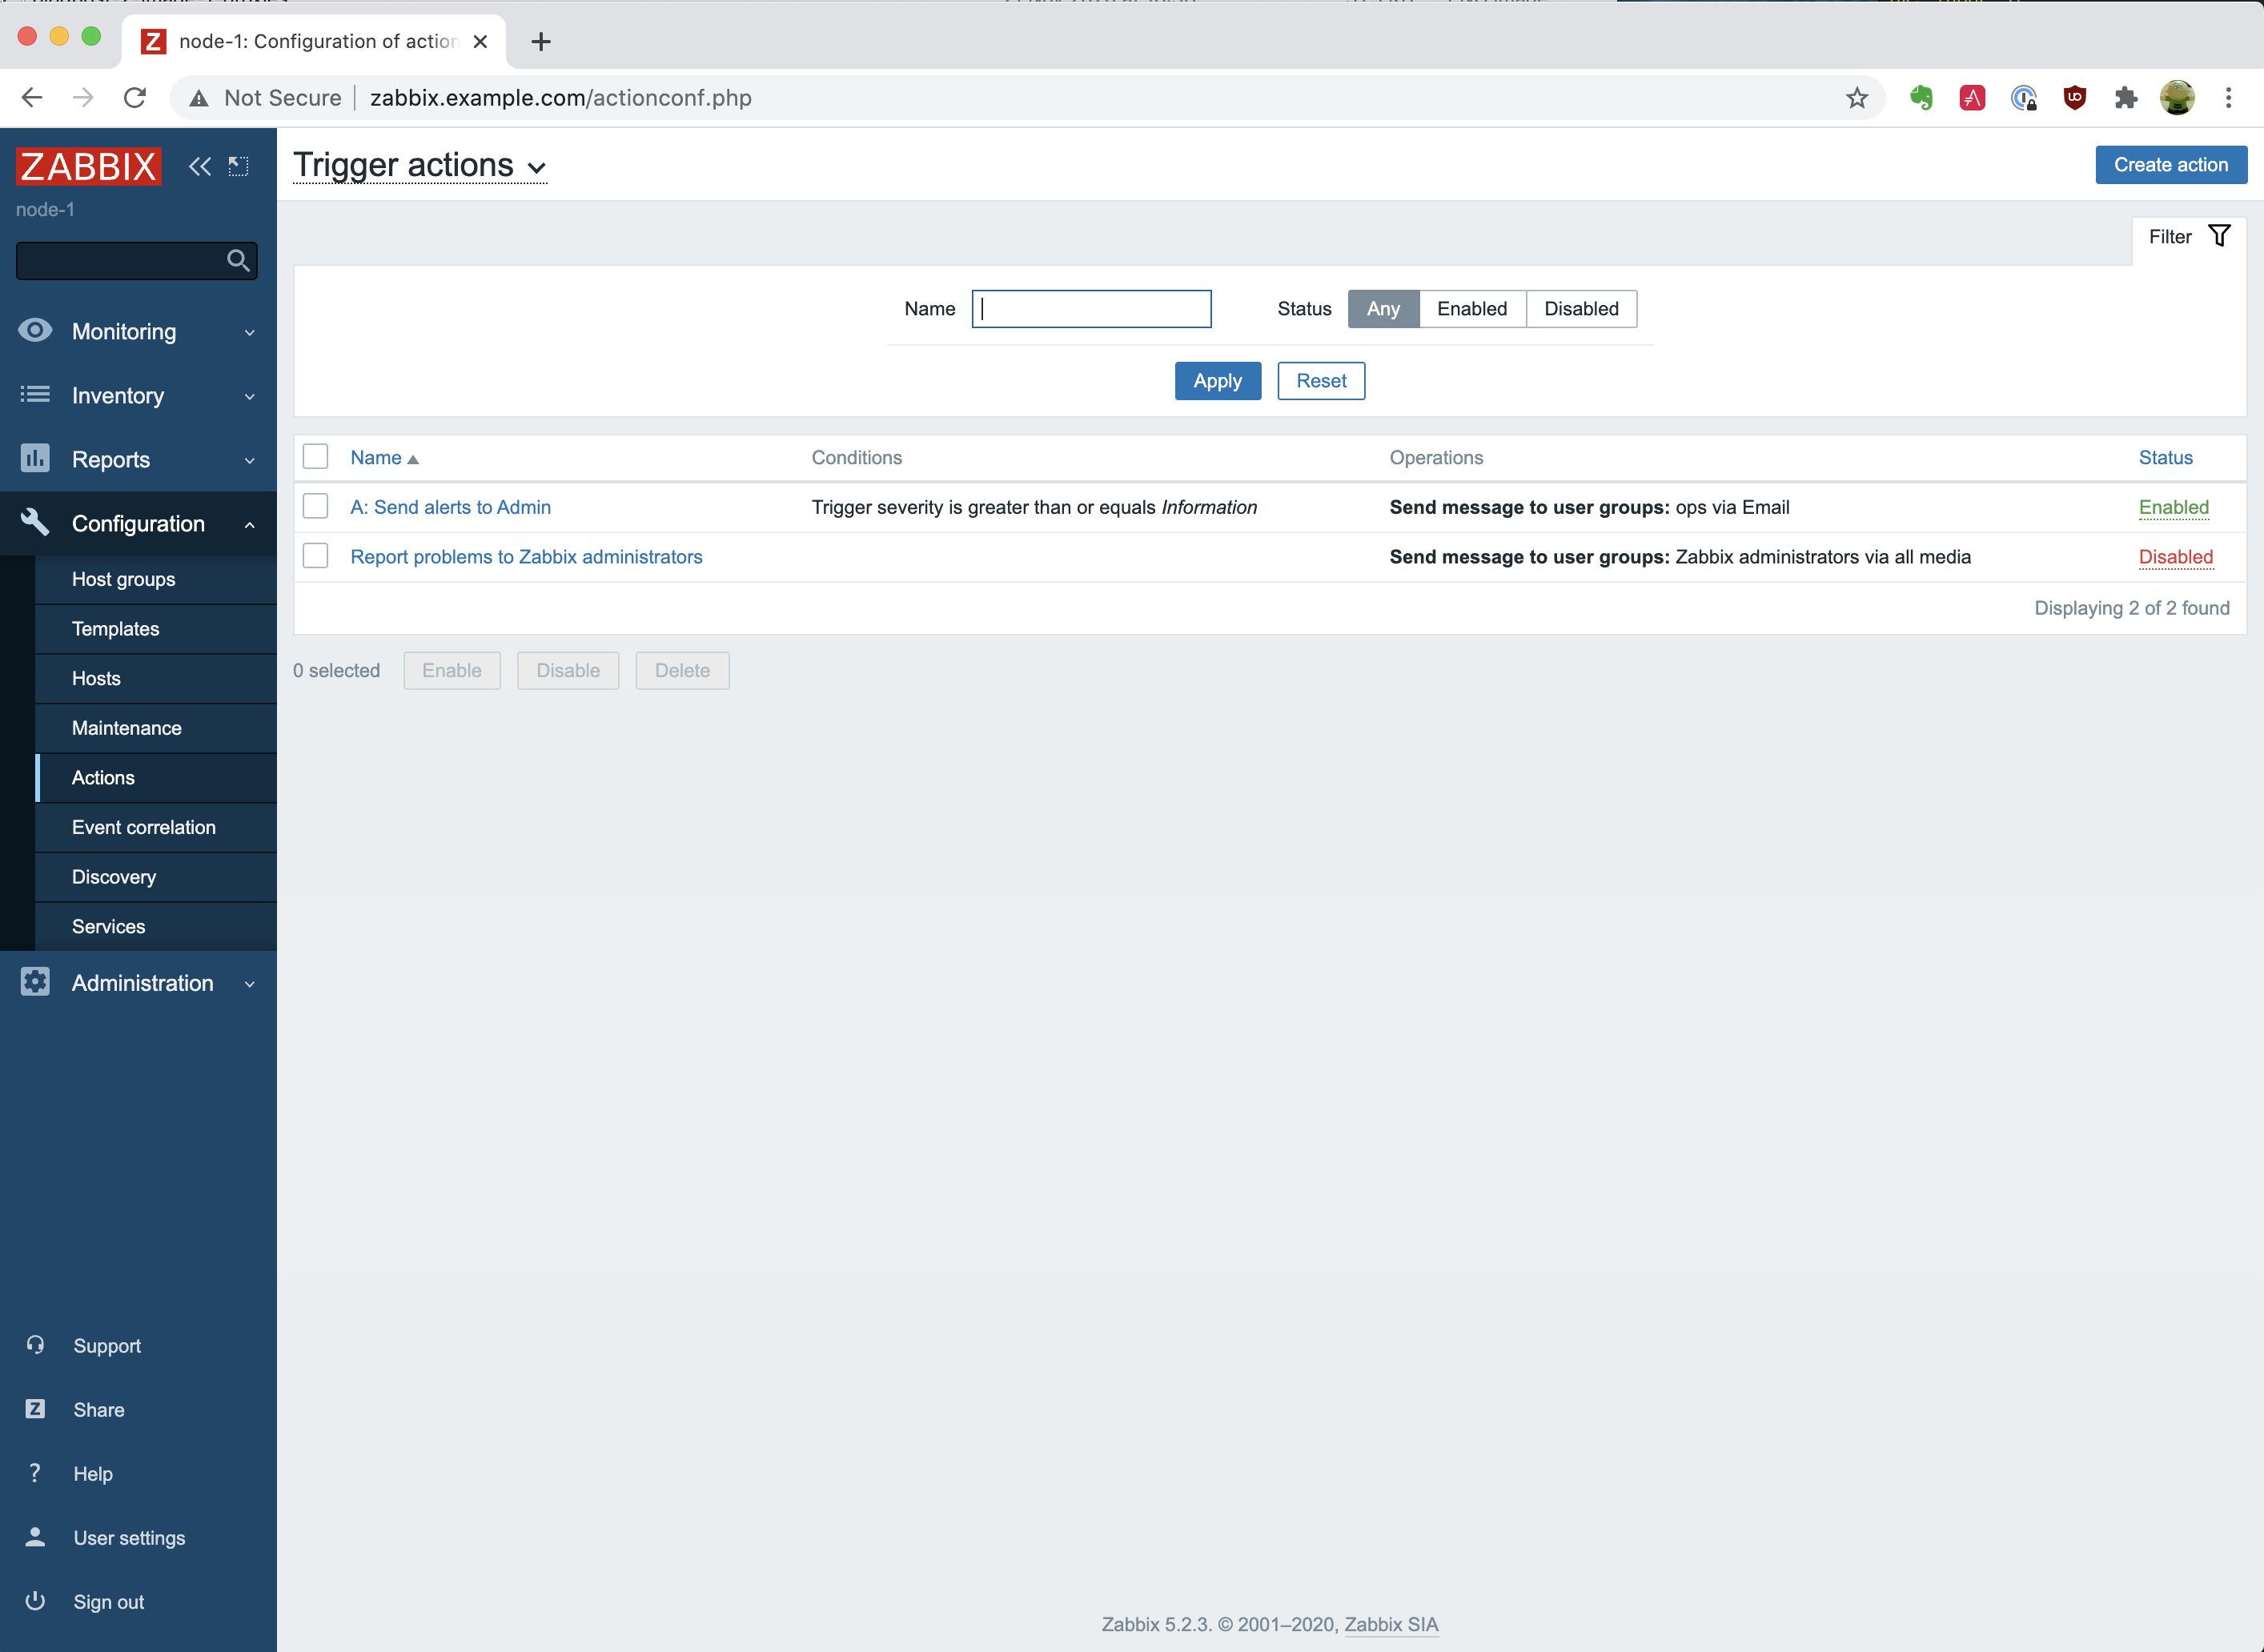
Now we have seen the media type, we will look at the trigger we just created. This trigger makes use of the media type we just saw. The trigger can be found in the “/ansible/zabbix-server.yml” file on line 69. When you go to “Configuration” and “Actions,” you will see our created trigger “A: Send alerts to Admin”. But we don’t want to run this in Production, and for demonstrating purposes, we have selected to be triggered when the severity is Information or higher.
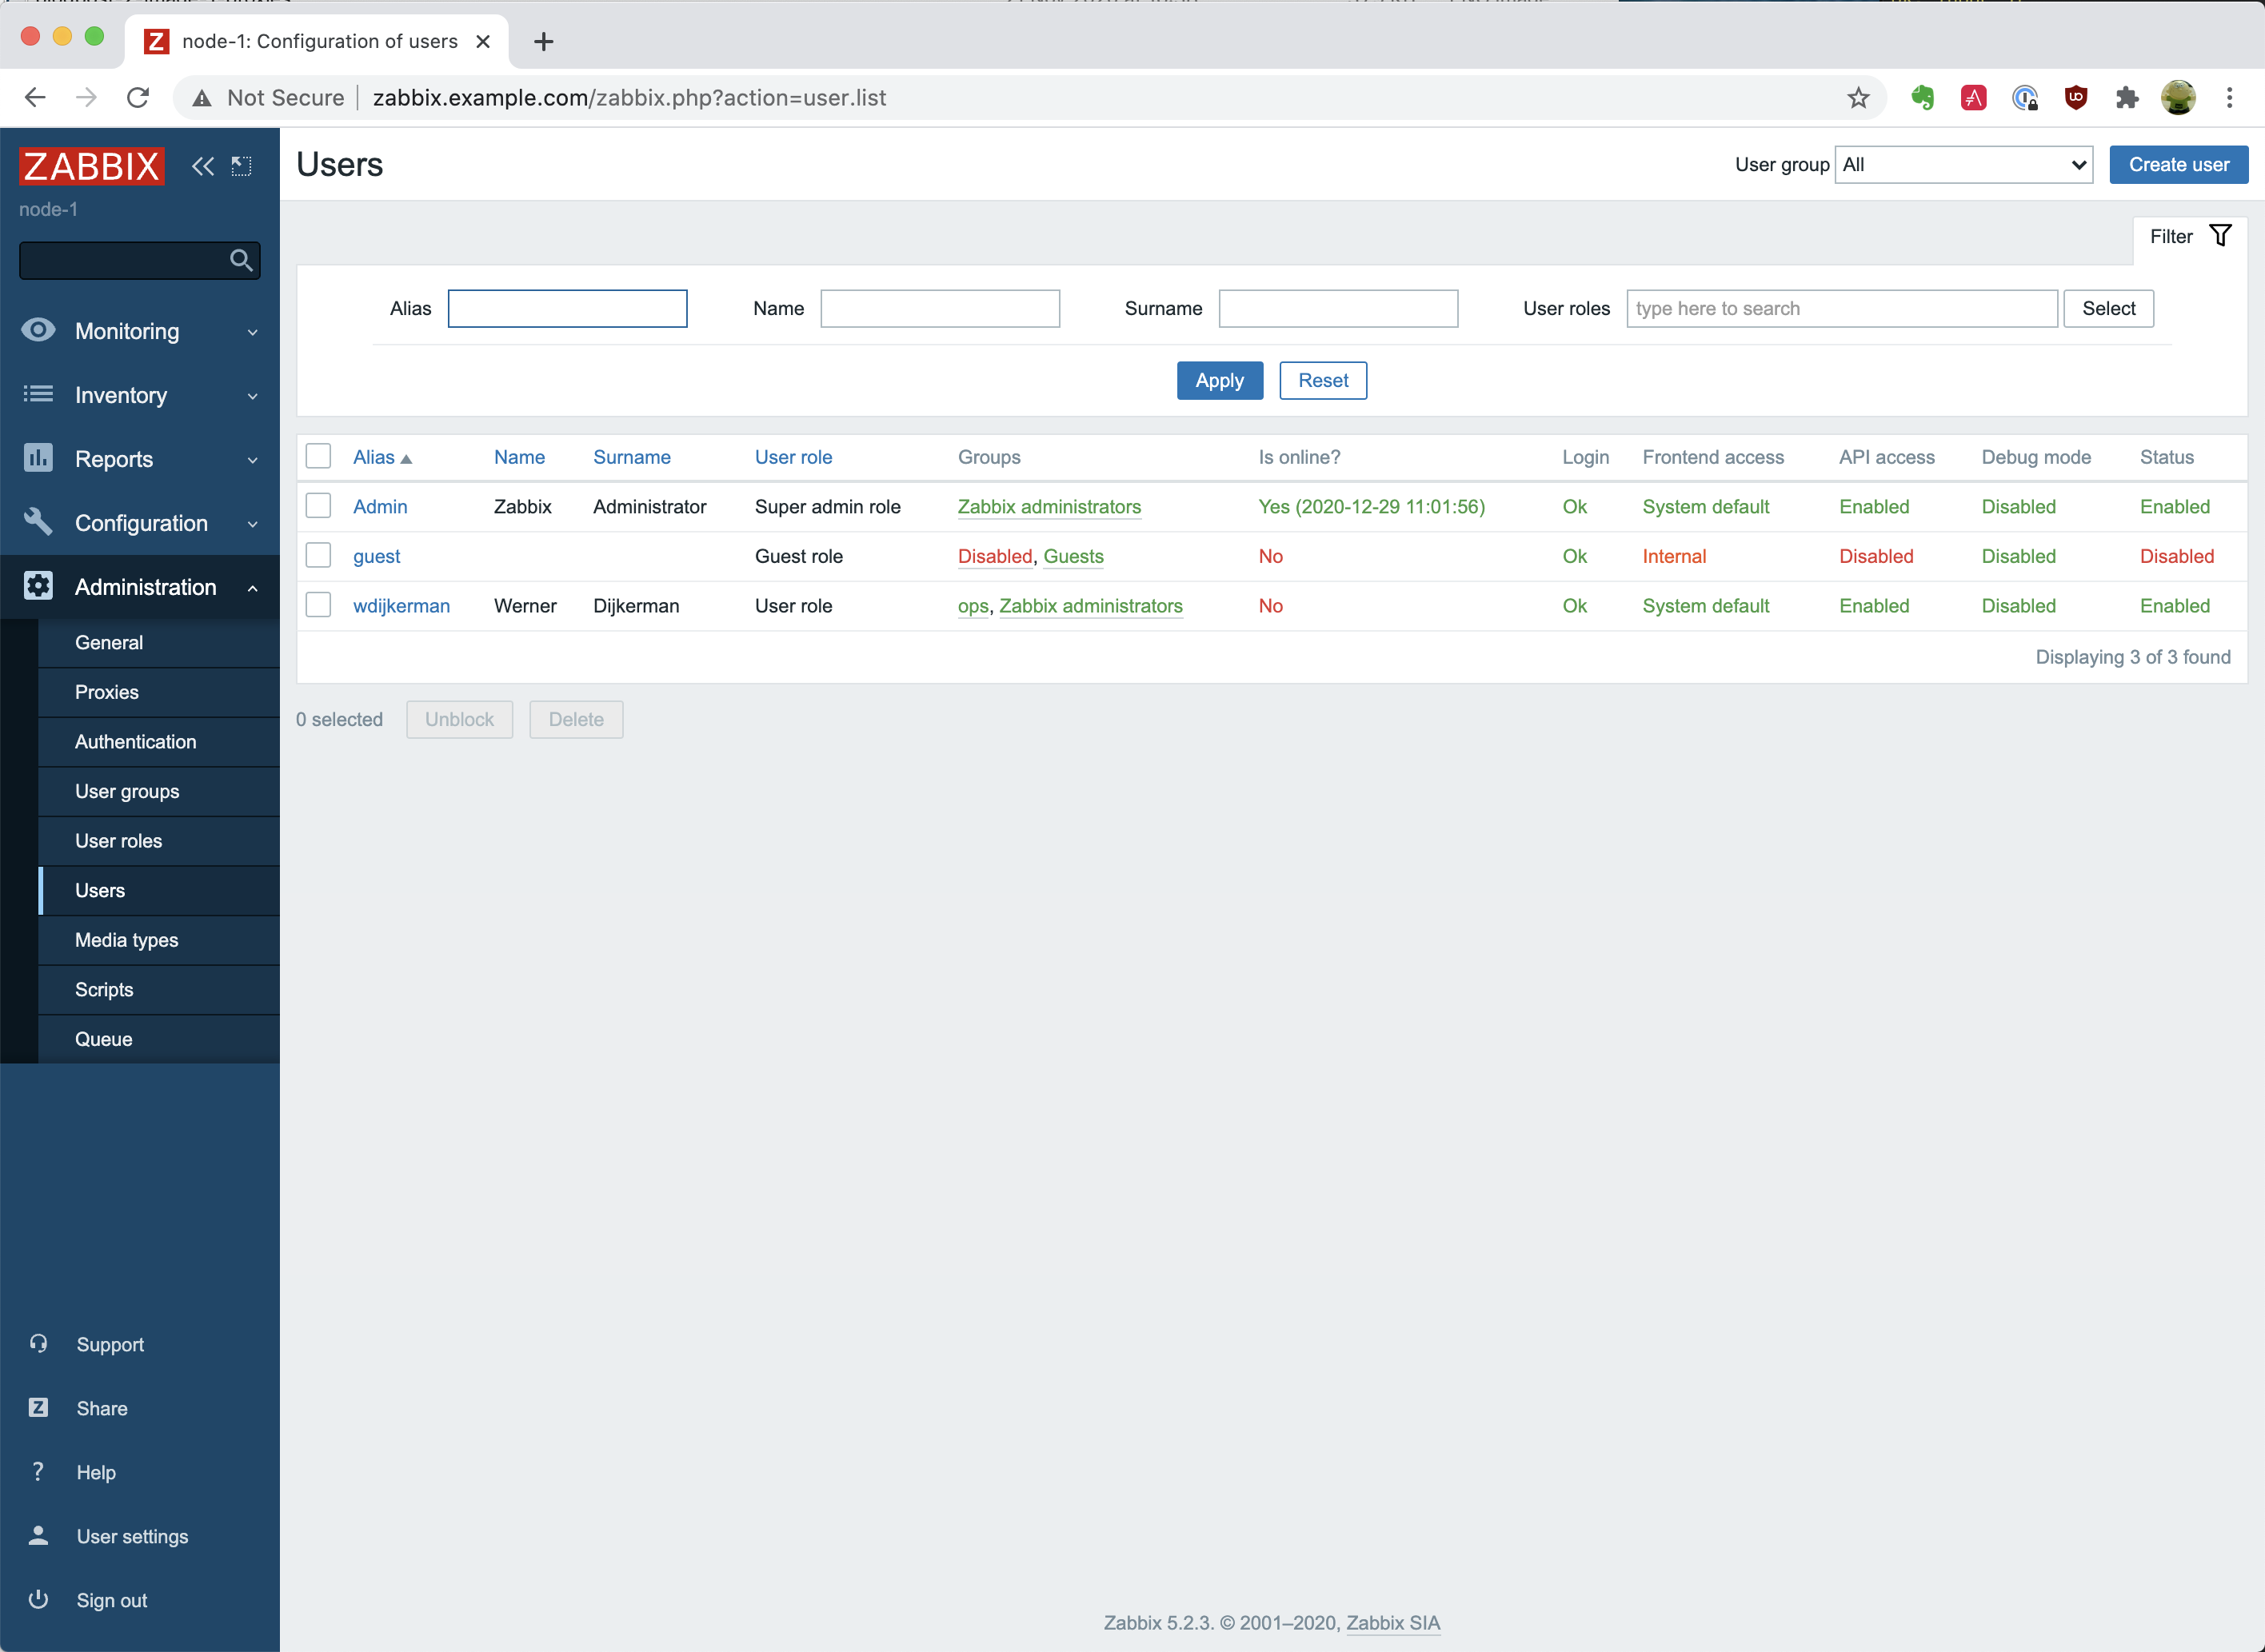
And lastly, we are going to see that we have also created new internal users. Navigate to “Administration” – “Users,” and you will see that we have created a user called “wdijkerman”, which can be found in the “/ansible/zabbix-server.yml” file on line 95. This user will be part of a group created earlier called “ops,”. The user type is Zabbix super admin and we have configured the email media type to be used 24×7.
We have defined a default password for this user – “password”. When you have changed the password in the Zabbix Frontend UI, executing the playbook would not change the password back again to “password.” So don’t worry about it. But if you would have removed – let’s say – the “ops” group, then, when you execute the playbook again, the group will be re-added to the user.
Summary
As you see, it is effortless to create and configure a Zabbix environment with Ansible. We didn’t have to do anything manually, and all installations and configurations were applied automatically when we executed the ansible-playbook command. You can find more information on either the Ansible page https://docs.ansible.com/ansible/latest/collections/community/zabbix/ or on the Github page https://github.com/ansible-collections/community.zabbix.
In the next post, we will install and configure the Zabbix Proxy.


I get stuck at:
TASK [community.zabbix.zabbix_server : MySQL | Create database user] **********************************************************************************************************************

task path: /home/user/.ansible/collections/ansible_collections/community/zabbix/roles/zabbix_server/tasks/mysql.yml:39

redirecting (type: modules) ansible.builtin.mysql_user to community.mysql.mysql_user

changed: [node-1 -> zabbix-database] => {"changed": true, "msg": "User added", "user": "zabbix-server"}
TASK [community.zabbix.zabbix_server : Get the file for create.sql >= 3.0] ****************************************************************************************************************
task path: /home/user/.ansible/collections/ansible_collections/community/zabbix/roles/zabbix_server/tasks/mysql.yml:57
fatal: [node-1]: FAILED! => {"changed": false, "cmd": "ls -1 /usr/share/doc/zabbix-server-mysql/create.sq*", "delta": "0:00:00.003983", "end": "2021-11-26 15:14:40.517585", "msg": "non-zero return code", "rc": 2, "start": "2021-11-26 15:14:40.513602", "stderr": "ls: cannot access '/usr/share/doc/zabbix-server-mysql/create.sq*': No such file or directory", "stderr_lines": ["ls: cannot access '/usr/share/doc/zabbix-server-mysql/create.sq*': No such file or directory"], "stdout": "", "stdout_lines": []}
user@zabbixserver:~$ sudo ls -alh /usr/share/doc/zabbix-server-mysql/
total 36K
drwxr-xr-x 2 root root 4.0K Nov 26 15:14 .
drwxr-xr-x 626 root root 24K Nov 26 15:14 ..
-rw-r--r-- 1 root root 3.8K Oct 20 14:31 changelog.Debian.gz
-rw-r--r-- 1 root root 980 Oct 20 14:31 copyright
try to move all files to /home/vagrant and change permissions, users and groups of folder /ansible to vagrant.