


Zabbix supports many different monitoring approaches for different infrastructures. Data collection and analysis are just a part of the job. Once the data is collected, we need to set up proper notification channels and notify end-users of any problems or try and remedy the issues in an automated manner.
Contents
I. Introduction (0:43)
II. Zabbix logic (1:40)
III. Media types (2:39)
IV. Zabbix integrations (14:11)
- Legacy approach to Zabbix integration — Slack (14:11)
- Official Slack integration with Webhooks (19:48)
Introduction
Zabbix supports many different monitoring approaches for different infrastructures. As Zabbix evolves, all those features are added alongside each other — agents, SNMP, Prometheus, out-of-the-box preprocessing support, etc. These features then can be used to collect and transform the data in many different ways, so the data can be collected, transformed, and further used however the end-users see fit. Still, data collection and analysis are just a part of the job. once the data has been collected, we need to set up proper notification channels and notify end users of any problems or try and remedy the problems in an automated manner. Some of these new features have finally enabled us to provide truly out-of-the-box integrations for our user base.
Zabbix logic
- We create a host with items that collect data from our data sources.
- Based on those items, we define triggers — our problem thresholds or definitions.
- Triggers create events in case if those problem thresholds are evaluated as true.
- Based on the expected problem events we create our actions with conditions.
- If those conditions are evaluated as true, then we execute our operations. In operations we define our notification workflow – who we notify via email or an SMS, or use a third-party integration to send someone a message via Skype, Slack, or some other piece of software. Operations also enable us to execute a script, restart a service, a server, or an application.

Zabbix Data analysis workflow
Media types
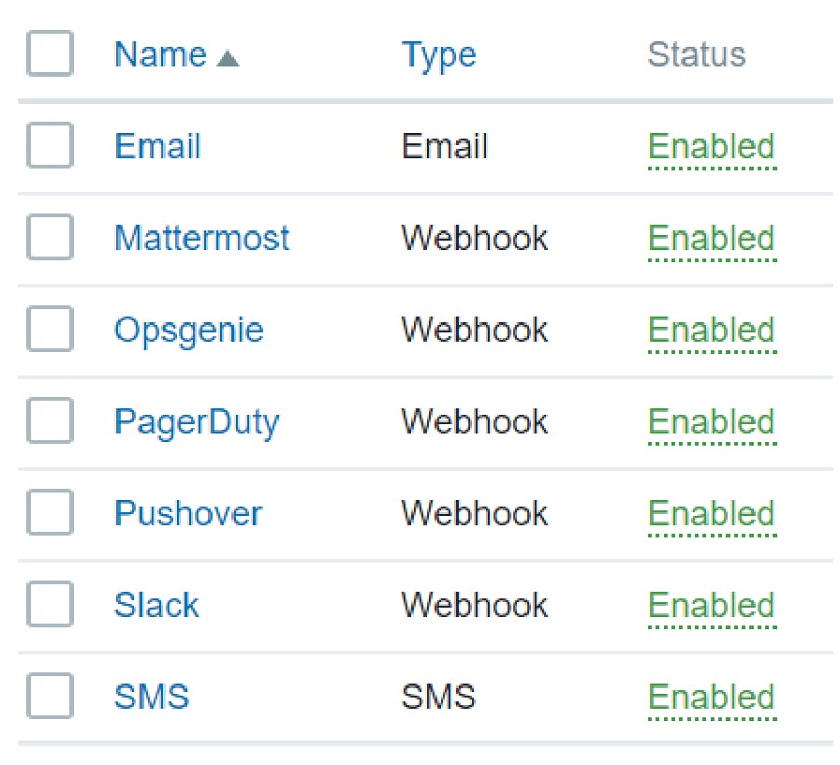
Media are the delivery channels used for sending notifications and alerts from Zabbix. Сurrently, Zabbix generally supports four media types: Email, SMS, Scripts, and, since Zabbix 4.4. – Webhook
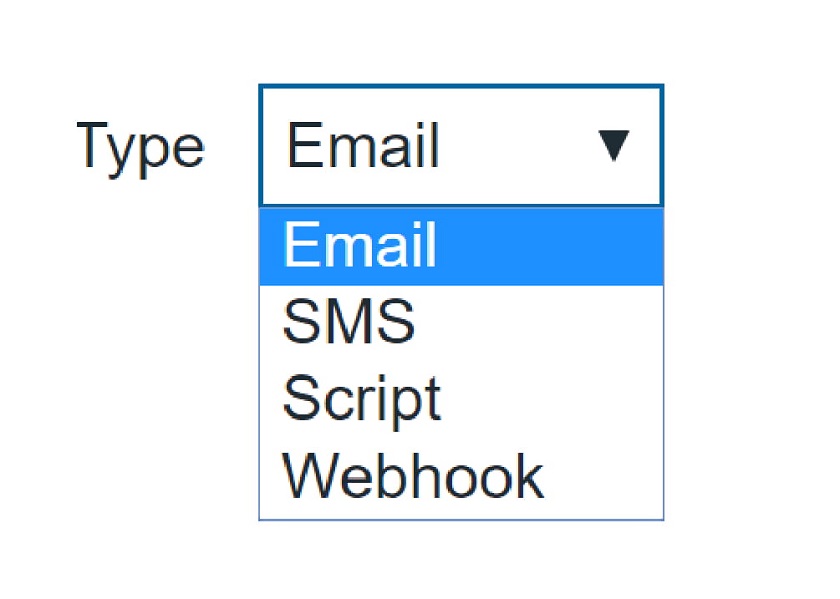
Media types supported in Zabbix
There have been other media types (Jabber, Ez Texting) depending on how we partnered with different solutions. Still, the core media types haven’t changed throughout the years.
Emails
Since Zabbix 4.2, the message can either be plain text or formatted in HTML, so that you can format your email with HTML tags, make it interactive or use other HTML features. For this media you have to configure SMTP parameters in Zabbix. Just like for other media types, next up you will have to create media for your individual users and then test it.
Speaking of testing – since Zabbix 4.2 release you don’t need to create a trapper item and send a trap to it via Zabbix Sender for testing purposes. Now we are not simulating problems anymore, as we can test our media types (a new “Test” button has appeared next to our media types) and confirm that they are working.

Media type testing
SMS
- Simple to configure.
- Requires a GSM modem attached.
- Tested models provided in the documentation.
- Connected via a serial port or USB.
- More complex configuration in case of a virtualized environment.
- Create the media for your individual users.
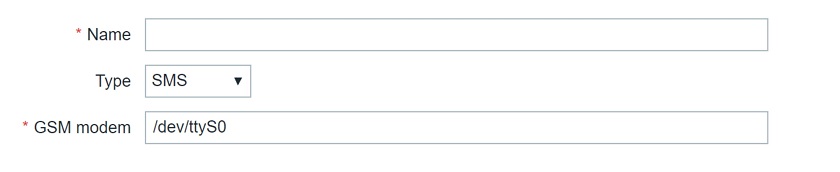
SMS configuration
Alert scripts
- Executed by the Zabbix server.
- Used to integrate Zabbix with 3rd party systems.
- Can pass Macros as parameters.
- Can be written in any language.
- Examples available on Zabbix share or the Integrations section.
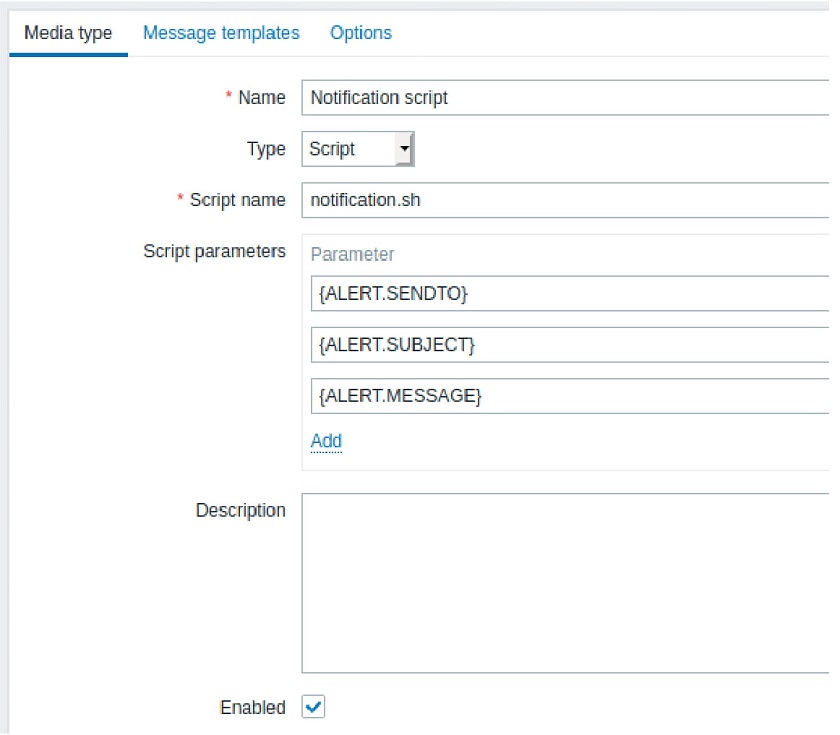
Alert script configuration
Till Zabbix 4.0, you were expected to create and use your own alert scripts for integration or use the community provided solutions. The issue with community solutions is that we can’t guarantee that they will be maintained and updated, therefore support for such solutions was still unofficial.

Community integration solutions
One of our largest challenges throughout the years has been providing easy to use out of the box solutions. So we decided to leverage Javascript to provide you a somewhat plug-and-play approach to integrations:
- Zabbix 4.2 – Support of JavaScript (in preprocessing).
- Zabbix 4.4 – Webhooks and programmable logic for actions and notifications (also with the help of JavaScript).

Zabbix out-of-the-box integrations
Webhooks
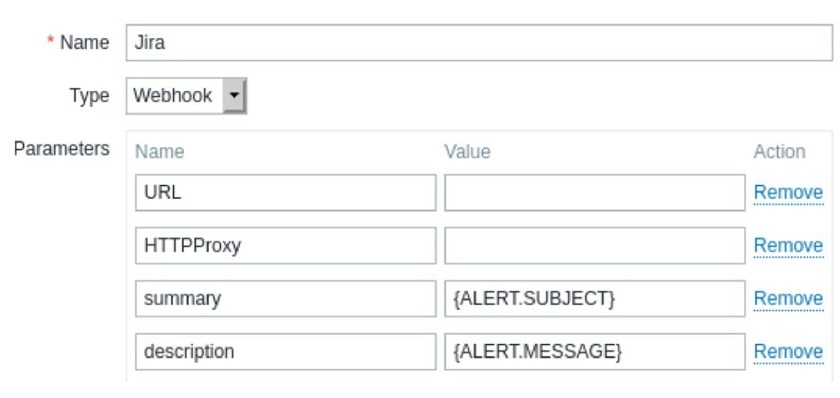
Webhooks work similar to alert scripts when it comes to configuration.
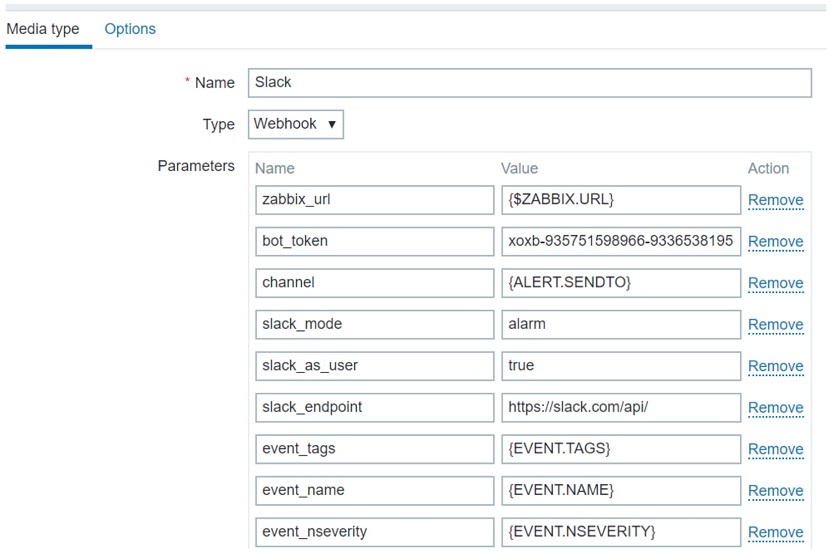
Webhook configuration
Here, we pass event-related parameters, which are usually documented and predefined in the out-of-the-box integration itself, such as API token, built-in macros, event tags, event names, severities, etc.
- The most important part of the webhook is the script. The JavaScript is provided out-of-the-box, written either by us – the Zabbix team or, in case of community webhooks, by our community members.
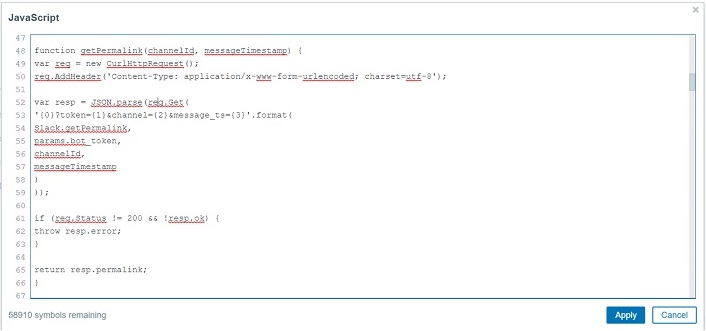
Webhook script
Official supported webhooks are available on the Zabbix GitHub page.
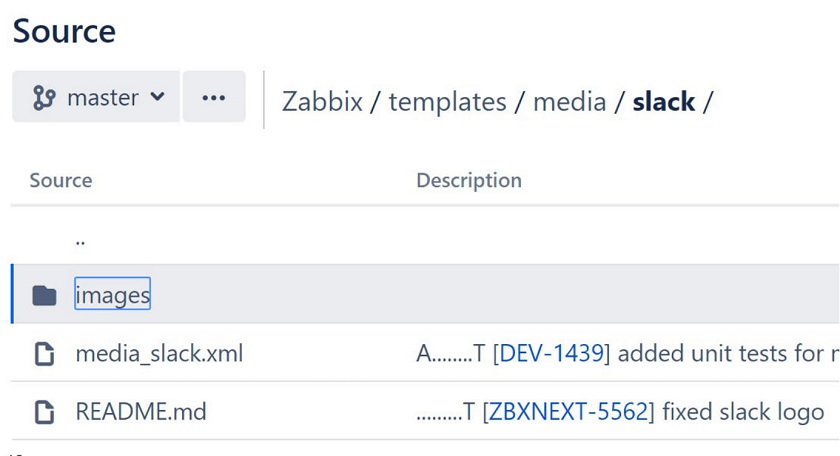
Importable script page
Since Zabbix 4.4, the webhooks are provided out-of-the-box. You’ll only need to point the script towards your third-party system.
Out-of-the-box integration scripts
- Webhook scripts are portable.
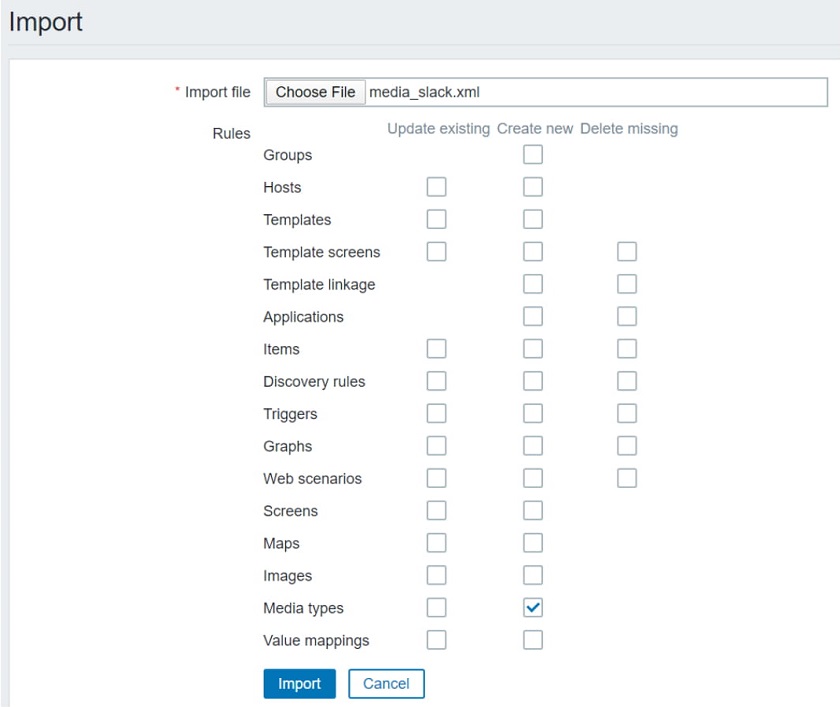
Export/import the media type
You can either create a new media type by importing it (for example, after downloading it from our git page) or update an existing one. Then, you need to copy your API token.
Copying API token
- Starting with Zabbix 5.0, you can now specify HTTP Proxy as a parameter in Webhooks (it’s the same logic as for HTTP agent item). This adds another layer of security natively – no need to look for any hacks or workarounds on how to pass your notifications through an HTTP proxy.
HTTP Proxy as Webhook parameter
- With Webhooks, we can also populate our tags with data from the external system

Populating tags with an external system data
Webhooks provide a semi-two-way integration, which is possible by using tags. In addition, you can insert links to a specific support ticket or channel which you can copy or make it clickable by enabling configuring the “Include event menu entry” part of the webhook.
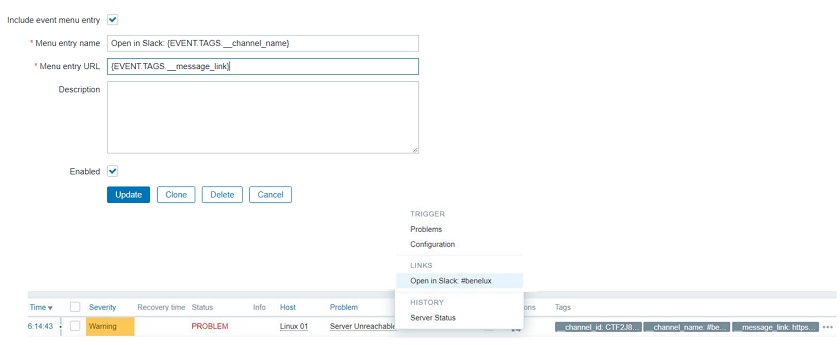
Adding direct links
Under the hood, the tag value can be obtained by inspecting the returned JSON response:

Obtaining tag values
To format the returned data, JavaScript should be used.

Returned data formatting
Zabbix integrations
Legacy approach to Zabbix integration — Slack
A large enough part of our community didn’t dare using the integrations up until now, simply because they were too complicated. Sometimes you don’t want to spend extra time messing around with OS-level configuration, downloading additional packages, and troubleshooting your scripts. Sometimes, you just want for your integration to work out-of-the-box.
So let’s do a comparison between legacy integrations and webhooks. For this demonstration, we are going to use zabbix-notify, a well-documented solution written in Perl, which uses alert scripts and is available on our community share.
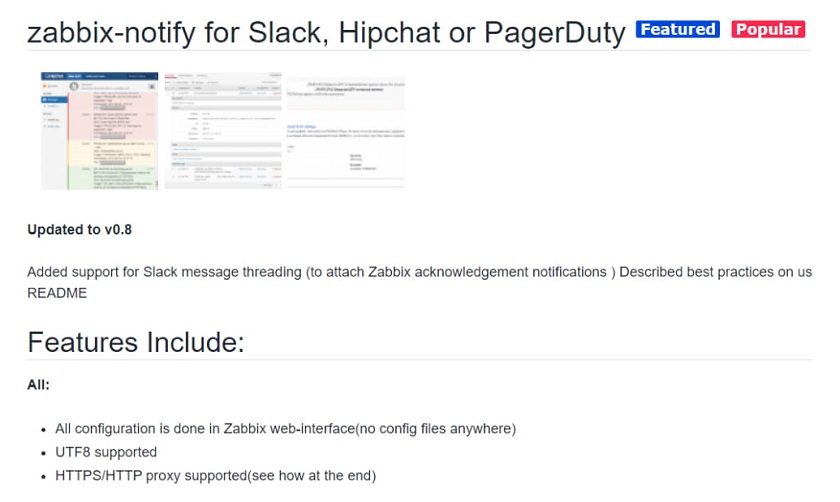
zabbix-notify for legacy integration
- Step 1: Install the required modules and dependencies.
We need to make sure that LWP and JSON::XS modules are installed. The command depends on your favorite flavor of a package manager, for example:
yum install perl-JSON-XS perl-libwww-perl perl-LWP-Protocol-https perl-parent
NOTE. The process is smooth on CentOS 7, but depending on the OS you can encounter dependency issues.
- Step 2: Download the .tar archive and install it into your system, and then execute some additional commands.
perl Makefile.PL INSTALLSITESCRIPT=/usr/local/share/zabbix/alertscripts

make test

make install
INSTALLSITESCRIPT should point towards your AlertScriptsPath directory, as per your Zabbix server configuration.
If you mess up any of these parameters, your integration won’t work – and you could end up spending some time trying to figure out why.
- Step 3: Create a Slack Application.
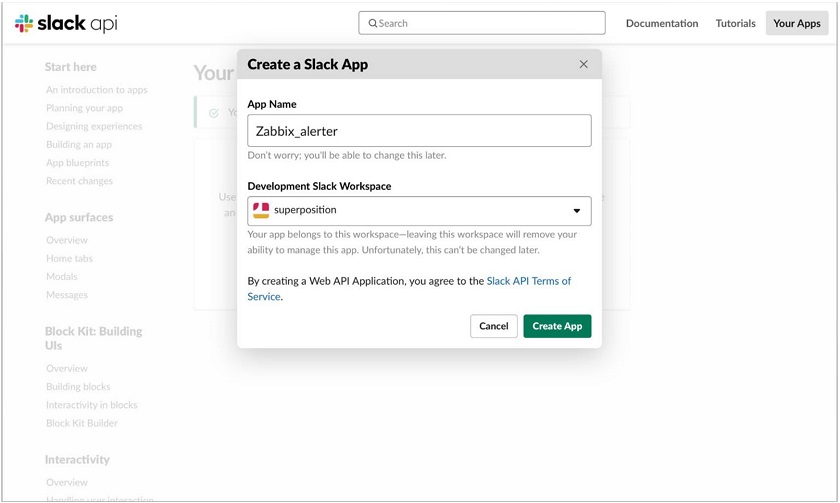
Creating Slack application
- Step 4: Create a slack bot user.
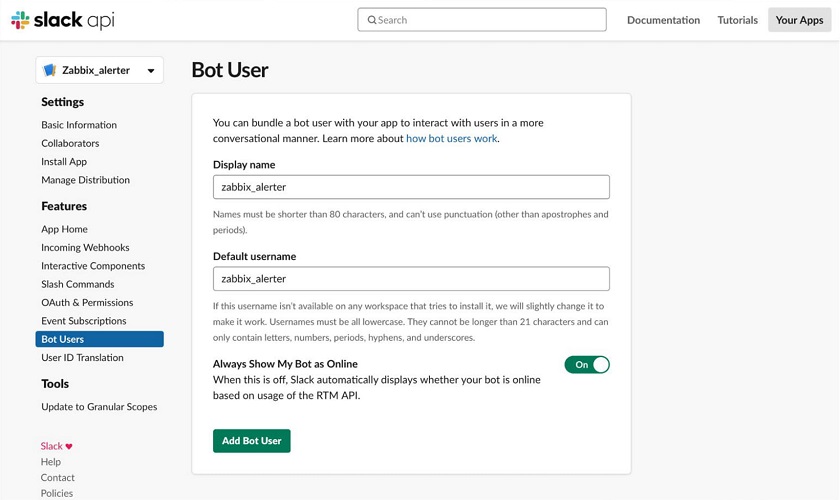
Creating slack bot user
- Step 5: Install app into your workspace.
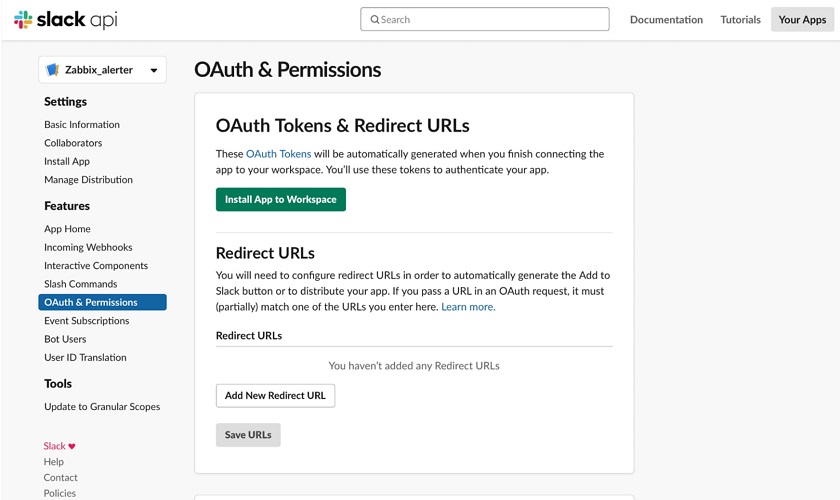
Installing application into workspace
Slack has this procedure well-documented, and you can find all of the necessary information from the Zabbix Integrations page.
- Step 6: Obtain your bot token.
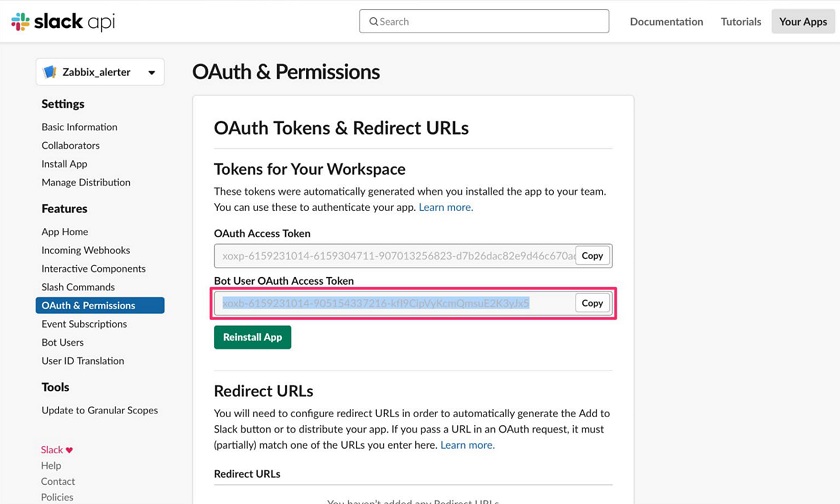
Copying API token
- Step 7: Create a new media type and provide the token.
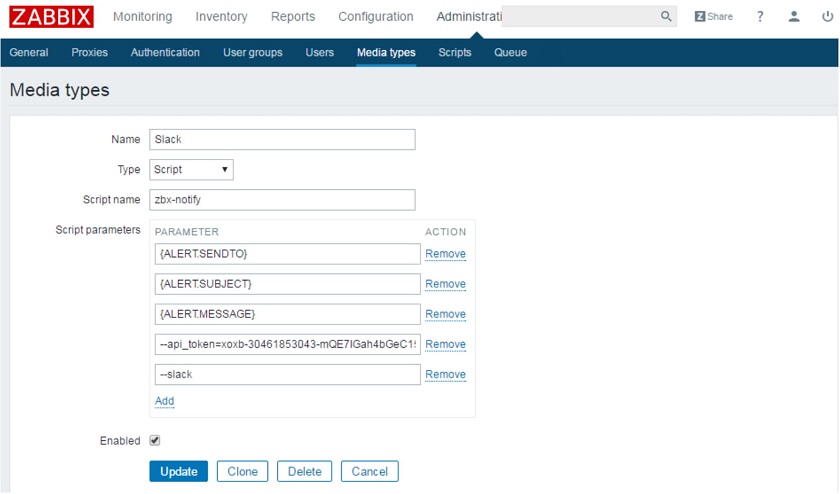
Creating new media type and passing the API token
- Step 8: Create a new media for your users.
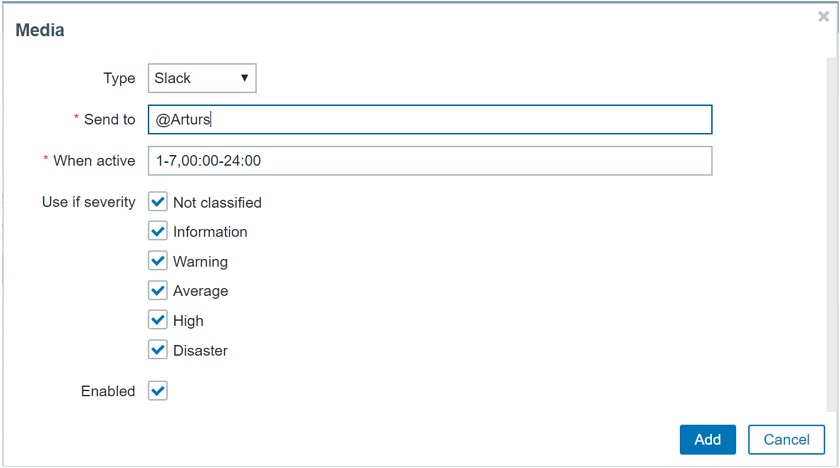
Creating new media for users
- Step 9: Create an action.
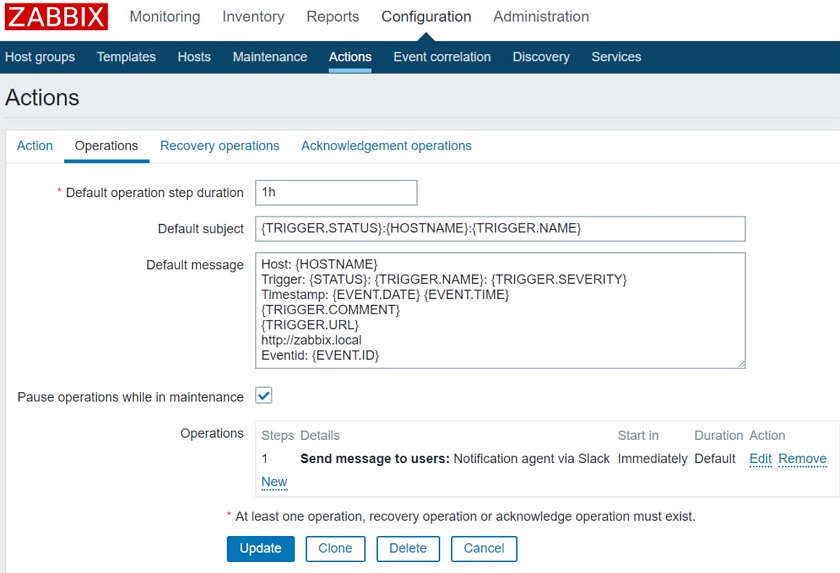
Creating action
- Step 10: Receive your slack alerts!
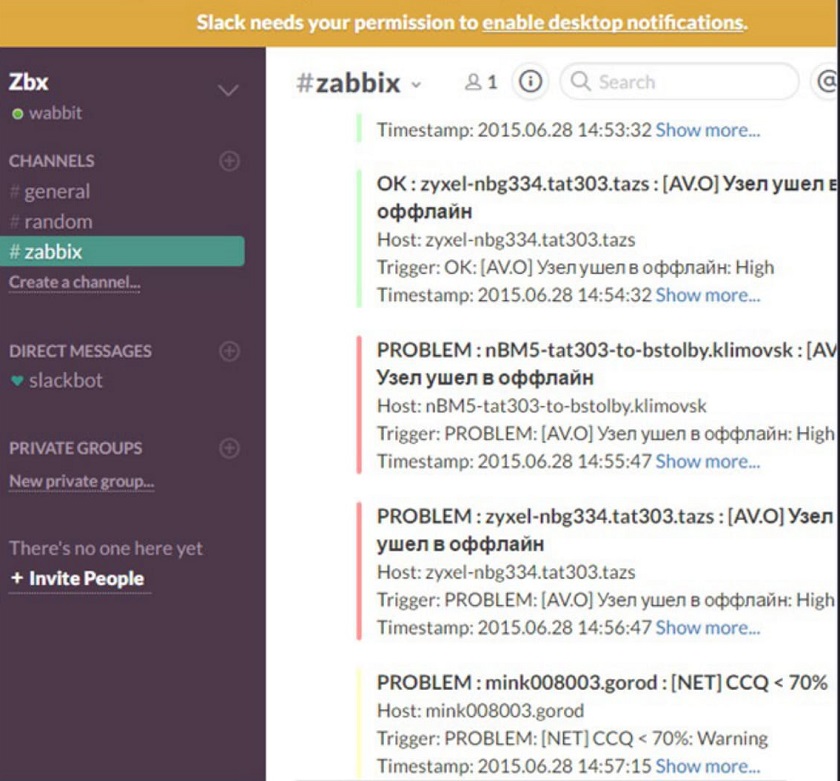
Receiving Slack alerts
Summarizing what we did here with implement the integration, we did have to do some additional configuration besides configuring Zabbix:
- Downloading and configuring the script
- Installing custom modules
- Testing the integration manually
NOTE.
1. You may encounter compatibility issues.
2. There’ll be no guaranteed long-term support.
No guaranteed long-term support
3. You may have possible dependency/compilation issues based on the underlying OS, so additional troubleshooting might be necessary.

Possible dependency/compilation issues
Official Slack integration with Webhooks
- Step 1: Repeat steps 3-6 to create a Slack Application and obtain the bot user token.
- Step 2: Create a {$ZABBIX.URL} macro, containing a link to your Zabbix instance (optional).
- Step 3: Import the media type (or not, if you have a fresh instance of Zabbix 4.4 or newer).
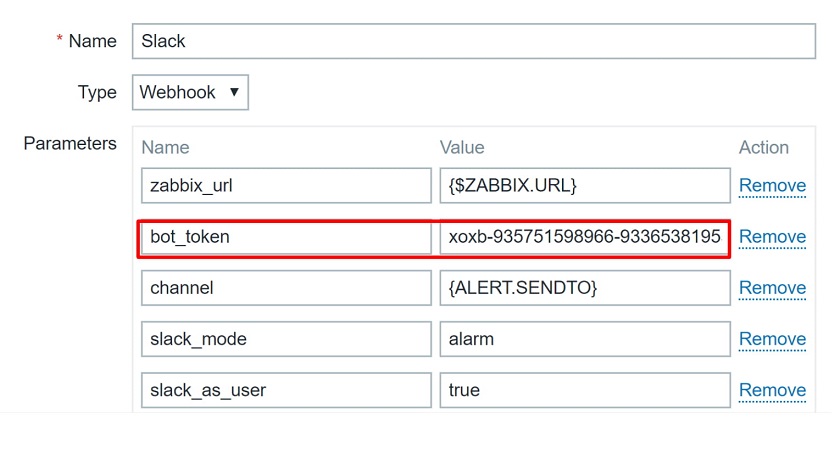
- Step 4: Set the bot_token value to the previously created token.
- Step 5: Create a media of the Slack media type for the corresponding user
After everything is set up, you should be able to receive your alerts in Slack.

Receiving alerts
NOTE. Notice the clickable Problem name – clicking on it will redirect you to your Zabbix instance.
While the amount of performed steps is very similar, the integration is way more streamlined:
- No additional module or script download/configuration required. The point is to make integrations centralized, as plug-and-play as possible. Zabbix development team keeps on developing new webhooks and providing support, fixing bugs, and improving the existing ones.
- The script was fully contained in the imported XML file – making it self contained and easily reusable on other Zabbix environments.
- Easy to do even for users not familiar with Zabbix configuration (as it’s fully configurable within Zabbix and also fully documented by us!)
- Guaranteed future support and additional updates!


Nice and comprehensive article. Thanks for sharing. I would also like to mention SIGNL4, as a two-way alerting option. It is part of Zabbix since version 5.0. You can find out more here: https://www.zabbix.com/integrations/signl4.
For earlier Zabbix versions you can download the SIGNL4 media type here: https://github.com/signl4/signl4-integration-zabbix
I just signed up just to say thank you for this article. It turned out to be very useful.