


In the previous blog posts, we created a Zabbix Server with a new user, a media type, and an action. In the 2nd blog post, we continued with creating and configuring a Zabbix Proxy. In the last part of this series of blog posts, we will install the Zabbix Agent on all of the 3 nodes we have running.
This blog post is the 3rd part of a 3 part series of blog posts where Werner Dijkerman gives us an example of how to set up your Zabbix infrastructure by using Ansible.
You can find part 1 of the blog post by clicking here.
To summarize, so far we have a Zabbix Server and a Zabbix Proxy. The Zabbix Server has a MySQL instance running on a separate node, the MySQL instance for the Zabbix Proxy runs on the same node. But we are missing one component right now, and that is something we will install with the help of this blog post. We will install the Zabbix Agent on the 3 nodes.
A git repository containing the code used in these blog posts is available on https://github.com/dj-wasabi/blog-installing-zabbix-with-ansible. Before we run Ansible, we need to make sure we have opened a shell on the “bastion” node. We can do that with the following command:
$ vagrant ssh bastion
Once we have opened the shell, go to the “/ansible” directory where we have all of our Ansible files present.
$ cd /ansible
In the previous blog post, we executed the “zabbix-proxy.yml” playbook. Now we are going to use the “zabbix-agent.yml” playbook. The playbook will install the Zabbix Agent on all nodes (“node-1”, “node-2” and “node-3”). Next up, on both the “node-1” and “node-3”, we will add a user parameters file specifically for MySQL. With this user parameters file, we are able to monitor the MySQL instances.
$ ansible-playbook -i hosts zabbix-agent.yml
This playbook will run for a few minutes installing the Zabbix Agent on the nodes. It will install the zabbix-agent package and add the configuration file, but it will also make a connection to the Zabbix Server API. We will automatically create a host with the correct IP information and the correct templates! When the Ansible playbook has finished running, the hosts can immediately be found in the Frontend. And better yet, it is automatically correctly configured, so the hosts will be monitored immediately!
We have several configurations spread over multiple files to make this work. We first start with the “all” file.
The file “/ansible/group_vars/all” contains the properties that will apply to all hosts. Here we have the majority of essential properties configured that are overriding the default properties of the Ansible Roles. Each role has some default configuration, which will work out of the box. But in our case, we need to override these, and we will discuss some of these properties next.
zabbix_url
This is the URL on which the Zabbix Frontend is available and thus also the API. This property is for example used when we create the hosts via the API as part of the Proxy and Agent installation.
zabbix_proxy
The Zabbix Agents will be monitored by the Zabbix Proxy unless the Agent runs on the Zabbix Server or the host running the database for the Zabbix Server. Like with the previous blog post, we will also use some Ansible notation to get the IP address of the host running the Zabbix Proxy to configure the Zabbix Agent.
zabbix_proxy: node-3
zabbix_agent_server: "{{ hostvars[zabbix_proxy]['ansible_host'] }}"
zabbix_agent_serveractive: "{{ hostvars[zabbix_proxy]['ansible_host'] }}"
With the above configuration, we configure both the Server and ServerActive in the Zabbix Agent’s configuration file to use the IP address of the host running the Zabbix Proxy. If you look at the files “/ansible/group_vars/zabbix_database” and “/ansible/group_vars/zabbix_server/generic” you would see that these contain the following:
zabbix_agent_server: "{{ hostvars['node-1']['ansible_host'] }}"
zabbix_agent_serveractive: "{{ hostvars['node-1']['ansible_host'] }}"
The Zabbix Agent on the Zabbix Server and on its database is using the IP address of the Zabbix Server to be used as the value for both the “Server” and “ActiveServer” configuration settings for the Zabbix Agent.
zabbix_api_user & zabbix_api_pass
These are the default in the roles, but I have added them here so it is clear that they exist. When you change the Admin user password, don’t forget to change them here as well.
zabbix_api_create_hosts & zabbix_api_create_hostgroups
Because we automatically want to create the Zabbix Frontend hosts via the API, we need to set both these properties to true. Firstly, we create the host groups that can be found with the property named “zabbix_host_groups”. After that, as part of the Zabbix Agent installation, the hosts will be created via the API because of the property zabbix_api_create_hosts.
Now we need to know what kind of information we want these hosts created with. Let’s go through some of them.
zabbix_agent_interfaces
This property contains a list of all interfaces that are used to monitoring the host. This is relatively simple in our case, as the hosts only have 1 interface available. You can find some more information about what to use when you have other interfaces like IPMI or SNMP: https://github.com/ansible-collections/community.zabbix/blob/main/docs/ZABBIX_AGENT_ROLE.md#other-interfaces We use the interface with the value from property “ansible_host” for port 10050.
zabbix_host_groups
This property was also discussed before – we automatically assign our new host to these host groups. Again, we have a fundamental setup, and thus it is an effortless property.
zabbix_link_templates
We provide a list of all Zabbix Templates we will want to assign to the hosts with this property. This property seems a bit complicated, but no worries – let’s dive in!
zabbix_link_templates:
  - "{{ zabbix_link_templates_append if zabbix_link_templates_append is defined else [] }}"
  - "{{ zabbix_link_templates_default }}"
With the first line, we add the property’s value “zabbix_link_templates_append”, but we only do that if that property exists. If Ansible can not find that property, then we basically add an empty list. So where can we find this property? We can check the files in the other directories in the group_vars directory. If we check, for example “/ansible/group_vars/database/generic”, we will find the property:
zabbix_link_templates_append:
  - 'MySQL by Zabbix agent'
So on all nodes that are part of the database group, we add the value to the property “zabbix_link_templates”. All of the database servers will get this template attached to the host. If we would check the file “/ansible/group_vars/zabbix_server/generic”, then we will find the following:
zabbix_link_templates_append:
  - 'Zabbix Server'
As you probably understand now, when we create the Zabbix Server host, we will add the “Zabbix Server” template to the host, because this file is only used for the hosts that are part of the zabbix_server group.
With this setup, we can configure specific templates for the specific groups, but there is also at least 1 template that we always want to add. We don’t want to add the template to each file as that is a lot of configuration, so we use a new property for this named “zabbix_link_templates_default”. In our case, we only have Linux hosts, so we always want to add the templates:
zabbix_link_templates_default:
  - "Linux by Zabbix agent active"
On the Zabbix Server, we both assign the “Zabbix Server” template and the template “Linux by Zabbix agent active” to the host.
But what if we have Macros?
zabbix_macros
As part of some extra tasks in this playbook execution, we also need to provide a macro for some hosts. This macro is needed to make the Zabbix Template we assign to the hosts work. For the hosts running a MySQL database, we need to add a macro, which can be found with the property zabbix_macros_append in the file “/ansible/group_vars/database/generic”.
zabbix_macros_append:
  - macro_key: "MYSQL.HOST"
    macro_value: "{{ ansible_host }}"
We will create 1 macro with the key name “MYSQL.HOST” and assign a value that will be equal to the contents of the property ansible_host (For the “node-2” host, the host running the database for the Zabbix Server), which is “10.10.1.12”.
User parameters
The “problem” with assigning the MySQL template is that it also requires some UserParameter entries set. The Zabbix Agent role can deploy files containing UserParameters to the given hosts. In “/ansible/group_vars/database/generic” we can find the following properties:
zabbix_agent_userparameters_templates_src: "{{ inventory_dir }}/files/zabbix/mysql"
zabbix_agent_userparameters:
  - name: template_db_mysql.conf
The first property “zabbix_agent_userparameters_templates_src” will let Ansible know where to find the files. The “{{ inventory_dir }}” will be translated to “/ansible” and here you will find a directory named “files” (and you will find the group_vars directory as well) and further drilling down the directories, you will find the file “template_db_mysql.conf”.
With the second property “zabbix_agent_userparameters” we let Ansible know which file we want to deploy to the host. In this case, the only file found in the directory named “template_db_mysql.conf”.
When the Zabbix agent role is fully executed, we have everything set to monitor all the hosts automatically. Open the dashboard, and you will see something like the following:
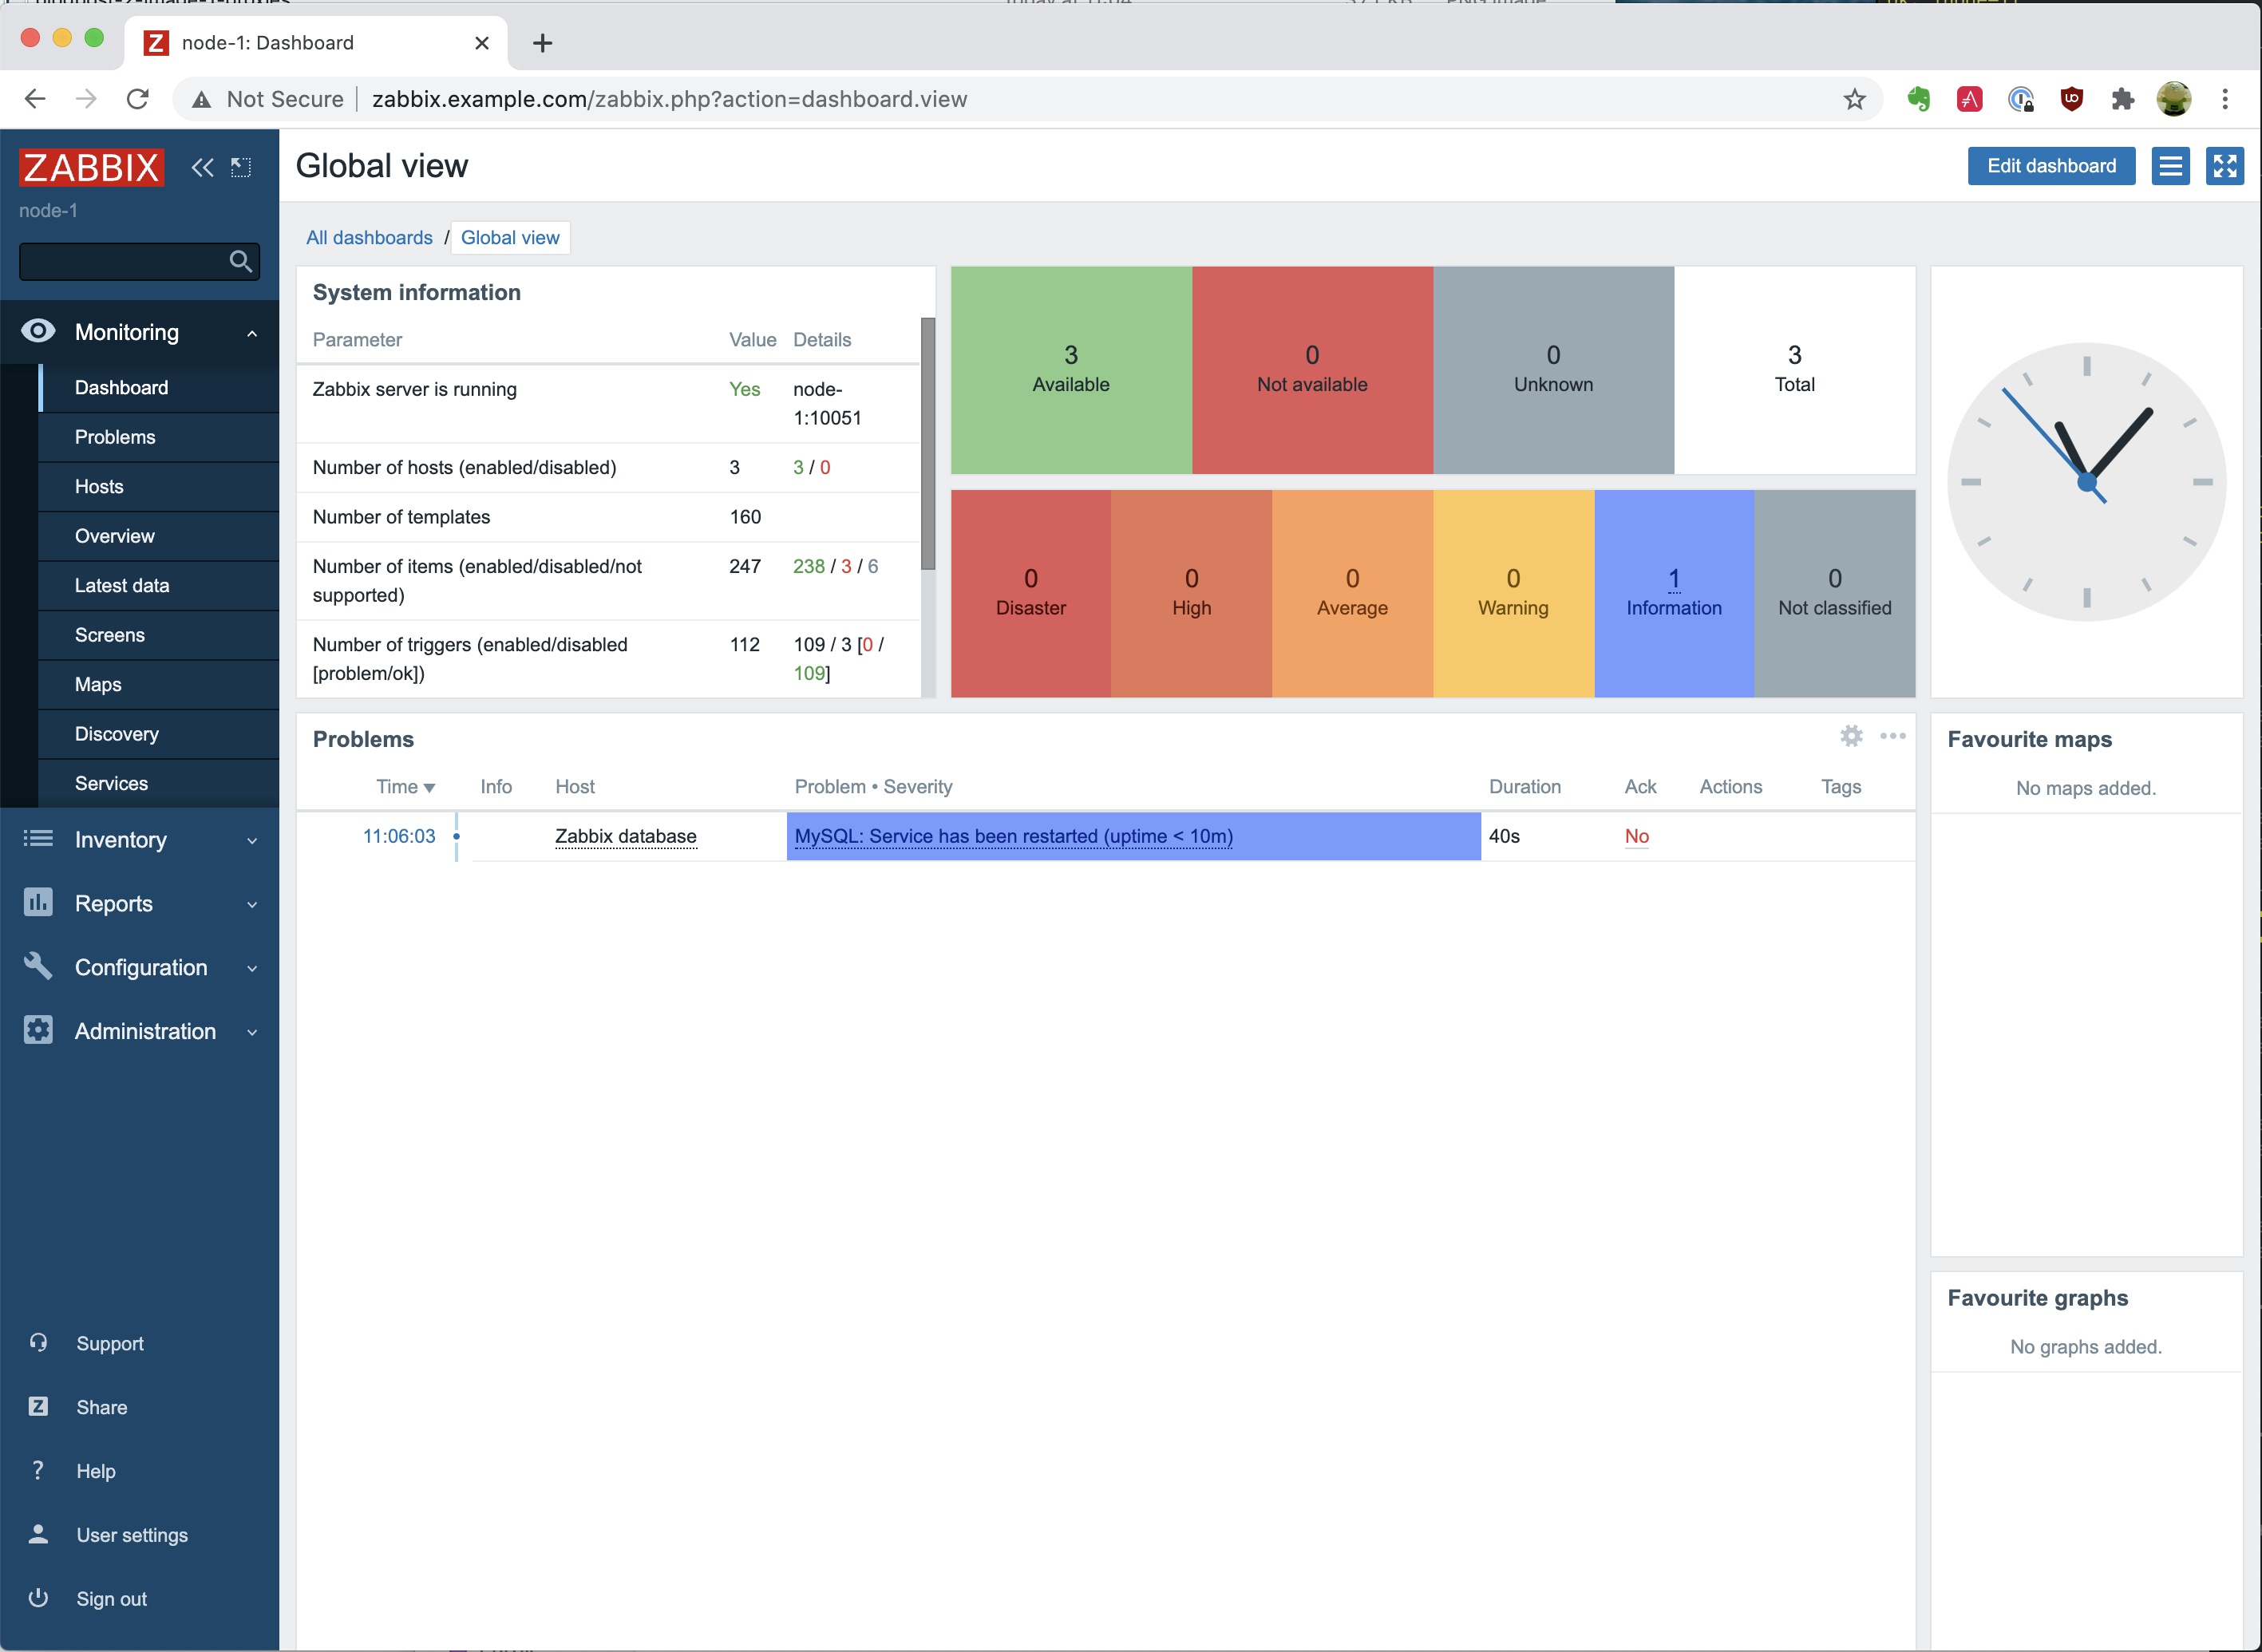
It provides an overview, and on the right side, you will notice we have a total of 3 nodes of which 3 are available. Maybe you will see a “Problem” like in the screenshot above, but it will go away.
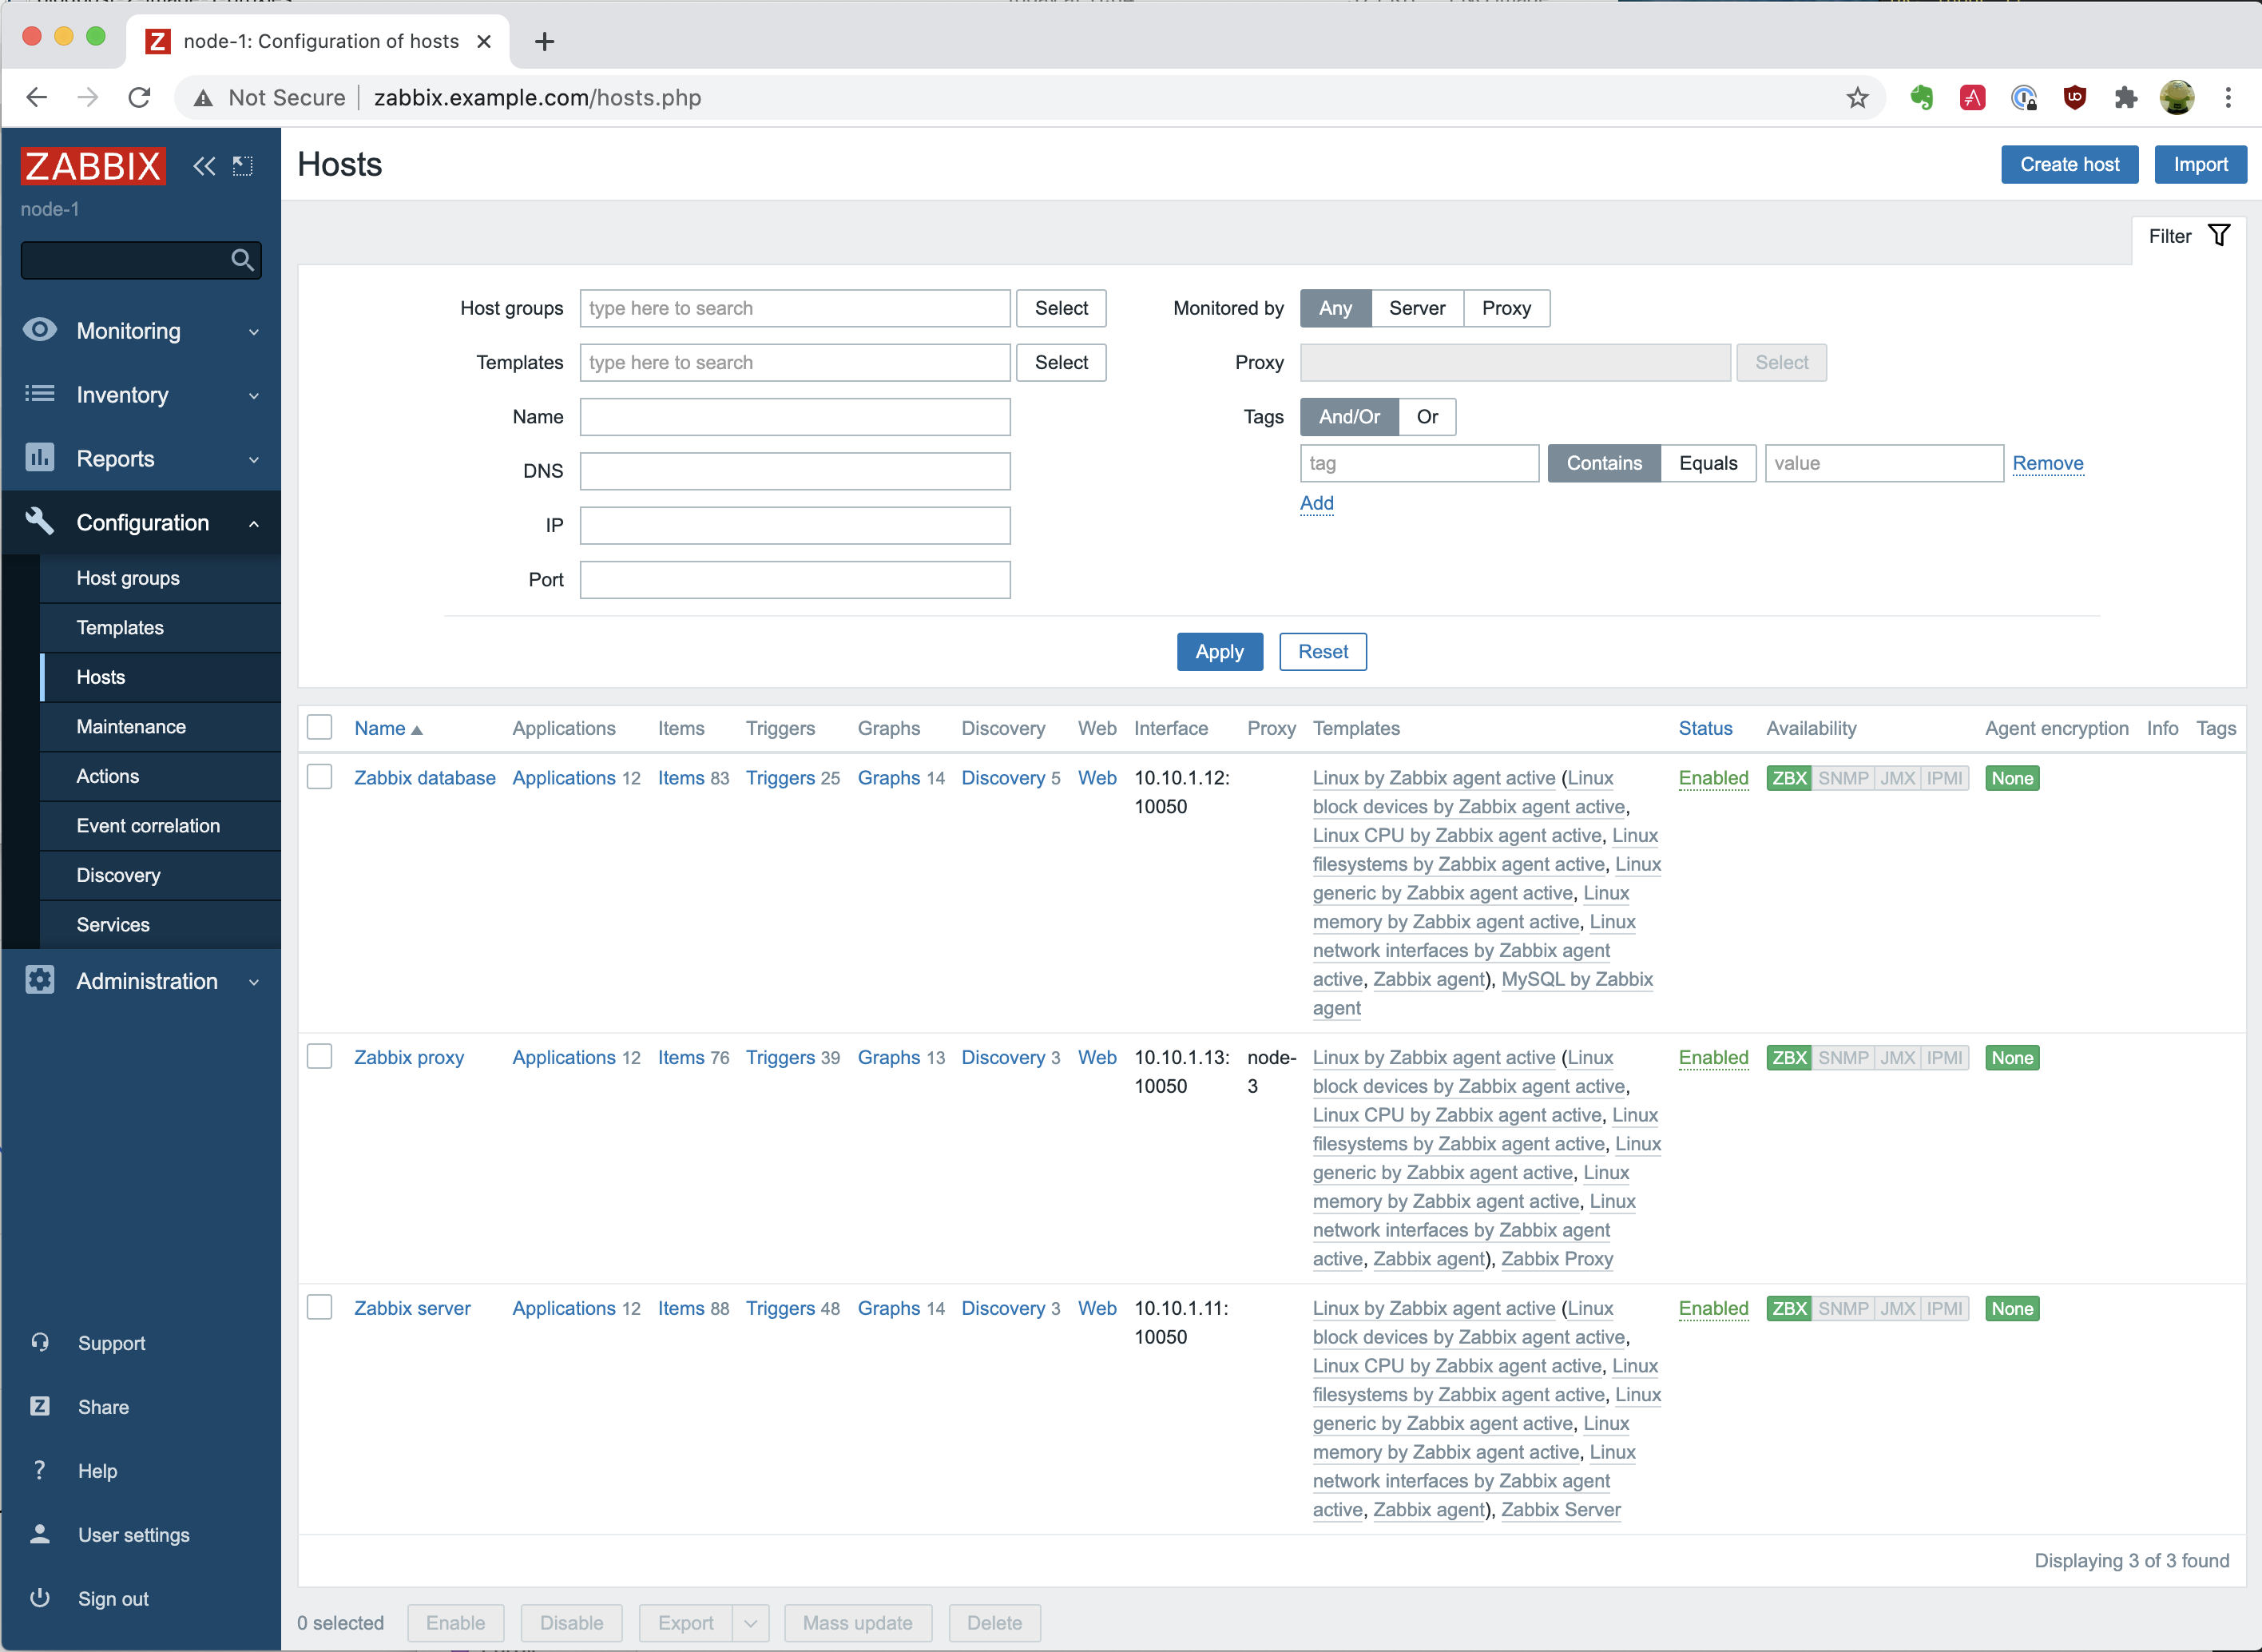
If we go to “Configuration” and “Hosts,” we will see that we have the 3 nodes, and they have the status “Enabled” and the “ZBX” icon is green, so we have a proper connection.
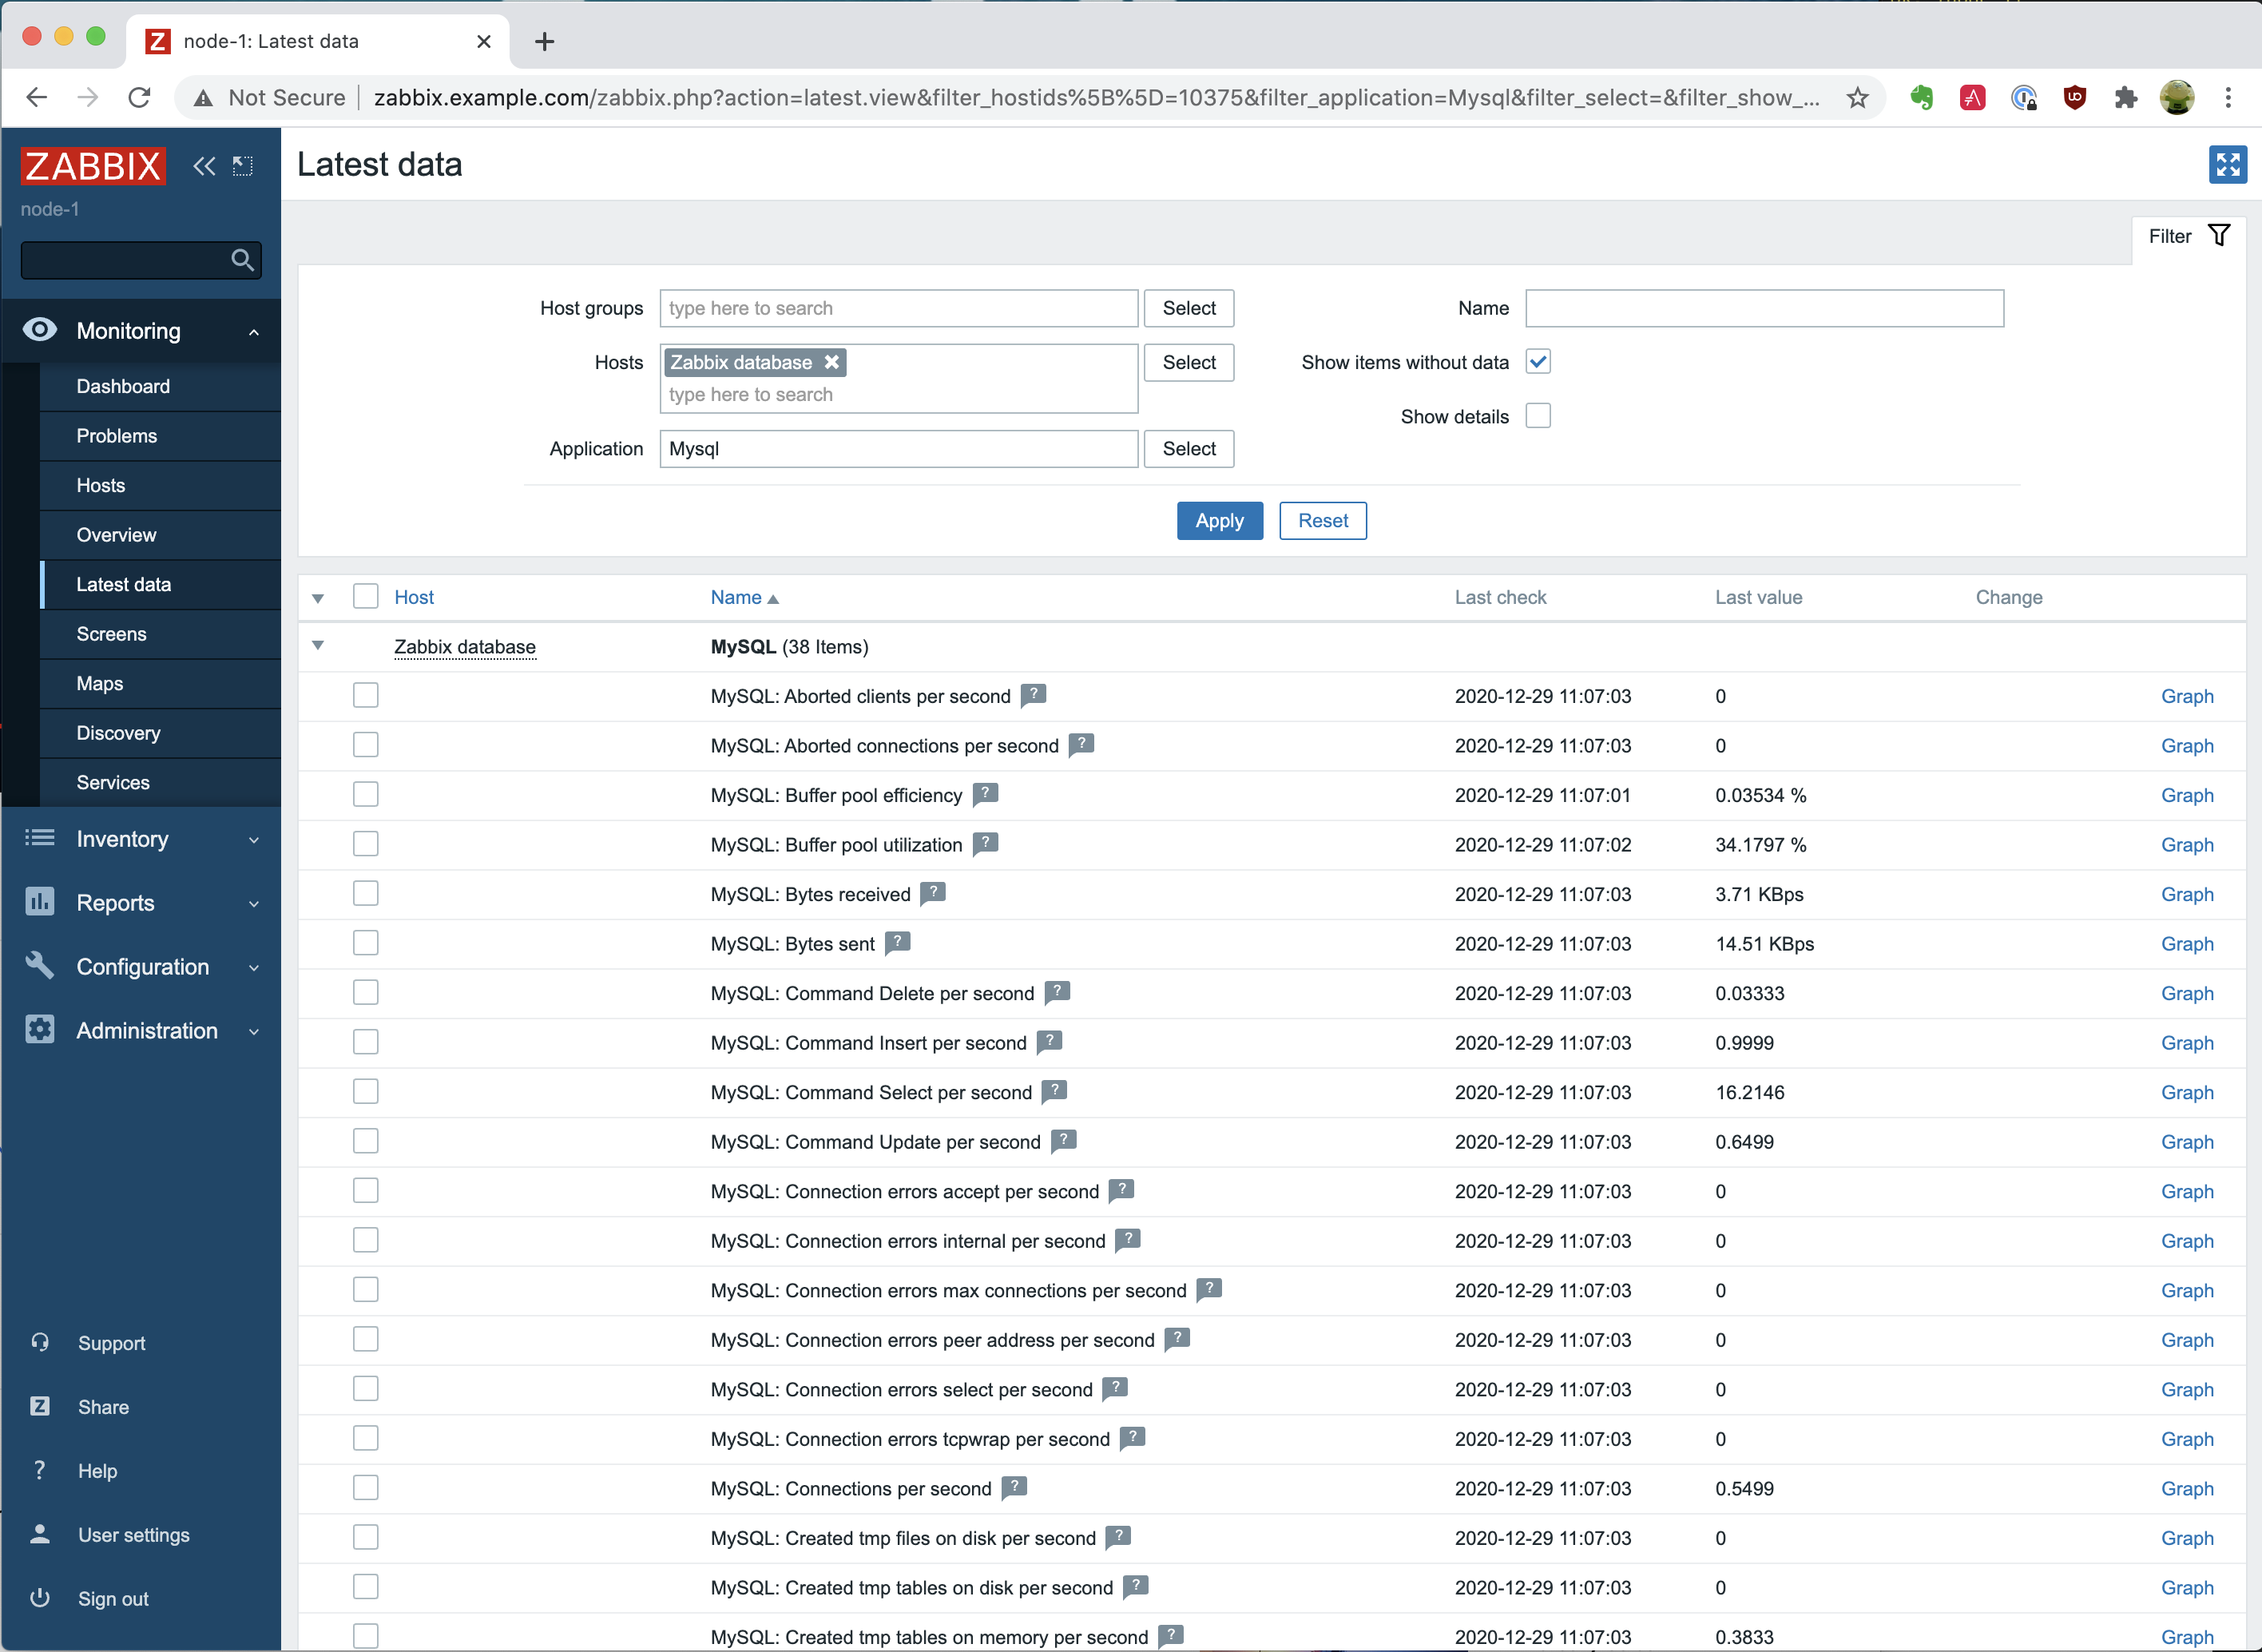
We should verify that we have some data, so go to “Monitoring” and click on “Latest data.” We select in the Host form field the “Zabbix database,” and we select “MySQL” as Application and click on “Apply.” If everything is right, it should provide us with some information and values, just like the following screenshot. If not, please wait a few minutes and try again.
Summary
This is the end of a 3 part blog post in creating a fully working Zabbix environment with a Zabbix Server, Proxy, and Agent. With these 3 blogposts you were able to see how you can install and configure a complete Zabbix environment with Ansible. Keep in mind that the code shown was for demo purposes and it is not something you can immediately use for the Production environment. We also used some of the available functionality of the Ansible collection for Zabbix, there are many more possibilities like creating a maintenance period or a discovery rule. Not everything is possible, if you do miss a task or functionality of a role that Ansible should do or configure, please create an issue on Github so we can make it happen.
Don’t forget to execute the following command:
$ vagrant destroy -f
With this, we clean up our environment and delete our 4 nodes, thus finishing with the task at hand!


But if I use these codes to adapt then to production and deployment? What can I do to install agent on 800 hosts? I read your code and I was thinking it is too hardcoded to adapt for my case.
If I change it adding a list of hosts, what is most important things to coverup in this logic you passed ? I was afraid to add more IPs on hosts and crash agent’s playbook. Give me some clue to change it.