Low-level discovery (LLD) functionality allows you to dynamically monitor all your environment for metrics that can change from time to time, and also can be and are different between multiple servers. Zabbix monitoring software will connect to the device, check for entities that exist on it, and based on discovery output create regular items and triggers.
Watch the video now.
Contents
I. Introduction (1:04)
II. Why low-level discovery? (1:22)
III. Built-in discovery rules (3:44)
IV. Custom low-level discovery rules (16:25)
Introduction
In this post, I’m going to talk about low-level discovery that provides a way to create items, triggers, or graphs for different entities. As opposed to network discovery, LLD is fully related to hosts and monitoring.
Why low-level discovery?
In Configuration > Hosts, you can access low-level discovery rules for a host next to all entities, while in Configuration > Templates — low-level discovery rules for the respective template.
We’ll take my default Zabbix server host as an example. So, in Configuration > Hosts click Discovery for the host to display Discovery rules.

Discovery rules
NOTE. It is not recommended to create something directly on the host, so discovery rules are created in Templates and then linked to the hosts.
We need to monitor network interfaces on all computers in our environment or all excluding some of them. At the same time, all of those computers are absolutely different with different operating systems and interfaces configured. To avoid wasting time manually checking all their configuration and creating specific items, it is recommended to set up network interface discovery, which is using low-level discovery.
Built-in discovery rules
There are built-in discovery rules described in the documentation which you can use out-of-the-box without any customization.
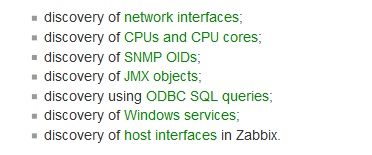 Out-of-the-box discovery rules in Zabbix
Network interface discovery
In Configuration > Hosts > Host > Discovery > Network interface discovery, set:
- Name to ‘Network interface discoveries‘.
- Key (which is built-in on the host interface) to ‘net.if.discovery‘ to discover interfaces (built-in keys can be retrieved from the documentation).
- Type — ‘Zabbix agent‘.
- Host interface on which you are going to perform discovery.
- Update interval. It is necessary to remember that Update interval is not configured for a regular item, but for Low level discovery, and it won’t get inbound or outbound traffic from your interfaces but will perform low-level discovery on the host.
- Keep lost resources period. Items created by a LLD rule are deleted automatically if a discovered file system or interface, etc. does not pass the filter anymore or is not discovered at all. So, using ‘0‘ is not recommended, since the entity may be deleted with all the historical data once its discovery status becomes ‘Not discovered anymore‘.
We can check in the CLI what happens when ‘net.if.discovery‘ rule is running. Run zabbix_get on the local host with ‘net.if.discovery‘.
![]()
Zabbix LLD macros and its value
So, in this discovery rule, we have just one Zabbix low-level discovery macro — {#IFNAME}, which is the interface name, that we can later use in our prototypes, and the discovered interfaces on the device: “enp0s3”, “enp0s8”, “lo”, and “docker0”.
If I try LLD one on my Windows machine I will have much more information, but LLD macro will remain the same.
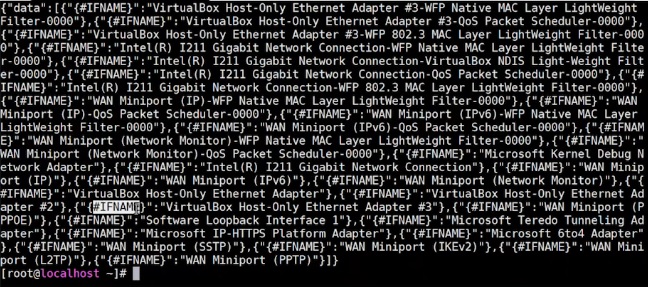
LLD in Windows
As LLD rule is not a regular item, you can see the output only in the CLI with zabbix_get. So, we can use the information we get in Zabbix in Configuration > Hosts > Item prototypes.

Item prototypes
Let’s have a look at ‘Bits received‘ and ‘Bits sent‘ with ‘net.if.in‘ and ‘net.if.out‘ keys.
Here in Key parameters, we need to specify the interface name which we saw in the CLI to indicate the interface we need to monitor if it was a regular item. Since we’re doing low-level discovery, we don’t know which interface will be discovered. So, instead of specifying an interface name, we specify a low-level discovery macro {#IFNAME} that will contain all the discovered interfaces.
You can open any interface to see how it looks like. It’s just like a regular item with the same configuration. But it’s an item prototype from which the regular items are created automatically based on the discovered output.
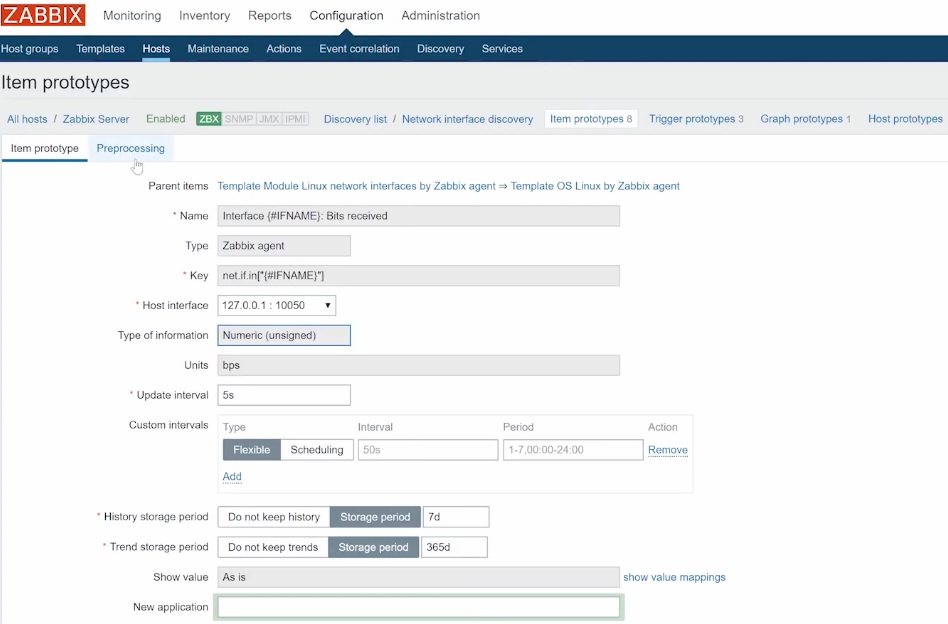
Item prototype parameters
Here, in the Bits received interface we have {#IFNAME} LLD macro as interface name and ‘net.if.in‘ key as we don’t know which interface we are going to monitor. Everything else is filled in as if we are creating a simple item for interface monitoring of incoming traffic. The same applies to Preprocessing tab as well.

Preprocessing parameters
So, in Configuration > Hosts > Network interface discovery, we created a ‘Network discovery‘ rule that performs discovery on the virtual machine.
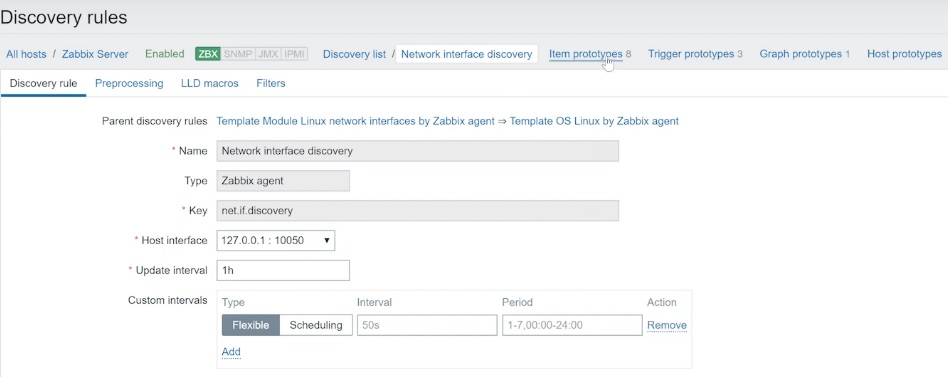
Discovery rules
We have multiple item prototypes, and all of them use LLD macros instead of actual parameters because we don’t know what will be discovered.
But on my host, in Configuration > Hosts > Zabbix server > Items, I can identify these items marked in color before the item name, which is the name of LLD rule.

LLD rules on Zabbix server
If I filter this out by ‘net.if.in‘ key, we’ll get the results based on network interface discovery rule, where the names of LLD macros are replaced with discovered interface.
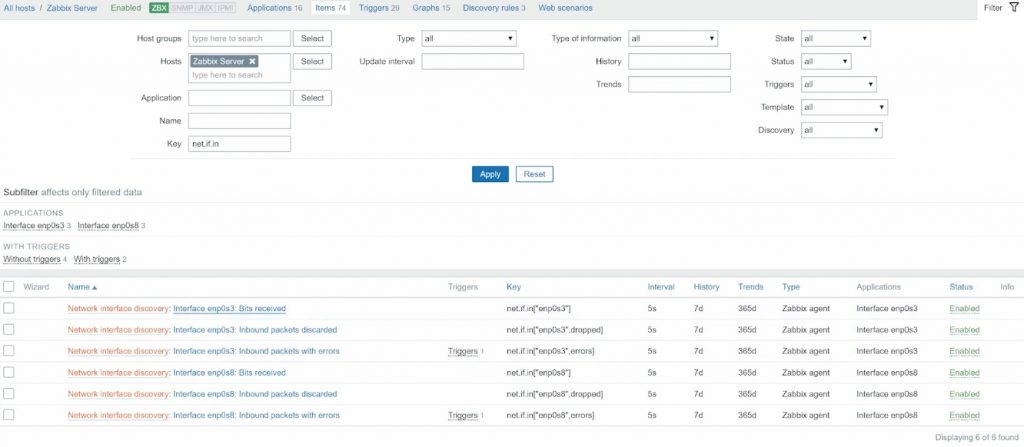
Discovered interfaces
Loop interface
As you can see in this example, a loop interface is not created. Normally, we do not want to monitor the loop interfaces. So, in Configuration > Hosts > Network interface discovery there is an additional Filters tab.

Filters
Here we can specify filters for our interface names. So we specify that interface name ‘does not match/matches‘ the user macro. The values we can check in Configuration > Hosts > Zabbix server > Macros > Inherited and host macros and add these filters to our low-level discovery.

LLD macros in the host
We can also filter the interface name out. To do that, go to Configuration > Hosts > Network interface discovery > Filters and Add a new filter. That will be enough not to discover the loop interface.

Filtering interface name out
As the items in LLD are created automatically, you can not just change item parameters. To do that, you need to click Configuration > Hosts > Network interface discovery > Item prototypes.
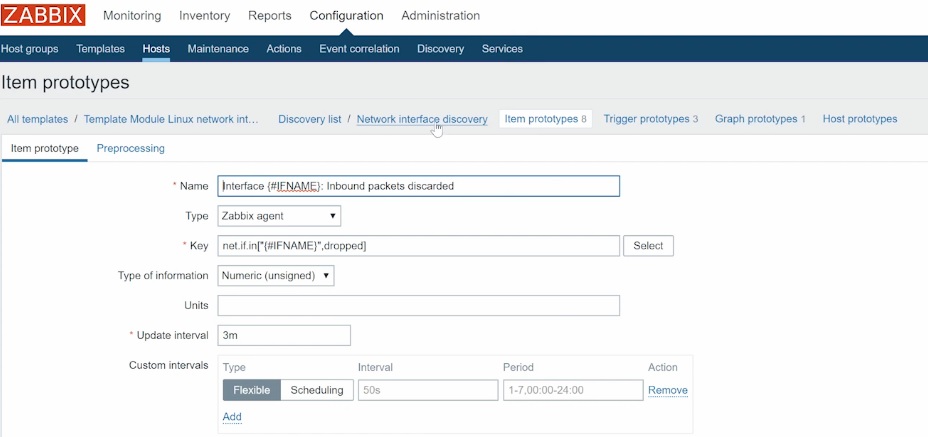
Item prototype parameters
Here you can change, for example, update interval to five minutes. However, the changes will apply only after the next cycle of low-level discovery which is specified in Configuration > Hosts > Items > Discovery rules > Update interval.
If an interface is not discovered anymore due to any changes in the filter parameters, it will be deleted after the Keep lost resources period.
Creating triggers from low-level discovery
Creating triggers from low-level discovery is very simple. If you want to create a new trigger prototype, go to Configuration > Hosts > Discovery rules, click Trigger prototypes and Create trigger prototype. In Trigger prototype, choose a name, then click Add and Select prototype.

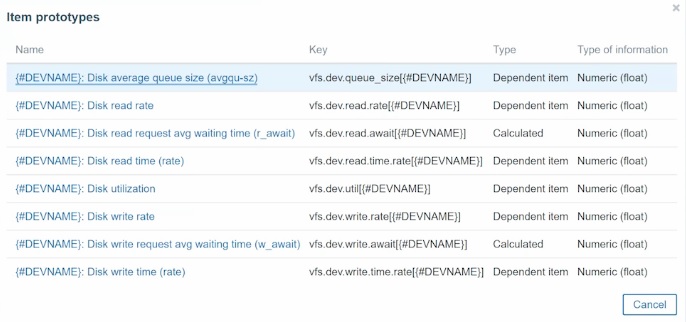
Selecting item prototype
This trigger will be based on the item prototype. If an item is created from the item prototype, then the trigger for that item will be created for this trigger prototype as well.
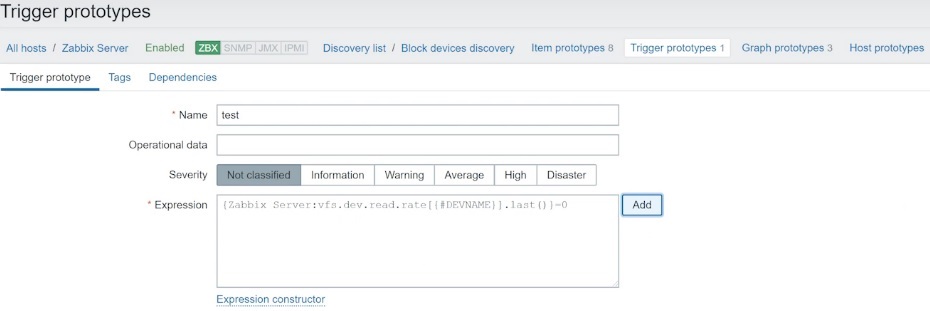 Trigger prototypes
Other types of built-in low-level discovery
The same rules apply for other types of low-level discovery.
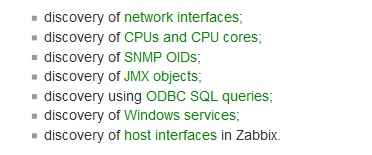
Other types of discovery
For example, if you run built-in ‘vfs.fs.discovery‘ item key in the CLI, you’ll discover the list of all file systems on your machine. Here you’ll have more macros, including {#FSNAME}, {#FSTYPE}, and all discovered values.
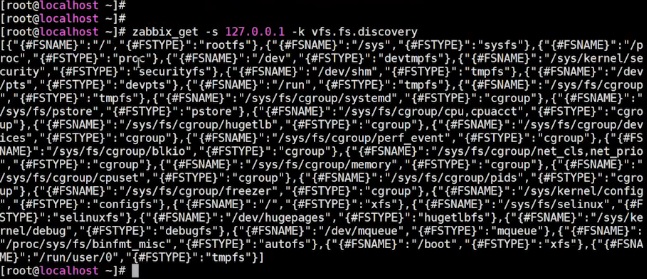
‘vfs.fs.discovery‘ output
The same item key run on your Windows host returns all file systems by disks. You need to utilize them in the item prototypes to create regular items.
Custom low-level discovery rules
Low-level discovery rules are very flexible and allow for creating customized low-level discovery rules with your scripts. It means that you can monitor whatever you want in your system. The most important thing is that you need to form the output as Zabbix wants to see it.
I have created a test LLD host.
![]()
Test host
Here click Discovery > Create discovery rule. Here the Type should always be ‘Zabbix trapper‘. Click Add. Then Click Item prototype > Create item prototype. For the sake of our example, let’s select ‘Zabbix trapper‘ as Type. We use macro as a Key.

Item prototype for custom LLD
To demonstrate how it works, I will run again the same interface discovery.
![]()
Actual output from zabbix_get on test host
I’ll open the notepad and change interface name to {#VIDEO} which I used for Item prototype earlier, and the values to ‘Click‘, ‘Like‘, and ‘Subscribe‘.
Then I’ll copy my example to the LLD by zabbix_sender.

Script
Here you need to specify your LLD host name, the discovery rule key, the value, and copy-paste the script and click Enter.
In Configuration > Hosts > Items you can see the items so created if you select the respective host.
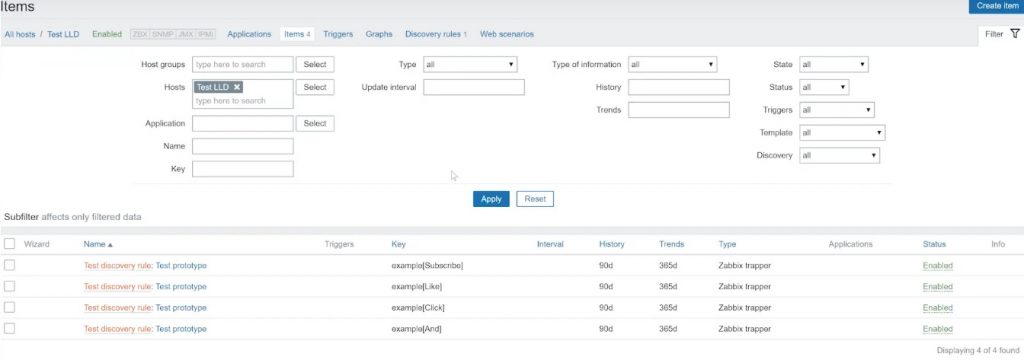 Items are created from low-level discovery
To change the name of the new discovery rule, in Configuration > Hosts > Items click the needed discovery rule, then click the name of the item prototype and add the macro. Then press Update.
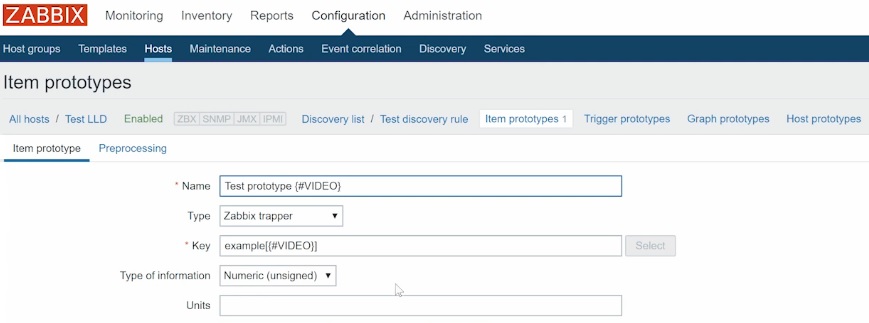 Adding macro in item prototype name
Then reload config_cache to send the values again and to see if items are updated.
Remember that the criteria uniqueness of all the items inside Zabbix is ensured by the key. If I delete the macro from the item prototype key, the low-level discovery rule won’t be supported, as the item cannot be updated with the same key.
So, it doesn’t matter which type of low-level discovery you use — the built-in or custom, SNMP or JMX. You always need to make sure that the key will be unique, and you can do that by using low-level discovery macros inside in the key.
That’s all for today on low-level discovery. You are welcome to like, comment, and subscribe.


 Prev Post

There is very little material online on how to setup LLD discovery rules using trappers.
When trying to do this I am getting on the discovery rule
I don’t understand why. Could I get some assistance with this?
ThanksM