


Use Zabbix to not only keep an eye on your IT infrastructure, but also collect and store Inventory data from your data sources, that later can be utilized in any third party tools.
Watch the video now.
Contents
Zabbix inventory
In the Zabbix front end, there is the Inventory tab. It is used mostly for visualization purposes, for showing the inventory that is already collected and kept about your hosts and data sources. The real configuration happens in two places.

Inventory tab
First of all, you should know that there is a default host inventory mode and it is disabled. You can see it if you go to Administration > General > Other.
Note. This section is visible only for super admins inside of the front end.
![]()
By default, you are not collecting any inventory, so you won’t be able to visualize it in any other place. There are also manual and automatic modes to choose from, but configuring them may be tricky.
Let’s say you have 100 hosts, and inventory collection used to be disabled until you decided to implement automatic inventory collection inside the monitoring system. You choose Automatic in Other configuration parameters and update the settings, but inventory collection remains disabled if you look at the actual host configuration. The reason is that changes to the default host inventory mode apply only to newly created hosts. It does not change the settings of the hosts that already exist inside the front end.
If you want to change the existing hosts, it can be done using API or direct database query. Users without experience in databases should use direct queries carefully or opt for API instead.
Manual and automatic mode
Let’s find out the difference between the two modes.
In Configuration > Hosts, each host has a Host inventory tab. As you already know, inventory collection is disabled by default.
If you click Manual, you will see a long list of fields.
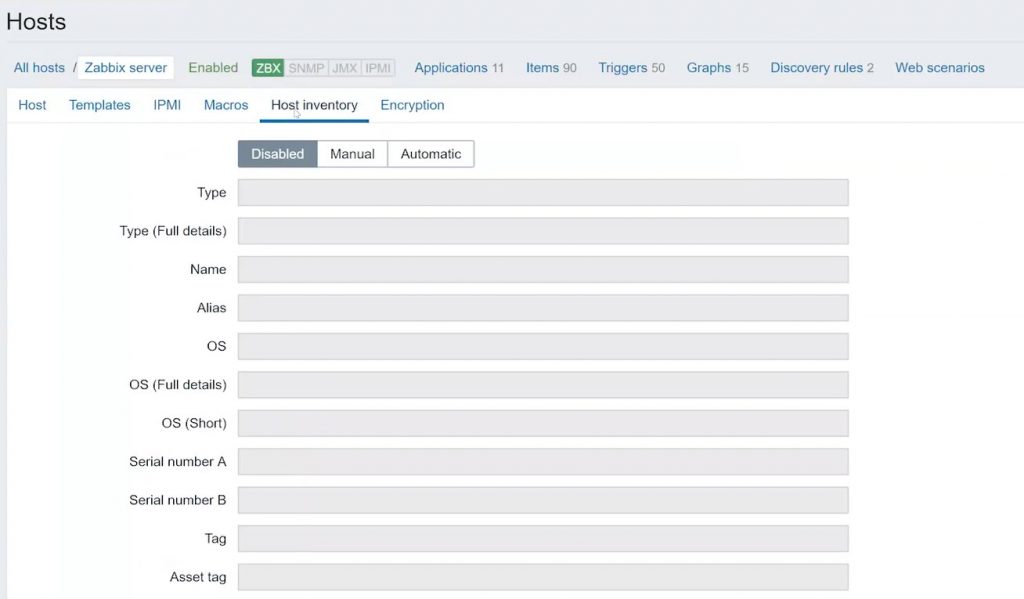
Host inventory tab
These are all the supplied inventory fields that are available in Zabbix by default. As you can guess from the name of the mode, you need to fill in all the fields by hand.
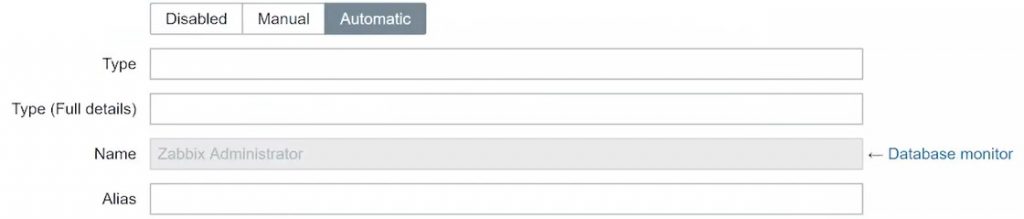
In the automatic mode, there is no need to manually fill in the fields. To configure automatic inventory collection, first, select Automatic in Host inventory. Then, go to Items > Your item. Look for the Populates host inventory field box. Select the field that you want the system to populate, for example, the Name.
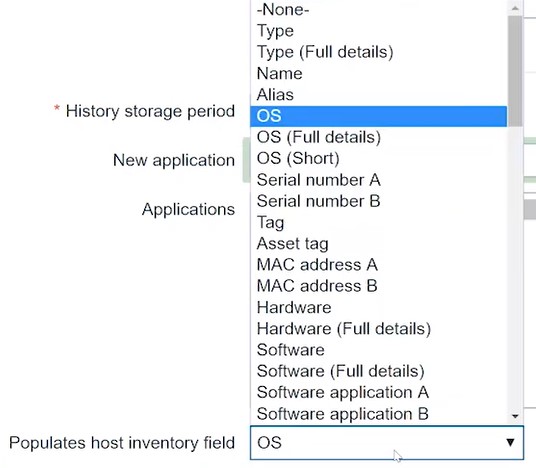
Populates host inventory field
If I go to my host, I will see that a name has been added to the OS field. The same name is also a value of my database item.
Name
Opposite the field, you can see the item that is gathering the value. Click on it to go to its configuration.
To sum it up, you should specify that some items on your host will populate host inventory fields, for example, system.hostname will return the hostname of the machine. You can also create small custom scripts that will retrieve values for fields like Software application.
As for the visualization part, go to Inventory > Overview to have an overview of your existing hosts. They can be grouped by any field, for example, by name.

Host inventory overview
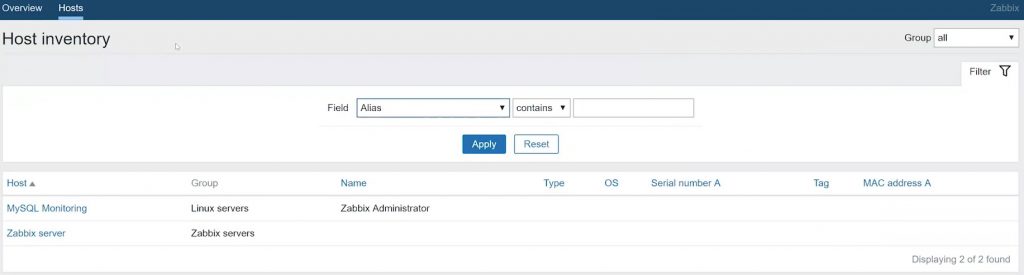
If you go to Inventory > Hosts, you can see all hosts, host groups, and actual inventory fields with values. You can also search hosts by the type of the field.
Hosts
Benefits
What are the benefits of each mode? The automatic mode means that you won’t have to go through the front end specifying fields manually. The values will be automatically received from items. However, not all inventory data can be retrieved by standard items. The downside is that you will have to create custom checks and custom items to obtain the required data.
In the manual mode, however, you will spend your time adding information to the hosts manually. With a contribution from other teams, you can actually get that inventory data without having custom checks and custom items pulling it from the host. But, obviously, if you have thousands of hosts it is not practical to configure them manually in the front end.
Note. This is where API comes in handy. Watch my video about Zabbix API.
Adding new fields
The most frequently asked questions about the inventory in Zabbix are how to create a new field and how to change an existing one.
To answer the first question, it is possible to add a new field. However, it would definitely require rewriting the code inside the front end and also modifying the database table, which is not recommended.
Changing the names of existing fields is a bit easier, more user-friendly and does not have potential negative consequences. Let’s take the Type field as an example.
Each field name is stored somewhere in the front end files. The front end file is just a PHP file. The value itself is stored inside a database. The database is something you normally don’t want to change the default version of in any case. This is because if you don’t have a default schema of the database, the next time you perform a major upgrade on your Zabbix installation most likely it will fail. If you don’t have any experience in this field you won’t know what is causing the problem and how to fix it. If you are experienced and absolutely friendly with databases, then, of course, you can modify it.
To change field names, we will need to use the CLI and know the location of the Zabbix front end. If you installed the front end from the packages, it will be usr/share/zabbix.
Let’s search for a field from your inventory:
user/share/zabbix
grep -R 'Hardware'
The output will list the language files.
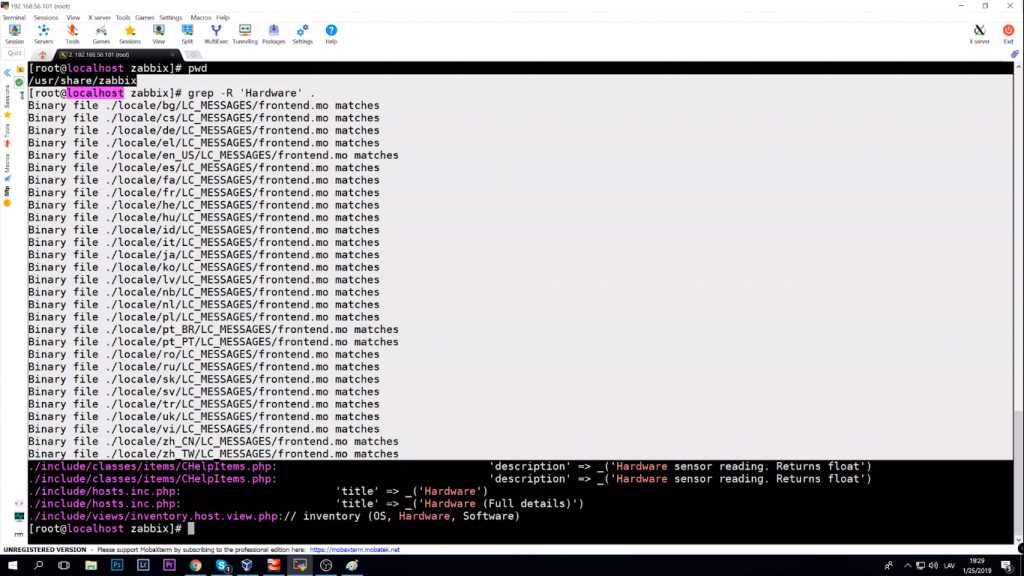
Language file output
You will need this:
vim include/hosts.inc.php
This file contains all the inventory fields with mapping. As you can see, the first field title is Type, and it is also linked to a database field called type.

Inventory fields with mapping
We can change the title, for example, to Zabbix Cookbook. Save the file, refresh the page and there we go, we now have a different field name.
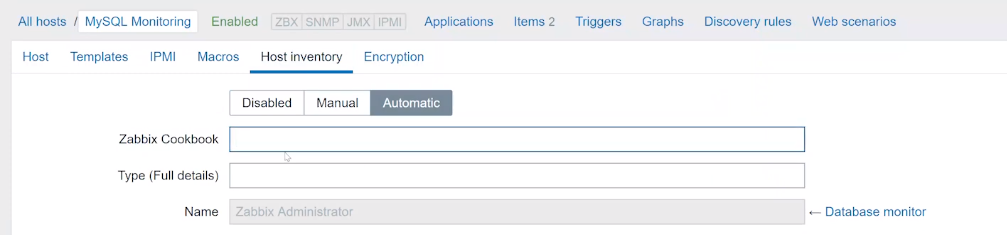
Changed field name
But be careful. I do not recommend to modify the database. And since you don’t modify the database, the db_field has some limitations. It could be the size, text, integer, etc. You are not able to change this, and you are still limited to the database field specification. Just don’t forget, that after you upgrade the front end (not the Zabbix server) these changes will be gone.
If you need to keep the new field names, the best thing will be to make a patch from your modified PHP file or just save your PHP file before the upgrade and later compare it to the new PHP file from the new version of the Zabbix making modifications again. To be sure that it will function I would not recommend just copy-pasting it over a new version.
Don’t forget that Zabbix is flexible and open-source. You are not limited to any functionality as long as you know how to write proper scripts. It will not be an issue for Zabbix to work with other tools intended just for inventory collection. You can run inventory collection software inside your environment using Zabbix API for integration, automatically grabbing the values provided by the software and then populating the hosts inside the front end with the actual inventory data. Then it can be exported using API queries. This will help you stay on top of the inventory in your company.
I hope that you learned something new today. Thank you for your attention!


I am sorry but why the inventory was not implemented like any other Zabbix component where you add arbitrary items to it? Is an inventory field any different than last value of an item? I don’t get why it was developed like a completelly different type of software.